TL;DR:
- Proper preparation and safety measures are essential before attempting DIY plumbing repairs.
- Common DIY repairs include faucet washers, toilet flappers, and PVC pipe fixes, while complex issues require professionals.
- Understanding local codes and regulations helps ensure safe, compliant repairs and prevents future complications.
Picture this: it’s 10 p.m. on a Sunday, and you hear water rushing inside your wall. By the time you trace the sound to a burst supply line under the bathroom sink, there’s already an inch of water on the floor. Knowing exactly what to do in those first three minutes can save you thousands of dollars in water damage. This guide walks you through essential tools, safety rules, proven repair techniques, and clear guidance on when to call a licensed plumber so you’re never caught off guard again.
Table of Contents
- What you need before you start: Preparation and safety
- Step-by-step repair: Pipes, faucets, and drains
- Troubleshooting and avoiding common mistakes
- Local plumbing realities: Orange and LA County tips
- The honest truth about DIY plumbing: When it pays off and when it doesn’t
- Orange and LA County plumbing help when you need it most
- Frequently asked questions
Key Takeaways
| Point | Details |
|---|---|
| Know your limits | DIY basics are doable for minor leaks, but gas lines and main supplies need pros. |
| Prep with the right tools | Having proper tools and understanding safety steps prevents costly mistakes. |
| Follow step-by-step repairs | Repair processes for copper and PVC pipes have specific, proven steps for safety and durability. |
| Check and troubleshoot repairs | Always verify your repair, look for leaks, and address issues quickly to avoid bigger damage. |
| Respect local plumbing codes | Knowing Orange and LA County rules keeps your home safe and ensures your repairs last. |
What you need before you start: Preparation and safety
Plumbing problems don’t wait for a convenient moment. Before you ever pick up a wrench, you need the right tools in arm’s reach and a clear understanding of your home’s plumbing layout. Rushing in unprepared is the fastest way to turn a small drip into a flooded bathroom.
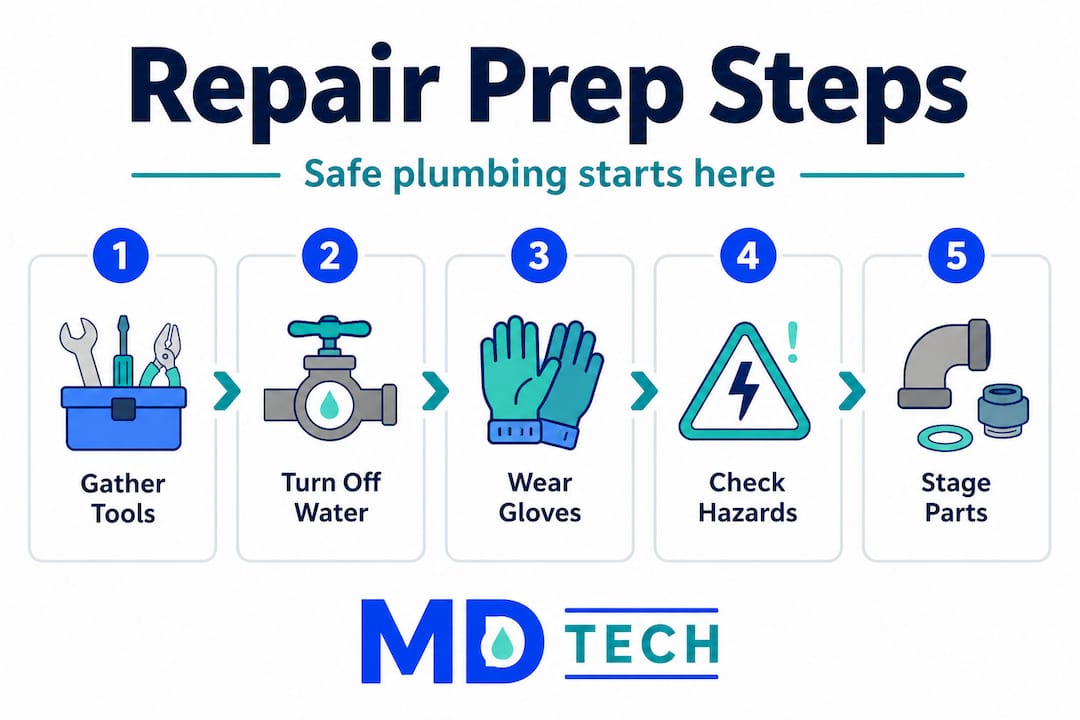
Essential tools and safety gear
Gather these items before you start any repair:
- Adjustable wrench and basin wrench for tight sink spaces
- Pipe cutter (both copper and PVC versions)
- Plumber’s tape (PTFE tape) for sealing threaded connections
- Plunger and drain snake for clogs
- Bucket, old towels, and a wet/dry vac for water control
- Safety goggles and nitrile gloves to protect against dirty water and sharp pipe edges
- Flashlight or headlamp because plumbing is always in the darkest corner
Knowing your home’s main water shutoff location is non-negotiable. In most Orange County and LA County homes, it’s near the street curb in a concrete box or on the side of the house. Turn it off first, every single time, before touching any supply line.
Before any repair, always confirm water flow has completely stopped by turning on a nearby faucet. Even a slow drip under pressure can spray the moment you cut into a pipe.
Following an appliance safety checklist before you start helps you catch overlooked hazards, especially in older homes where supply lines may be more fragile than they look.
Know your DIY limits
Not all plumbing repairs belong in the DIY category. As DIY plumbing guidelines make clear, faucet washers, toilet flappers, and P-traps are fair game for homeowners, while gas lines, main supply replacements, and any concealed work requiring permits should go straight to a licensed plumber.
| Repair type | DIY appropriate | Professional required |
|---|---|---|
| Faucet washer replacement | Yes | No |
| Toilet flapper swap | Yes | No |
| P-trap cleaning or replacement | Yes | No |
| Main water line repair | No | Yes |
| Gas line work | No | Yes |
| Behind-wall pipe replacement | Usually no | Yes |
| Sewer line issues | No | Yes |
Staying in your lane protects your home, your wallet, and your safety. Making regular plumbing checks a habit also reduces how often you’ll face emergency repairs in the first place.
Pro Tip: Take a short video walkthrough of your plumbing shutoffs once a year. Share it with your family so everyone in the house knows how to stop water flow in an emergency, not just you.
Step-by-step repair: Pipes, faucets, and drains
With the right tools staged and safety rules locked in, you’re ready to get to work. The three most common repairs you’ll face as a homeowner are copper pipe fixes, PVC pipe fixes, and basic fixture swaps like faucet washers and toilet flappers.
Repairing a copper pipe
Copper piping is common in homes built before the mid-1990s across both Orange and LA Counties. When a copper pipe develops a pinhole leak or a clean crack, here’s the correct sequence:
- Shut off the main water supply and open a downstream faucet to drain pressure.
- Mark the damaged section with a marker, extending at least half an inch past both visible edges of the damage.
- Cut out the damaged section using a copper pipe cutter; rotate the tool slowly for a clean edge.
- Deburr both cut ends with a pipe reamer or emery cloth until the metal is bright and smooth.
- Apply flux paste to both pipe ends and to the inside of new couplings.
- Slide on the couplings and new pipe section, then heat with a torch and feed solder into the joint until it flows completely around the seam.
- Wipe with a damp cloth and let the joint cool before restoring water.
For homeowners who aren’t comfortable with a torch, push-to-connect fittings like SharkBite work on clean, deburred copper pipe ends without any soldering. They’re slightly more expensive but dramatically reduce the chance of burning yourself or scorching nearby wood.
Repairing a PVC or CPVC pipe
PVC (white) and CPVC (cream-colored) pipes are common in newer SoCal homes and for drain lines throughout. The repair process is different and important to follow exactly.
- Shut off water and drain the line completely.
- Cut out the damaged section with a PVC pipe cutter or a fine-tooth hacksaw.
- Dry-fit your replacement section with couplings to confirm length before gluing.
- Apply purple PVC primer to both the pipe end and the inside of the coupling socket; let it sit for 30 seconds.
- Apply PVC cement to both surfaces immediately after the primer is still tacky.
- Push the fitting onto the pipe and hold firmly for 30 seconds while rotating a quarter-turn to spread cement evenly.
As plumbing repair guides confirm, PVC joints cannot be reglued externally once they’ve failed; you must always cut out and replace the section. Trying to paint cement over a leaking joint is a temporary illusion, not a fix.
Faucet washers and toilet flappers
These two repairs are the bread and butter of DIY plumbing and can save you significant money on your water bill.
Faucet washer replacement:
Turn off the supply valves under the sink. Remove the handle (usually one Phillips screw under the decorative cap). Unscrew the packing nut, pull out the stem, and replace the rubber washer at the bottom with an identical one from your hardware store. Reassemble in reverse order.
Toilet flapper replacement:
Shut off the supply valve behind the toilet. Flush to drain the tank. Unhook the old flapper from the overflow tube ears and disconnect the chain from the handle arm. Snap the new flapper into place and adjust chain length so there’s roughly half an inch of slack.
Pro Tip: When you’re at the hardware store for a faucet washer, take a photo of the old washer next to a ruler. Faucet washers come in dozens of sizes and thickness variations, and buying the wrong one means a second trip.
If your repair involves a connection near the dishwasher, understanding how to fix dishwasher leaks can help you trace whether the water source is the dishwasher drain hose or the household supply line.
Homeowners in LA and Orange Counties with homes built before 1985 should also check whether copper pipes show any signs of green oxidation or pitting, both signals that the pipe wall is thinning and a full section replacement may be overdue. Modern smart home plumbing sensors can alert you to these slow-developing leaks before they cause damage.
Troubleshooting and avoiding common mistakes
Completing the physical repair is only half the job. Verifying that it actually worked and didn’t introduce new problems is just as important.
Checking your work
After restoring water slowly (never crank it open all at once), watch the repair site for a full five minutes. Run water through the line at full pressure for 30 seconds, then shut it off and watch for seeping. Check for moisture with dry paper towels pressed firmly against fittings.
Common signs that a repair needs revisiting:
- Dripping or weeping at the joint even under low pressure
- Reduced water pressure downstream, which can signal a collapsed fitting or debris blockage
- Hissing sounds from inside a wall or under a slab, signaling a pressurized leak you can’t see
- Water hammer (banging pipes) after the repair, suggesting trapped air or a sudden pressure change
The biggest DIY mistakes
Most failed plumbing repairs come down to a short list of avoidable errors:
- Using mismatched fittings: Connecting copper to galvanized steel without a dielectric union causes rapid corrosion at the joint.
- Skipping the cleaning and prep step: Flux and PVC cement don’t bond to dirty or oxidized surfaces; this is the number-one cause of leaks at brand-new repairs.
- Overtightening: Plastic fittings crack and metal threads strip. Hand-tight plus one quarter-turn with a wrench is usually enough.
- Not drying the pipe before gluing PVC: Any water inside the pipe dilutes the cement and prevents a proper bond.
If water doesn’t stop completely after shutting off the main supply, do not attempt the repair. Call a licensed plumber immediately. Cutting into a pressurized line is dangerous.
Repairs that involve gas line safety are never DIY territory. Even experienced homeowners can miss micro-leaks that accumulate to dangerous concentrations. Always follow established appliance repair safety steps when working near any gas-connected appliance.
Pro Tip: Keep a dedicated plumbing repair folder, whether paper or digital, with receipts, part numbers, photos of before-and-after repairs, and the date of each fix. This record is invaluable during home sales and for tracking recurring issues in the same location.
As sound DIY plumbing practice notes, keeping repairs within the right skill bracket reduces the chance of a failed fix that costs far more than the original problem to undo.
Local plumbing realities: Orange and LA County tips
Beyond the general repair steps, homeowners in Orange and Los Angeles Counties deal with specific conditions that shape how repairs should be approached.
Aging infrastructure and local codes
Many homes in older neighborhoods of Anaheim, Long Beach, Pasadena, and Santa Ana still have galvanized steel pipes that are decades past their useful life. Galvanized pipes corrode from the inside out, reducing flow over time and eventually failing without warning. If your home was built before 1970 and still has original plumbing, every repair you make is a temporary fix on a system that may need full replacement soon.
Key code and material realities for local homeowners:
- Lead pipes: Homes built before 1986 may have lead solder at copper joints. Any disturbance to these joints during repair can release lead particles into drinking water; use a filter and have water tested afterward.
- Permits: Replacing more than a single fixture, adding new lines, or working on any drain, waste, or vent system typically requires a permit in both Orange County and LA County jurisdictions.
- Water hardness: Southern California water is notoriously hard, with mineral content that accelerates scale buildup in pipes, water heaters, and fixture valves. This is why washers and flappers wear out faster here than in other regions.
When inspection is required by law
Certain repairs trigger mandatory inspections under California Plumbing Code. These include adding a new water heater, replacing a main shutoff valve, and any modification to a drain or vent stack. Skipping these inspections can void your homeowner’s insurance coverage and create liability if you sell the property.
Understanding plumbing inspections in SoCal before you start a project can save you from having to tear out finished work for a code officer. Hard water deposits alone account for significant efficiency loss in local plumbing systems, making it worth addressing scale buildup as part of every repair you perform.
Pro Tip: Save every receipt and take timestamped before-and-after photos of any repair involving your pipes. This documentation satisfies local code inspectors and serves as proof of maintenance for insurance claims.
The honest truth about DIY plumbing: When it pays off and when it doesn’t
Here’s something most DIY articles won’t say plainly: the cost savings of home plumbing repairs are real, but they’re not guaranteed. Swapping a toilet flapper costs you $8 and 15 minutes. Getting it wrong costs you a running toilet that wastes 200 gallons of water per day until you notice. At Southern California water rates, that’s not a savings story.
The genuine value of DIY plumbing knowledge isn’t in fixing every leak yourself. It’s in understanding your home well enough to catch problems early, shut off water before serious damage happens, and communicate clearly with a licensed plumber about what you’ve already done. Homeowners who know their systems save money by preventing disasters, not by replacing every fitting themselves.
Local codes in Orange and LA Counties exist for a practical reason. Faulty plumbing work in a shared-wall condo or apartment building can damage neighboring units. A repair that seems contained can affect the building’s drainage stack. These aren’t hypothetical risks; they are documented, recurring incidents in densely built SoCal neighborhoods.
The uncomfortable truth is that most homeowners overestimate how much they’ve saved on a DIY repair once they account for the second and third trips to the hardware store, the tools bought for one job, and the professional callout that was eventually needed anyway. DIY plumbing pays off when you invest time in learning properly before a crisis, not during one.
Working with certified plumbers for anything beyond basic fixture repairs isn’t admitting defeat. It’s making a smart decision that protects your property value, keeps your family safe, and keeps you on the right side of local code requirements.
Orange and LA County plumbing help when you need it most
When a repair is beyond the scope of a weekend project, or when a leak simply won’t stop, having a trusted local professional ready to call makes all the difference.

Our team at Appliances Repair MD Tech serves homeowners and property managers across Orange County and Los Angeles County with fast, code-compliant repair plumbing services that cover everything from stubborn faucet leaks to full fixture replacement. If you’re dealing with cracked supply lines or corroded sections, our pipe repair specialists can diagnose and fix the issue correctly the first time. We also offer detailed local plumbing inspections to ensure your home meets current code standards. Book your appointment online and get an expert on-site when you need them most.
Frequently asked questions
What plumbing repairs can I do myself?
Homeowners can safely replace faucet washers, swap toilet flappers, and clean or replace P-trap drains; anything involving gas lines or main pipes should always go to a licensed professional.
How do I know if a pipe leak needs professional repair?
If the leak is in a main supply line, behind a wall, or near any gas connection, call a licensed plumber, especially when the water doesn’t fully stop after shutting off the main or when a permit would be required.
Is it safe to repair copper and PVC pipes myself?
Basic repairs on accessible copper and PVC pipes are manageable for careful homeowners who follow proper steps; however, use a professional for main supply copper repairs or any pipe concealed inside walls, and remember that PVC joints that have failed must always be cut out and replaced, not patched.
Why do plumbing codes matter for home repairs?
Local codes set minimum safety standards for all plumbing work, and failing to meet them can require inspections, void your insurance, or require removing completed work to satisfy a code officer before a home sale.
Recommended
- What is smart home plumbing? A 2026 guide for homeowners
- What Is Water Heater Repair: Explained Clearly
- Step by Step Appliance Repair: Easy Home Fixes
- Step by Step Washer Repair: Easy Troubleshooting Tips
- Emergency plumbing guide Windsor: fast solutions for homeowners
- Types of plumbing repairs every UK homeowner should know