TL;DR:
- Preparing appliance details before scheduling, especially model and serial numbers, significantly increases first-visit repair success rates. Clear communication by describing specific symptoms, providing key information, and confirming appointment details ensures efficient service and quick repairs. Maintaining detailed post-repair records and avoiding scheduling mistakes help preserve warranty coverage and streamline future diagnostics.
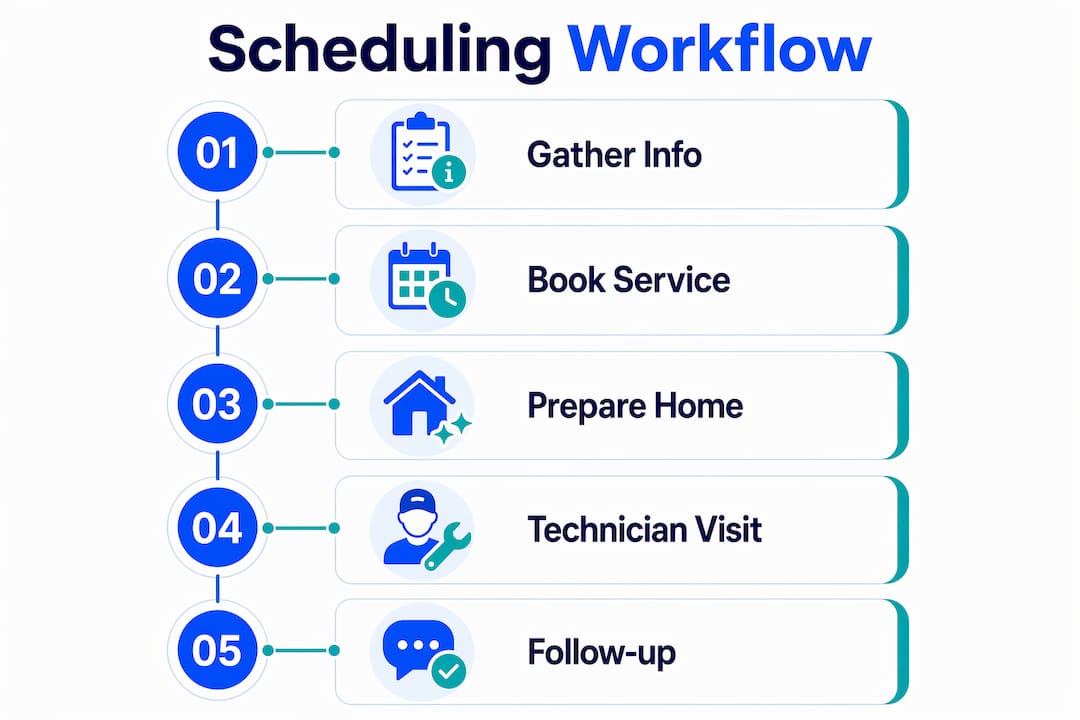
Scheduling an appliance service workflow is the process of booking, managing, and completing repair or maintenance visits for your household appliances in a structured, repeatable way. The industry term for this is service workflow management, and when done right, it cuts repair delays, reduces callbacks, and gets your refrigerator, washer, or oven back online faster. This guide walks you through every stage: what to prepare before you call, how platforms like ServiceTitan and Smart Service match technicians to your job, what happens during the visit, and how to build a post-repair record that protects your warranty. Follow this process and you will spend less time waiting and more time with a working appliance.
What should you prepare before scheduling appliance service?
The single most valuable thing you can do before booking is gather your appliance’s model and serial numbers. Providing model and serial numbers at scheduling raises the first-visit fix rate from an average of 60–65% to as high as 82–87%. That jump happens because the technician can pre-load the correct parts on the truck before ever arriving at your door.
Beyond the model number, four pieces of information drive every efficient appliance service process: appliance type, the specific symptom, your location, and your preferred time window. Providing these four details at the time of booking is the industry best practice for optimizing part inventory and technician preparedness. Think of it as giving the dispatcher a complete picture instead of a rough sketch.
Here is a quick reference for what to gather and where to find it:
| Information Needed | Where to Find It | Why It Matters |
|---|---|---|
| Appliance type and brand | Front panel or owner’s manual | Determines technician specialty and parts category |
| Model number | Label inside door, back panel, or drawer frame | Enables pre-loading of correct parts on the truck |
| Serial number | Same label as model number | Required for warranty verification and parts ordering |
| Symptom description | Your observation | Narrows diagnostic path before the visit |
| Preferred time window | Your schedule | Allows dispatcher to match available technician slots |
Pro Tip: Snap a photo of the appliance label before you call. Text or email it to the service company during booking. Many scheduling platforms now accept SMS photo submissions, and that image alone can eliminate a second visit caused by a wrong part.
Finding the label takes 30 seconds. On most refrigerators it sits inside the fresh food compartment on the upper left wall. On washers, check the door frame. On ovens, look inside the door or on the back panel. Write the numbers down or save the photo to a dedicated folder on your phone labeled “Home Appliances.”
How to schedule and manage your appliance repair appointment
A well-run appliance service scheduling process takes less time than you think. Professional booking processes are designed to be completed in 45–60 seconds, with same-day or next-day availability common in urban areas. That speed is possible because modern dispatch platforms match technicians by location, availability, and parts inventory in real time.
Here is the step-by-step booking workflow you should follow:
- Gather your appliance details before opening the booking form or dialing. Have model number, serial number, symptom, and your address ready.
- Choose your booking channel. Most reputable services offer online forms, phone booking, and app-based scheduling. Online forms through platforms like ServiceTitan or Smart Service auto-populate technician availability as you type.
- Describe the symptom precisely. “The washer won’t spin” is more useful than “it’s broken.” Specific symptoms trigger specific diagnostic checklists for the technician.
- Select a 2-hour arrival window. Reputable services confirm a 2-hour arrival window with technician details sent via text or email immediately after booking. This window is your commitment from the company.
- Confirm contact details. Provide both a phone number and an email so the company can reach you through multiple channels if the technician is running early or late.
- Review the confirmation. Check the appointment summary for accuracy: appliance type, address, time window, and any diagnostic fee mentioned upfront.
Pro Tip: Set a calendar reminder 30 minutes before the start of your arrival window. Use that time to clear the area around the appliance, locate your owner’s manual, and write down any additional symptoms you noticed since booking. Technicians move faster when the workspace is ready.
After booking, the dispatcher’s system assigns a technician based on geographic proximity, skill set, and whether the truck already carries the parts your model likely needs. This is why your model number matters at step one, not step three. The appliance repair management process works best when the information flows in the right direction from the start.
What happens during the technician visit?
The onsite visit follows a defined diagnostic sequence. The technician begins with a visual inspection, then moves to meter testing, and finishes with error code reading if the appliance has a digital control board. The first professional visit includes all three steps plus a written estimate before any repair work begins.
Most reputable services charge a diagnostic fee, typically around $79, which is credited toward the repair cost if you proceed. That fee covers the technician’s time, travel, and diagnostic tools. Knowing this upfront prevents surprises and helps you make a clear repair-versus-replace decision. For context on that decision, the repair vs. replacement guide from Appliancesrepairmdtech walks through the key cost thresholds.
Your role during the visit is to communicate clearly and stay available. Here is how to make the technician’s job easier and your repair faster:
- Clear the area around the appliance before the technician arrives. Move laundry baskets, kitchen items, or furniture that blocks access.
- Keep the appliance plugged in and powered on unless the technician instructs otherwise. Error codes disappear when the unit loses power.
- Share the symptom notes you prepared during booking. If the machine made a specific noise on Tuesday at 7 a.m., say so. That detail narrows the diagnostic path.
- Have your model and serial number written on a sticky note near the appliance. Even if you gave it during booking, having it visible saves time.
- Ask the technician to explain the diagnosis in plain language before you approve the estimate. A good technician will show you what failed and why.
The written estimate you receive before work begins is your protection. Never approve verbal-only estimates. The written version documents parts, labor, and total cost so there are no disputes after the job is done.
How can you maintain service records after a repair?
Keeping a repair log is the single post-visit habit that pays the most dividends over time. Maintaining detailed records of each repair, including model number, serial number, date, parts replaced, and technician notes, creates a vital reference for recurring issues and warranty claims. Most homeowners skip this step and regret it the first time a part fails again six months later.
Your repair log does not need to be complicated. A notes app on your phone, a shared Google Doc, or a simple paper folder works fine. What matters is consistency.
- Record the date of service, the technician’s name, and the company name after every visit.
- List every part replaced, including the part number if the technician provides it.
- Photograph the appliance label, the replaced part, and the written estimate before filing them away.
- Note any instructions the technician gave for ongoing care or monitoring.
Schedule a check-in within 1–2 weeks after the repair to confirm the appliance is performing correctly. That window is when recurring problems surface and when warranty coverage is easiest to invoke. If something feels off, call the service company while the repair is still fresh in the technician’s memory.
Your records also support the warranty role in appliance repairs. Warranty claims require proof of service dates, parts used, and technician credentials. A well-kept log gives you that proof instantly. For guidance on appliance maintenance schedules that pair with your repair records, Appliancesrepairmdtech covers Orange County and Los Angeles County homes in detail.
What are the most common scheduling mistakes to avoid?
Incomplete information is the leading cause of delayed repairs and unnecessary callbacks. Strong intake processes use standardized questioning to narrow down issues before dispatch, improving first-call completion and technician productivity. When homeowners skip this step, technicians arrive without the right parts and a second visit becomes unavoidable.
Remote diagnosis is a tool worth understanding. Remote diagnosis can reduce visits and costs under low demand, but under high demand it can delay the first visit by nearly 3 days compared to direct dispatch. If your appliance is completely non-functional, request direct dispatch rather than a remote consultation. If the issue is intermittent and non-urgent, a remote diagnostic call can save you a service fee.
Here are the most common scheduling mistakes homeowners make:
- Booking without the model or serial number, which forces the technician to guess on parts.
- Describing symptoms vaguely, such as “it’s making a noise,” instead of specifying when, how often, and what type of noise.
- Choosing the earliest available slot without confirming the technician carries parts for your appliance brand.
- Failing to confirm the arrival window the day before, which leads to missed appointments.
- Not asking about the diagnostic fee upfront, which creates friction when the invoice arrives.
Pro Tip: Write down three things before you call: what the appliance is doing wrong, when it started, and whether anything changed recently (new detergent, power outage, moved the unit). That 60-second exercise gives the dispatcher everything needed to send the right technician the first time.
Key takeaways
A structured service workflow management process, built on accurate information intake and clear communication, is the fastest path to a successful appliance repair on the first visit.
| Point | Details |
|---|---|
| Gather model and serial numbers first | Providing these at booking raises first-visit fix rates from 60–65% to as high as 82–87%. |
| Book with four key details ready | Appliance type, symptom, location, and time window are the minimum for accurate dispatch. |
| Confirm the arrival window in writing | A confirmed 2-hour window with technician details protects you from scheduling gaps. |
| Keep a post-repair log | Record parts, dates, and technician notes to support warranty claims and future diagnostics. |
| Avoid remote diagnosis under high demand | Direct dispatch is faster when your appliance is completely non-functional. |
Scheduling is technical triage, not paperwork
After years of watching appliance repair calls go sideways, the pattern is always the same. The homeowner called in a hurry, gave a vague symptom, skipped the model number, and the technician showed up without the right part. Two visits became three. Frustration built on both sides.
The mindset shift that changes everything is treating the booking call as technical triage. Scheduling intake is a learned operational skill, not mere administrative work. Every detail you provide at booking is a decision the dispatcher makes about which technician, which truck, and which parts go to your address. When you give complete information, you are doing half the diagnostic work before anyone sets foot in your home.
The homeowners who get same-day fixes are not lucky. They are prepared. They have the model number ready. They describe the symptom with specifics. They clear the workspace before the technician arrives. These habits take five minutes total and routinely cut repair time in half. Build them once and every future service call runs smoother.
Ready to book your next appliance repair?
Appliancesrepairmdtech serves homeowners across Orange County and Los Angeles County with licensed technicians, online appointment booking, and same-day availability for urgent repairs.

Whether your refrigerator stopped cooling, your washer won’t drain, or your oven is throwing error codes, Appliancesrepairmdtech handles it all. The team specializes in Samsung appliance repairs and carries parts for major brands to maximize first-visit fix rates. Need to understand your parts replacement options before the technician arrives? The appliance parts replacement guide walks you through what to expect. Book online in under a minute and get technician details confirmed by text.
FAQ
What information do i need to schedule appliance repair?
You need the appliance type, brand, model number, serial number, a description of the symptom, your address, and your preferred time window. Providing the model and serial number at booking significantly improves the chance the technician arrives with the correct parts.
How long does appliance service scheduling take?
Professional booking processes are designed to be completed in 45–60 seconds online or by phone, with same-day or next-day availability common in urban areas like Orange County and Los Angeles.
What is a diagnostic fee and is it refundable?
A diagnostic fee, typically around $79, covers the technician’s inspection visit. Most reputable services credit that fee toward the total repair cost if you approve the work.
Should i request remote diagnosis or direct dispatch?
Request direct dispatch when your appliance is completely non-functional. Remote diagnosis works well for intermittent issues under low demand, but can delay the first visit by nearly 3 days when service demand is high.
How do i use my repair records for a warranty claim?
Keep a log with the service date, technician name, parts replaced (including part numbers), and your written estimate. Warranty claims require documented proof of service, and a complete log gives you that instantly.