Installing household appliances correctly is more than just plugging them in and turning them on. Poor installation can lead to gas leaks, electrical fires, water damage, and voided warranties. For homeowners and property managers in Orange County and Los Angeles County, following proven best practices ensures safety, maximizes appliance lifespan, and keeps your home running efficiently. Whether you’re upgrading a kitchen or preparing a rental property, understanding the right installation techniques protects your investment and keeps occupants safe. This guide walks you through essential criteria, appliance-specific practices, and smart decision-making frameworks to help you install appliances with confidence.
Table of Contents
- Key takeaways
- Key criteria for safe and efficient appliance installation
- Best practices for installing common household appliances
- Comparing DIY versus professional appliance installation
- Summary comparison and situational recommendations for homeowners and property managers
- Professional appliance installation and repair services in Orange County and Los Angeles
- Frequently asked questions
Key Takeaways
| Point | Details |
|---|---|
| Hire licensed pros | Using licensed insured professionals provides compliance, enables proper permits, and reduces the risk of insurance denial for installation related damage. |
| Adhere to safety standards | Electrical connections must match voltage and amperage ratings, gas lines require approved connectors and proper venting, and water hookups must have secure hoses and shutoffs. |
| AB628 compliance | California AB628 requires stoves and refrigerators in all new or renewed leases starting in 2026. |
| Built in stack installations | Built in and stack installations require precise cabinetry alignment and specialized electrical work for safe operation. |
Key criteria for safe and efficient appliance installation
Understanding what makes an appliance installation safe and efficient starts with knowing the foundational criteria. These benchmarks separate a quick setup from a professional installation that protects your home and family.
Safety standards form the backbone of proper installation. Every appliance must meet electrical, gas, and plumbing compliance requirements specific to California building codes. Electrical connections need matching voltage and amperage ratings. Gas appliances require approved flexible connectors and proper venting to prevent carbon monoxide buildup. Water-using appliances like dishwashers and washing machines need secure hose connections with shutoff valves within easy reach.
Proper placement and leveling directly affect how well your appliances perform. A refrigerator tilted backward prevents doors from closing properly and forces the compressor to work harder. Washers that aren’t level vibrate excessively during spin cycles, causing premature wear on internal components. Manufacturers specify exact clearances for ventilation, and ignoring these requirements can trigger overheating and early failure.
Built-in and stackable units present unique challenges. These installations demand precise cabinetry alignment and specialized electrical work. You can’t simply slide a built-in oven into a standard opening and expect it to work safely. The unit must integrate seamlessly with surrounding cabinets while maintaining proper ventilation pathways.
Legal requirements add another layer of complexity for property managers. California’s AB628 mandates stoves and refrigerators for all new or renewed leases starting in 2026. This law pushes property managers to standardize appliance installations across rental units, making efficiency and compliance critical planning factors.
Using licensed, insured professionals protects you from insurance denials. Many homeowner policies exclude damage caused by unlicensed work. If a DIY gas line installation leads to a fire, your insurer may refuse the claim entirely. Professional installers carry liability coverage and pull necessary permits, creating a paper trail that satisfies insurance requirements.
Pro Tip: Before scheduling any installation, photograph your existing connections and clearances. These images help installers prepare the right parts and tools, reducing installation time and preventing return trips.
Key installation criteria checklist:
- Verify electrical outlet ratings match appliance requirements
- Confirm gas line capacity for multiple appliances
- Check water pressure and drainage for dishwashers and washers
- Measure clearances for ventilation and door swing
- Review local permit requirements for major installations
- Validate that proper installation practices align with manufacturer warranties
Best practices for installing common household appliances
Each appliance type brings distinct installation requirements. Knowing these specifics helps you prepare properly and recognize when professional help is essential.
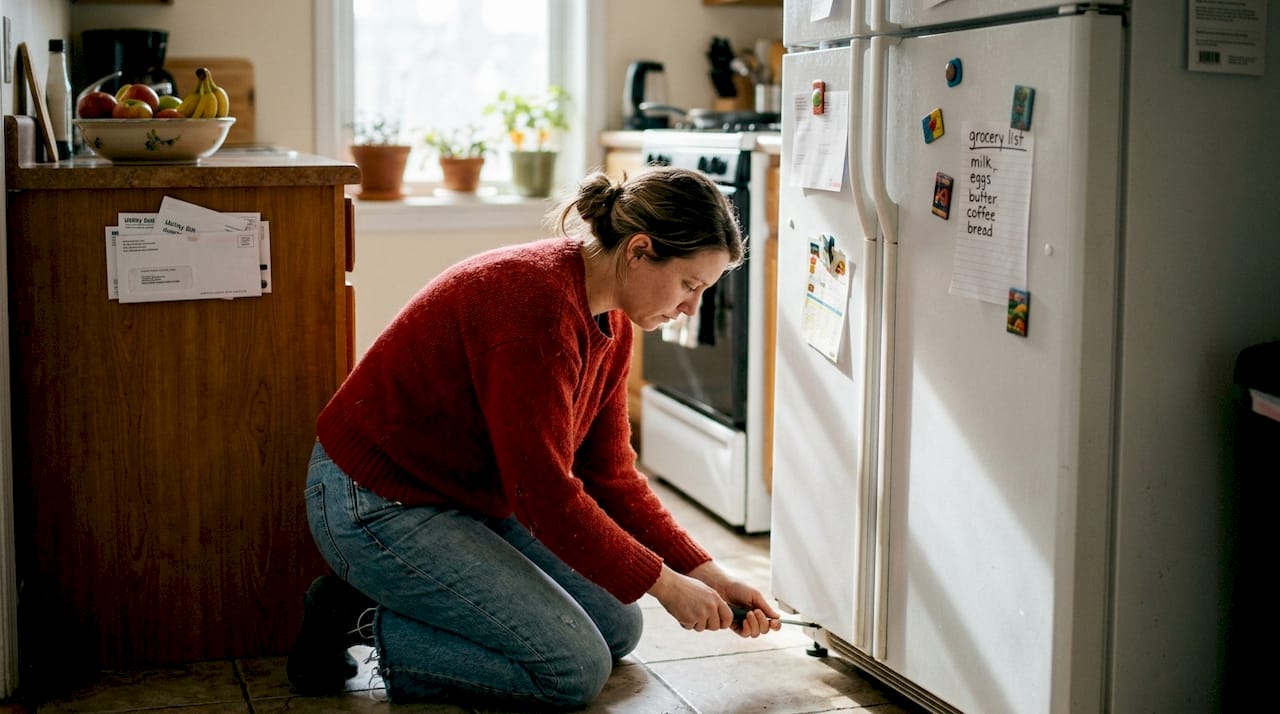
Refrigerators need dedicated 20-amp circuits and sufficient clearance for heat dissipation. Position the unit so the door opens away from counters and traffic flow. Built-in models require exact cabinet dimensions and often need custom panels to match surrounding cabinetry. Leave at least two inches between the back wall and refrigerator coils for proper airflow. Water line connections for ice makers must use braided stainless steel lines, not plastic tubes that can crack and flood your kitchen.
Gas and electric ranges demand careful attention to connections. Electric models require 240-volt outlets with proper grounding. Gas ranges need flexible connectors rated for natural gas or propane, depending on your supply. Always apply pipe thread sealant rated for gas use, never standard plumber’s tape. Install an anti-tip bracket behind the range to prevent forward tipping if someone leans on an open oven door. This simple device prevents serious injuries, especially in homes with children.
Dishwashers connect to hot water lines and require air gaps to prevent backflow contamination. The drain hose must loop higher than the garbage disposal connection to avoid dirty water siphoning back into the clean dishes. Secure the dishwasher to underside of the counter with mounting brackets. Level the unit front to back and side to side, or the spray arms won’t rotate properly and dishes won’t get clean.
Washers and dryers present different challenges based on type. Front-load washers need anti-vibration pads to minimize movement during high-speed spins. Dryer vents should run as straight as possible to the exterior, with rigid metal ducting instead of flexible plastic that can sag and trap lint. Gas dryers require the same careful connection standards as ranges. For stacked units, built-in configurations demand custom cabinetry alignment and specialized wiring to ensure both units receive proper power and ventilation.
Pro Tip: Run a test cycle on every appliance immediately after installation while the technician is still present. This catches connection issues before they become emergency repairs.
Installation sequence for major appliances:
- Shut off utilities (water, gas, electricity) at the source
- Remove old appliance and inspect connections for damage
- Update connections if they don’t meet current code standards
- Position new appliance and verify level in all directions
- Make final utility connections with appropriate materials
- Restore utility service and test for leaks or faults
- Run a complete cycle to verify proper operation
- Document installation with photos and keep receipts
Property managers should verify that all installations meet lease requirements. With AB628 in effect, ensuring compliant appliances are in place before lease signing prevents legal complications. Standardizing on specific models across properties also simplifies maintenance and parts inventory.
Following these appliance installation best practices protects your investment and keeps your household running smoothly. The extra time spent on proper installation pays dividends through longer appliance life and fewer emergency repair calls. Professional installers bring the expertise to handle edge cases and ensure technician involvement enhances safety throughout the process.
Comparing DIY versus professional appliance installation
Deciding between DIY and professional installation requires weighing immediate costs against long-term risks and benefits. Understanding both approaches helps you make informed choices that match your skills and situation.
DIY installation offers obvious upfront savings. You avoid labor charges that can range from $100 to $500 depending on appliance complexity. For simple replacements where connections already exist and meet code, a handy homeowner can complete the work in an afternoon. Swapping a freestanding electric range for an identical model rarely requires specialized knowledge.
However, DIY installations risk long-term costs through repairs and insurance denials when improper setup leads to failures. A gas connection that seems tight might have a slow leak you can’t detect without proper testing equipment. That leak could lead to an explosion or carbon monoxide poisoning. Insurance companies routinely deny claims for damage caused by unlicensed work, leaving you responsible for tens of thousands in repairs.
Professional installers guarantee compliance with local building codes. They know Orange County and Los Angeles County permit requirements and handle the paperwork. Licensed technicians carry specialized tools for testing gas pressure, measuring electrical loads, and detecting water leaks before they cause damage. Their work comes with warranties that cover both labor and any damage caused during installation.
The impact on appliance lifespan is significant. Manufacturers design appliances to operate within specific parameters. A dryer vent with too many turns restricts airflow, forcing the heating element to work harder and fail sooner. A refrigerator installed without proper leveling strains the compressor and reduces efficiency. Professional installation ensures appliances operate as designed, maximizing their useful life.
Long-term cost analysis favors professional installation for complex jobs. Consider a gas range installation: DIY might save $200 upfront, but a faulty connection could cause a house fire resulting in $50,000 in damage that insurance won’t cover. Professional installation costs more initially but includes liability coverage, permits, and guaranteed code compliance.
Pro Tip: Even if you plan to DIY simple installations, hire insured technicians for gas appliances and built-in units. The risk-to-savings ratio makes professional help the smart choice for these installations.
| Factor | DIY Installation | Professional Installation |
|---|---|---|
| Upfront cost | $0 to $50 in supplies | $100 to $500 labor plus materials |
| Time required | 2 to 6 hours | 1 to 2 hours |
| Code compliance | Your responsibility to verify | Guaranteed by licensed contractor |
| Permit handling | You must research and obtain | Included in service |
| Insurance coverage | May void coverage if improper | Contractor liability protects you |
| Warranty protection | Risk of voiding manufacturer warranty | Maintains full warranty coverage |
| Long-term reliability | Depends on your skill level | Professional standards ensure proper function |
Key considerations when choosing DIY:
- Your experience level with similar projects
- Availability of proper tools and testing equipment
- Time available to research code requirements
- Comfort working with gas, electrical, or plumbing systems
- Willingness to accept financial risk if something goes wrong
When professional installation is essential:
- Any gas appliance installation or modification
- Built-in units requiring cabinetry modification
- Electrical work requiring new circuits or panel upgrades
- Installations in rental properties where liability matters
- Situations where permits are required by local code
The choice between DIY and professional installation isn’t always clear-cut. Simple appliance swaps where connections already exist and meet current code might be appropriate DIY projects. Complex installations involving gas lines, electrical upgrades, or structural modifications always warrant licensed professional involvement. Your decision should prioritize safety and long-term value over short-term savings.
Summary comparison and situational recommendations for homeowners and property managers
Bringing together the key points from earlier sections, this comparison helps you match installation approaches to your specific circumstances. Different situations call for different strategies.
| Installation aspect | Best for DIY | Best for professionals | Why it matters |
|---|---|---|---|
| Appliance type | Freestanding electric units | Gas appliances, built-ins, stackables | Complexity and safety risks vary dramatically |
| Existing connections | Code-compliant, identical replacement | Upgrades needed or first-time install | New connections require permits and expertise |
| Property type | Owner-occupied single family | Rental properties, multi-unit buildings | Liability and legal requirements differ |
| Skill level | Experienced with similar projects | Limited DIY experience | Mistakes cost more than professional help |
| Time constraints | Flexible schedule, can troubleshoot | Need working appliance immediately | Professionals complete work faster |
| Budget priority | Minimizing immediate costs | Protecting long-term investment | Short-term savings vs. long-term value |
Homeowners face different considerations than property managers. If you own your home and have successfully completed similar projects, replacing a freestanding electric dryer might be within your capabilities. Property managers dealing with tenant turnover and legal obligations should default to professional installation to protect against liability claims and ensure AB628 compliance.
Pro Tip: Schedule installations during lease transitions when units are vacant. This gives professionals time to work without disrupting tenants and allows thorough testing before occupancy.
Installation readiness checklist:
- Measure the installation space and compare to appliance dimensions
- Verify utility connections match appliance requirements
- Check that access pathways accommodate appliance delivery
- Confirm permits are obtained if required by local code
- Schedule installation when you can be present to answer questions
- Prepare the area by removing old appliances and cleaning connections
- Have manufacturer instructions and warranty information available
- Plan for disposal of old appliances through proper channels
For property managers standardizing appliances across multiple units, consistency simplifies maintenance and reduces costs. Choosing the same refrigerator and stove models for all units means repair technicians can stock common parts and complete fixes faster. This standardization becomes even more important under AB628, where providing required appliances is a legal obligation.
Homeowners planning kitchen remodels should coordinate appliance installation with cabinetry work. Built-in refrigerators and ranges need precise measurements and often require custom panels. Working with both the cabinet installer and appliance technician ensures proper fit and function. These comprehensive installation guides help you plan complex projects.
Budget-conscious approaches still prioritize safety. If funds are tight, consider professional installation for gas appliances and complex built-ins while handling simple electric appliance swaps yourself. This hybrid approach balances cost savings with risk management. Always use the detailed installation checklists to verify you haven’t missed critical steps.
Professional appliance installation and repair services in Orange County and Los Angeles
After learning about installation best practices and comparing your options, you might be ready to connect with experienced professionals who can handle the technical details. That’s where specialized appliance services make the difference between a stressful DIY project and a smooth, worry-free installation.
MDTECH APPLIANCE REPAIR brings years of experience installing major appliance brands throughout Orange County and Los Angeles County. Our licensed technicians handle everything from straightforward replacements to complex built-in installations requiring custom electrical work and cabinetry modifications. We’re particularly experienced with Samsung appliance installations, ensuring these high-tech units integrate properly with your home systems.

Beyond installation, our team provides expert guidance on repair versus replacement decisions. Sometimes a failing appliance just needs a new part and professional service to run like new. Our technicians can walk you through appliance part replacement options and help you understand the key differences between repair and replacement so you make cost-effective choices. Whether you’re a homeowner upgrading your kitchen or a property manager preparing rental units for new tenants, our services ensure your appliances are installed safely, operate efficiently, and meet all local code requirements.
Frequently asked questions
What are the most important safety checks to perform before appliance installation?
Verify that electrical outlets match the appliance’s voltage and amperage requirements, and confirm circuit breakers can handle the load. For gas appliances, inspect connections for corrosion or damage and ensure proper ventilation exists. Check that water supply lines have shutoff valves within easy reach and that drainage systems can handle the appliance’s output without backing up.
How does California law AB628 affect appliance installation for property managers?
AB628 mandates that stoves and refrigerators must be provided in all new or renewed residential leases starting in 2026. Property managers should budget for compliant installations across their rental portfolios and standardize on reliable models to simplify maintenance. This law makes professional installation even more critical since non-compliant properties face legal consequences.
Can I install built-in or stackable appliances myself in Orange County?
Built-in and stackable units require custom cabinetry alignment and specialized wiring that goes beyond typical DIY skills. These installations need precise measurements, often involve electrical panel upgrades, and must meet strict ventilation requirements. Professional installation is strongly recommended to avoid costly mistakes that could damage expensive appliances or create safety hazards.
How long does professional appliance installation typically take?
Most straightforward installations where connections already exist and meet code take one to two hours. Complex installations involving new electrical circuits, gas line modifications, or built-in cabinetry work can require four to six hours or multiple visits. Professional installers assess your specific situation during scheduling and provide accurate time estimates based on the scope of work required.
What happens if an improperly installed appliance causes damage to my home?
If you performed the installation yourself or hired an unlicensed worker, your homeowner’s insurance may deny the claim entirely. Licensed professional installers carry liability coverage that protects you if their work causes damage. This insurance protection alone often justifies the cost of professional installation, especially for gas appliances where the potential damage from leaks or fires can be catastrophic.
Recommended
- Top Safety Steps for Appliance Repair Success – MDTECH APPLIANCE REPAIR
- Appliance Installation Tips: Expert Advice for Easy Setup
- Role of Ventilation in Appliance Safety
- Role of Proper Appliance Installation: Ensuring Safety & Efficiency
- Coffee Machine Installation Service | Setup & Training | Devon Somerset