
A gas conversion workflow is the ordered sequence of decisions and tasks that takes your home from its current fuel source to fully operational natural gas, starting with a single phone call to your local gas utility to confirm whether a main runs in your street. That one call determines everything: your timeline, your budget, and whether you’re looking at a 4-week project or a 6-month one.
Here’s what every conversion covers, in order:
- Availability check: Confirm a gas main exists at your street (or assess main-extension cost)
- Site survey: Licensed contractor walks the property and sizes the job
- Equipment decision: Replace the furnace/boiler outright or convert existing burner with a kit
- Utility service application: Submit paperwork; utility schedules meter set and trench work
- Permits and plan-check drawings: Contractor pulls mechanical and gas-piping permits
- Gas-line and meter installation: Utility and contractor complete underground and interior runs
- Appliance installation and testing: New or converted equipment is connected and fired
- Municipal and utility inspections: Rough-in and final sign-offs
- Commissioning and documentation: Final activation, insurance notification, rebate filing
If the gas main already runs in your street, most homeowners finish in 2–4 weeks from first call to final sign-off. If a main extension is required, the timeline can stretch up to six months and the budget climbs substantially.
Key Takeaways
The most important step in any gas conversion is confirming main availability with your utility before spending money on equipment or contractor bids, because that single answer determines your timeline, budget, and whether the project makes financial sense at all.
| Point | Details |
|---|---|
| Check availability first | Call your gas utility before hiring anyone; main availability determines timeline and total cost. |
| Permits are non-negotiable | Fuel conversions require a mechanical permit and gas-piping subpermit under IRC R105; plan-check runs 1–4 weeks. |
| Timeline varies widely | Service-on-street projects finish in 4–8 weeks; main extensions can take up to 6 months. |
| Buried tanks add cost and risk | Underground tank removal runs $2,000–$5,000 or more if contamination requires remediation. |
| Appliancesrepairmdtech | Handles permits, utility coordination, and installation as one service in Orange and Los Angeles counties. |
Table of Contents
- What is the full gas conversion workflow, step by step?
- How do you check natural gas availability and what does the utility do next?
- What permits and inspections does a gas conversion require?
- How do you choose the right licensed contractor for a gas conversion?
- What does a gas conversion cost, and how long does it take?
- What safety tests happen before the gas is turned on?
- When does a gas conversion stop making sense?
- What should you do to prepare your home on conversion day?
- Why local licensing and permit experience matter more than price
- MD TECH handles your gas conversion from site survey to final sign-off
- Sources
What is the full gas conversion workflow, step by step?
The natural gas conversion steps below mirror how utilities and licensed contractors actually sequence the work. Use this as your project checklist.
-
Confirm gas availability. Call your utility or check their online service map. If a main runs in your street, you’re on the faster path. If not, ask about main-extension cost and lead time before going further.
-
Schedule a site survey. A licensed HVAC contractor or gas fitter walks the property, measures pipe runs, checks venting and flue conditions, and identifies any structural issues. This visit produces the scope of work and the plan-check sketch you’ll need for permits.
-
Decide: convert or replace. Burner conversion kits exist for some oil furnaces and boilers, but manufacturers warn that conversion can void existing warranties and that new gas-designed equipment typically runs more efficiently. Older equipment usually tips the math toward replacement.
-
Submit the utility service application. Your contractor or you file a service request with the gas company. The utility then schedules a site assessment, determines meter location, estimates the customer contribution for any underground line, and puts the job in their work queue.
-
Pull permits and submit plan-check drawings. Your contractor files for a mechanical permit and a gas-piping subpermit. Plan-check review typically runs 1–4 weeks. Do not order equipment until permits are approved and the utility has confirmed its installation date.
-
Utility installs the service line and meter. The gas company trenches from the main to your meter location, sets the meter, and pressure-tests the service line. This is the step most likely to hit scheduling delays, especially in busy seasons.
-
Rough-in inspection. The municipal inspector checks gas-piping pressure before walls are closed. The contractor schedules this; you don’t need to be present, but the work stops until it passes.
-
Final inspection and utility activation. After the final municipal sign-off, the utility activates gas flow and performs its own pressure test at the meter. Appliances are lit and tested for combustion, venting, and carbon monoxide output.
-
Documentation and notifications. Collect all permit sign-off cards, appliance manuals, and warranty documents. Notify your homeowner’s insurance carrier of the fuel change, and file any rebate paperwork with your utility or state energy office.
Pro Tip: Order equipment only after you have written permit approval and a confirmed utility installation date. Furnaces and boilers ordered too early can sit in your garage for weeks while the utility backlog clears, and some manufacturers’ warranties start at delivery, not installation.
How do you check natural gas availability and what does the utility do next?
Start with the simplest check: walk your street and look for gas meters on neighboring homes. If your neighbors have them, a main almost certainly runs in your street. For a definitive answer, call your local gas utility directly or use their online service-area map.
If the main exists, here’s what happens after you contact the utility:
- The utility sends a field representative to assess meter location, measure the distance from the main to your home, and estimate the cost of the underground service line.
- You receive a customer contribution estimate for the trench and line work. This varies by utility and distance but is a real out-of-pocket cost separate from your contractor’s bid.
- The utility schedules street work and meter installation. Scheduling is often the longest single delay in the entire project, particularly when trenching is required.
- Typical utility timelines run 2–6 weeks for a standard service connection once paperwork is submitted.
If no main exists in your street, the project becomes a main extension. The utility leads that process, charges a substantially higher customer contribution, and manages its own engineering and permitting. Early utility communication is critical before you spend money on contractor bids or equipment, because a main-extension project can take up to six months and may not pencil out financially for every homeowner.
The paperwork utilities typically require includes a signed service application, the property address, proof of ownership or written consent for trenching on your property, and sometimes a copy of your contractor’s permit application.
What permits and inspections does a gas conversion require?
Nearly every fuel-type conversion in the U.S. triggers at least two permits: a mechanical permit under IRC R105 covering the heating equipment change, and a gas-piping subpermit covering any new or extended gas lines. Plan-check drawings are normally required for both.
A typical plan-check drawing is a one-page sketch showing:
- Meter location and distance from the main
- Interior gas-line routing with pipe sizes
- Each appliance’s BTU input rating
- Venting and flue connections
Plan-check review runs 1–4 weeks in most jurisdictions, with total permit-to-final-inspection timelines usually landing in the 2–6 week range after approval. Permit fees vary by municipality. A mechanical subpermit commonly runs $100–$300; a gas-piping subpermit typically adds $75–$200. Some jurisdictions bundle these; others charge separately.
Who pulls the permits? In most states, a licensed HVAC contractor or master plumber pulls both permits. Some jurisdictions allow homeowners to pull their own permits for work on their primary residence, but this transfers all filing responsibility and inspection coordination to you. A licensed contractor pulling permits as part of the bid bears that filing responsibility, coordinates inspections, and typically warranties the installation, which often shortens the municipal review cycle.
Pro Tip: Before signing any contract, ask the building department in writing: who is allowed to pull this permit, and what drawings are required? Get that answer in writing, then require your contractor to include permit fees and their timeline estimate as explicit line items in the bid. A contractor who can’t answer permit questions clearly is a red flag.
The inspection sequence is: rough-in pressure test (before walls close) → final municipal inspection → utility pressure test and meter activation. Nothing moves to the next step until the previous one passes.
How do you choose the right licensed contractor for a gas conversion?
The contractor you hire manages permits, utility coordination, oil-tank decommissioning, and final commissioning. A weak hire at this stage costs more than the money you saved on the bid.
Credentials and insurance to verify before signing anything:
- State HVAC contractor license or master plumber license (whichever your jurisdiction requires for gas work)
- Liability insurance of at least $1 million per occurrence
- Workers’ compensation coverage for all employees on site
- Contractor license number verifiable through your state’s licensing board
Questions to ask every contractor you interview:
- Who pulls the permits, and will permit fees be itemized in the bid?
- Do you handle the utility service application, or does the homeowner?
- Have you decommissioned oil tanks before, and do you work with a licensed tank removal company?
- Can you provide references from local inspectors or recent customers in this municipality?
- What is your warranty on labor and parts, and who handles service calls after activation?
Red flags that should end the conversation:
- Offers to skip permits or “handle it informally”
- Vague scope on gas-line routing or appliance connections
- Large unexplained cash discounts with no written contract
- No proof of license or insurance when asked directly
Hiring a contractor who handles gas-line installation as a core service, not a side job, reduces the risk of unpermitted work and failed inspections significantly.
What does a gas conversion cost, and how long does it take?
Cost and timeline depend heavily on two variables: whether the gas main is already in your street, and whether you have a buried oil tank. Here’s how the line items stack up:
Buried tank removal is the single biggest wildcard. Costs often reach $2,000–$5,000 or more if soil contamination is discovered and remediation is required. State environmental agencies typically require notification when contamination is found, which adds both time and cost.
For detailed gas-line cost breakdowns, the distance from the street main to your meter location drives the utility’s customer contribution more than almost any other factor.
Timeline at a glance:
- Gas main in your street: 4–8 weeks total from first call to final sign-off
- Main extension required: up to 6 months
Factors that add time: utility scheduling backlogs, contaminated tank removal requiring state environmental review, engineering or structural work triggered by the site survey, and plan-check delays at busy building departments.
Pro Tip: Add a line item in every bid for “permit and utility coordination.” Contractors who don’t account for this time often hit holds mid-project when the utility or building department needs additional information, and that hold becomes your problem, not theirs.
What safety tests happen before the gas is turned on?
No gas flows until two separate sign-offs are complete: the municipal inspector’s and the utility’s. Here’s what each test covers and who runs it.
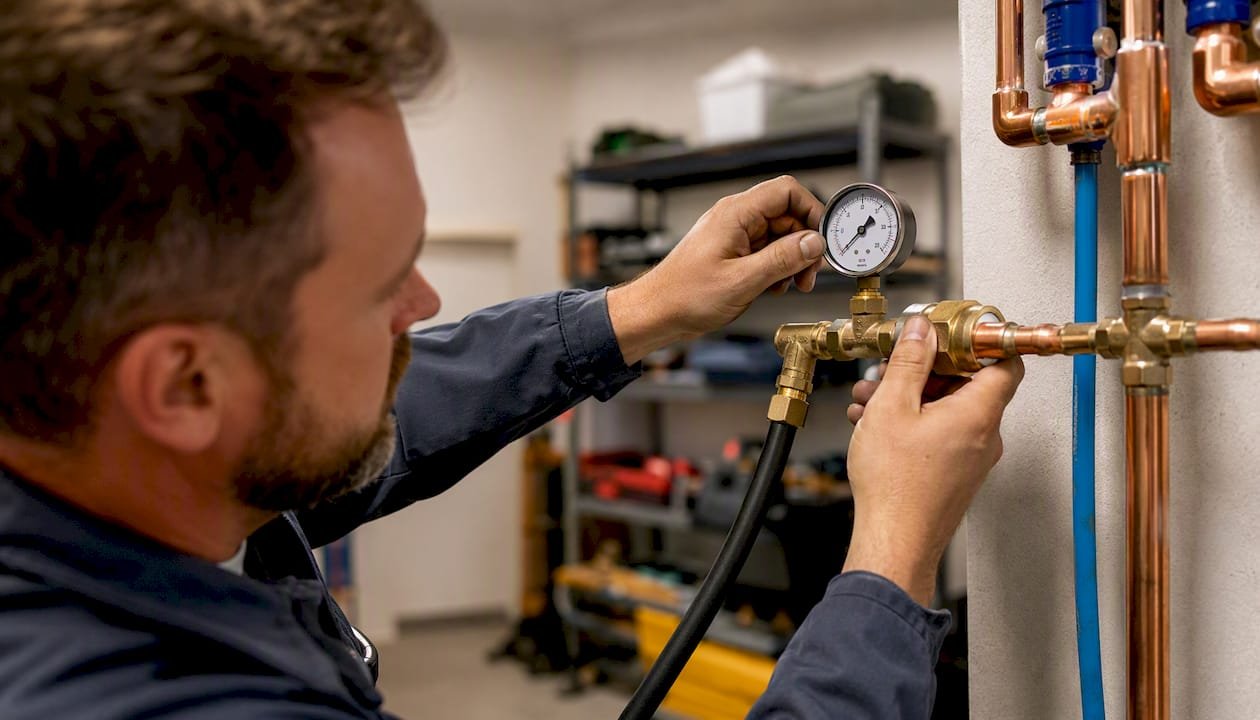
Gas-piping pressure test (rough-in): The contractor pressurizes the interior gas lines before walls are closed. The municipal inspector witnesses or verifies the test. If the system holds pressure for the required duration without dropping, the rough-in passes and walls can close.
Appliance combustion analysis: After installation, the contractor fires each appliance and measures combustion efficiency, flue gas temperature, and carbon monoxide output. This is the installer’s responsibility, not the inspector’s, and it’s where venting problems surface.
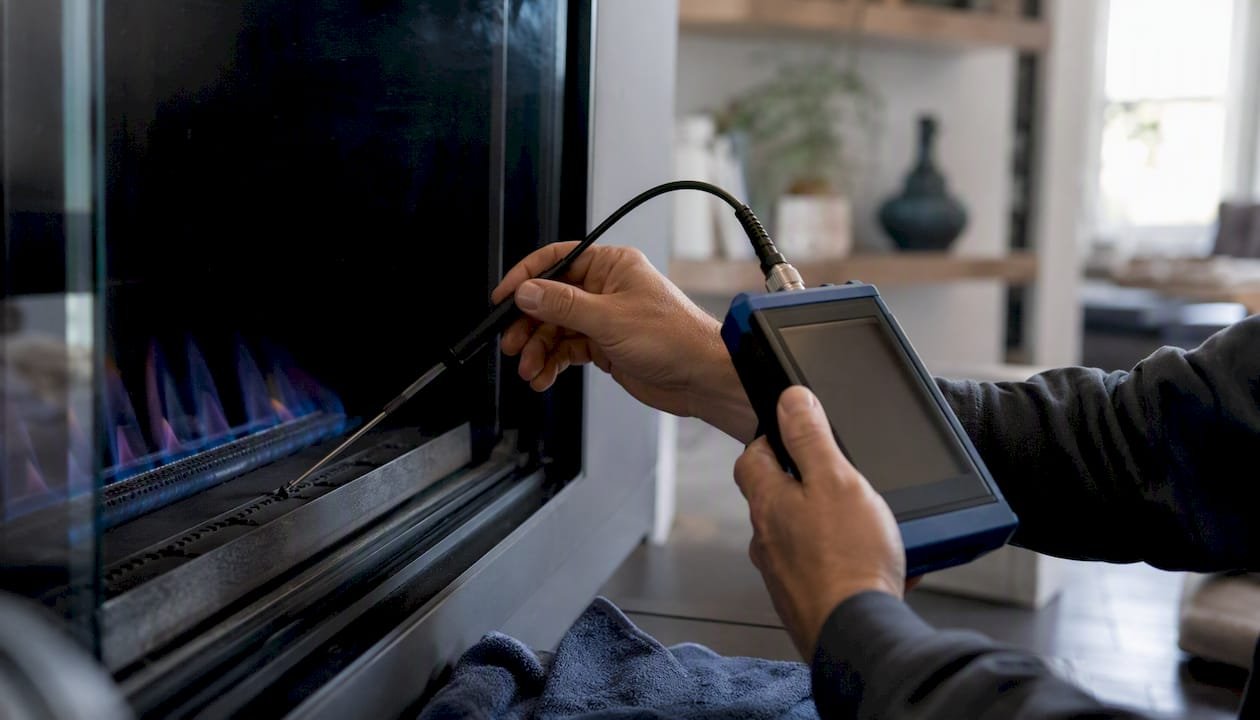
Venting and draft checks: The technician verifies that each appliance’s flue draws properly and that combustion gases are exhausting to the outside. Backdrafting is a serious safety failure and must be corrected before commissioning.
Carbon monoxide alarm verification: Most jurisdictions require CO alarms within a specified distance of sleeping areas when gas appliances are present. The inspector typically verifies alarm placement at the final inspection.
Utility meter activation and final pressure test: After the municipal final inspection passes, the utility activates gas flow and performs its own pressure test at the meter. Do not use any gas appliance until both the municipal and utility sign-offs are complete. Lighting a pilot or running a burner before activation is both a safety risk and a permit violation.
Post-commissioning, keep a written record of every test result, the inspector’s sign-off date, and the utility’s activation confirmation. You’ll need these for insurance and warranty purposes.
When does a gas conversion stop making sense?
Not every property is a good candidate. Three scenarios consistently make the math work against conversion.
Rural properties far from a gas main. If the nearest main is more than a few hundred feet away, the utility’s main-extension charge can exceed the lifetime fuel savings. Get the utility’s written cost estimate before spending anything on contractor bids.
Buried tanks with contamination risk. An underground storage tank that has been leaking adds soil testing, state environmental agency notifications, and potentially five-figure remediation costs to the project. If your tank is old, corroded, or has a history of leaks, get a tank integrity assessment before committing to conversion.
Short ownership horizon. A full oil-to-gas conversion rarely pays back in fewer than 5–7 years. If you plan to sell within that window, the upfront cost may not recover at closing.
Alternatives worth evaluating:
- High-efficiency oil systems: A modern condensing oil boiler can cut fuel consumption significantly without the conversion cost or timeline. Worth considering if your oil equipment is near end of life anyway.
- Electric heat pumps: Cold-climate heat pumps now perform reliably in temperatures well below freezing and qualify for federal tax credits under the Inflation Reduction Act. No gas main required.
- Propane as a bridge: If gas is coming to your area in the next few years, propane can run the same appliances in the interim with a relatively straightforward LP conversion when the main arrives.
- Staged conversion: Install the meter and interior gas line now, keep the oil system running, and swap appliances one at a time as they reach end of life. This spreads cost and reduces disruption.
What should you do to prepare your home on conversion day?
The on-site crew works faster when the house is ready. Run through this checklist the evening before installation begins.
- Clear a 3-foot path to the furnace/boiler room, the oil tank, and any exterior meter location
- Locate and label the oil tank shutoff valve and all existing fuel lines
- Move valuables, rugs, and furniture away from work areas
- Secure pets and keep children out of the work zone for the full day
- Have all permit documents, the utility service confirmation, and contractor contact numbers printed and on hand
- Confirm the contractor has a copy of the approved plan-check drawings on site
Pro Tip: Photograph the appliance serial plate, the existing flue or chimney connection, and the oil tank before any removal begins. These photos protect you if a warranty question arises later and give the inspector a reference point if the permit drawings need to match existing conditions.
Why local licensing and permit experience matter more than price
The homeowners who run into trouble on gas conversions almost always share one thing: they hired on price and skipped the questions about permit history and local utility relationships. A contractor who has pulled permits in your specific municipality knows the building department’s quirks, knows which inspectors require additional documentation, and has a working relationship with the local utility’s scheduling team. That knowledge cuts weeks off a project.
At Appliancesrepairmdtech, every gas conversion job starts with a written scope that names who pulls each permit, the expected utility coordination timeline, and the warranty terms on both labor and parts. Homeowners should demand the same from any contractor they consider. If a bid doesn’t itemize permit fees and utility coordination as separate line items, the contractor hasn’t thought through the project fully, and you’ll discover that gap mid-job.
The permit process is also where unlicensed work gets expensive fast. A failed inspection on unpermitted gas work can require full removal and reinstallation, and your homeowner’s insurance may deny a claim tied to unpermitted fuel-system work. Local licensing isn’t a formality. It’s the mechanism that keeps the project on track and the home insurable.
MD TECH handles your gas conversion from site survey to final sign-off
Gas conversions in Orange County and Los Angeles County move faster when one team manages the whole sequence. Appliancesrepairmdtech covers site surveys, interior gas-line installation, oil-tank decommissioning coordination, permit filing, appliance installation, and safety testing and commissioning as a single, coordinated service.
Permits and utility coordination are built into the service, not billed as surprises after the fact. The technicians are licensed, insured, and familiar with the building departments and utility procedures across both counties. For homeowners who want HVAC and gas conversion work handled by one licensed team without managing multiple subcontractors, Appliancesrepairmdtech is the direct path. Book a local estimate online at Appliancesrepairmdtech and get a written scope with permit fees and timeline included before any work begins.
Sources
Keep these resources on hand as you plan and execute the project.
- Complete Guide to Gas Line Permits (2026)
- Oil to Gas Heating Conversions: The Homeowner’s Guide (2026) | Today’s Homeowner
- Oil to Gas Conversion Long Island 2026 | Cost & Rebates
This article is general information, not a substitute for advice from a qualified lawyer. Consult a qualified legal professional about your own circumstances before acting on anything here.