
Most homeowners pay between $268 and $841 for a residential gas line installation, with a national midpoint around $470 for a typical appliance run. Retrofit jobs in existing homes with concrete cutting or long underground runs can push costs well past $1,000. Your single best move right now: call a licensed plumber or mechanical contractor, describe your job in detail, and ask for a written, itemized quote that lists permit fees and inspection responsibilities separately.
Two variables swing the price more than anything else: how far the pipe needs to travel and whether the installer has to cut through concrete or trench under a driveway. A 10-foot indoor stove run is a fundamentally different job from a 60-foot underground run to an outdoor kitchen, even though both are “gas line installations.”
Before signing anything, confirm that the quote covers the permit application, a pressure test, and utility coordination if a new meter or service connection is involved.
Key Takeaways
Gas line installation cost in the U.S. typically runs $268–$841 for a standard residential job, but permits, trenching, and utility work can push complex projects well past $1,500.
| Point | Details |
|---|---|
| National cost range | Most homeowners pay $268–$841, with a midpoint around $470 for a typical appliance run. |
| Biggest cost drivers | Pipe run length, trenching surface (soil vs. concrete), pipe material, and BTU load determine most of the price difference between bids. |
| Permits and utility activation | Permits are required in most jurisdictions; SoCalGas and other utilities will not activate service until local inspection sign-off is provided. |
| Timeline reality | Physical work takes hours to two days; total project time runs days to weeks once permits, inspections, and utility scheduling are factored in. |
| Appliancesrepairmdtech | Covers Orange and Los Angeles counties with licensed technicians, permit coordination, pressure testing, and written itemized estimates. |
Table of Contents
- How much does gas line installation cost by appliance type?
- What actually drives the price difference between two bids?
- Permits, inspections, and why your utility won’t turn on the gas without them
- How long does a gas line installation actually take?
- Can you install your own gas line? The honest answer on DIY
- Which pipe materials and installation methods affect your cost most?
- How to hire the right contractor for gas piping work
- Retail installer hookups vs. full gas-line work: know the difference
- Realistic price scenarios: what common jobs actually cost
- Why licensed local pros are the only sensible choice here
- Appliancesrepairmdtech handles gas line work in Orange and LA Counties
- Sources
How much does gas line installation cost by appliance type?
Not all appliance hookups cost the same. A gas dryer sitting 8 feet from an existing stub-out is a quick afternoon job. A new gas fireplace insert requiring a dedicated line from the meter is a different project entirely. Aggregated national data from Thumbtack shows these typical per-appliance ranges:
| Appliance | Typical Low | Typical High | Common Cause of High End |
|---|---|---|---|
| Gas stove / range | $150 | $500 | Long run, no existing stub |
| Gas dryer | $150 | $500 | New dedicated line needed |
| Gas furnace | $300 | $800 | Larger pipe sizing, longer run |
| Water heater | $150 | $500 | Meter upgrade, long run |
| Gas fireplace | $300 | $900 | Dedicated line, wall penetrations |
| Outdoor BBQ grill | $300 | $1,200 | Trenching, distance from meter |
| Fire pit / outdoor feature | $400 | $1,500 | Long trench, boring under hardscape |
The low end on any row assumes a short run to an existing gas line with no trenching. The high end reflects a new dedicated line, significant pipe length, or underground work.
Supply-from-street vs. in-home branch line. Running a branch line from an existing interior manifold to a new appliance is the cheaper scenario. Bringing a new service line from the street to the meter, or extending the meter to a new location, involves utility coordination, street or yard trenching, and sometimes a meter upgrade. That work can add $500 to $2,000 or more on top of the in-home piping cost. SoCalGas notes that its new-service estimates include appurtenances, valves, service pipe, and regulators, and that payment may be required before construction is scheduled.
- Short indoor appliance branch (under 20 feet): $150–$500
- Medium indoor run (20–50 feet): $300–$800
- New service from street or meter extension: add $500–$2,000+
- Underground outdoor run with trenching: $500–$1,500+
What actually drives the price difference between two bids?
According to BobVila, the four biggest cost drivers are pipe run length, site complexity, pipe material, and total appliance BTU load. Here is what each one means in practice:
Linear feet of pipe. Most contractors price gas piping by the linear foot, typically $15–$30 per foot for labor and materials combined on a straightforward indoor run. A 10-foot run and a 50-foot run are not the same job even if the hourly rate is identical.
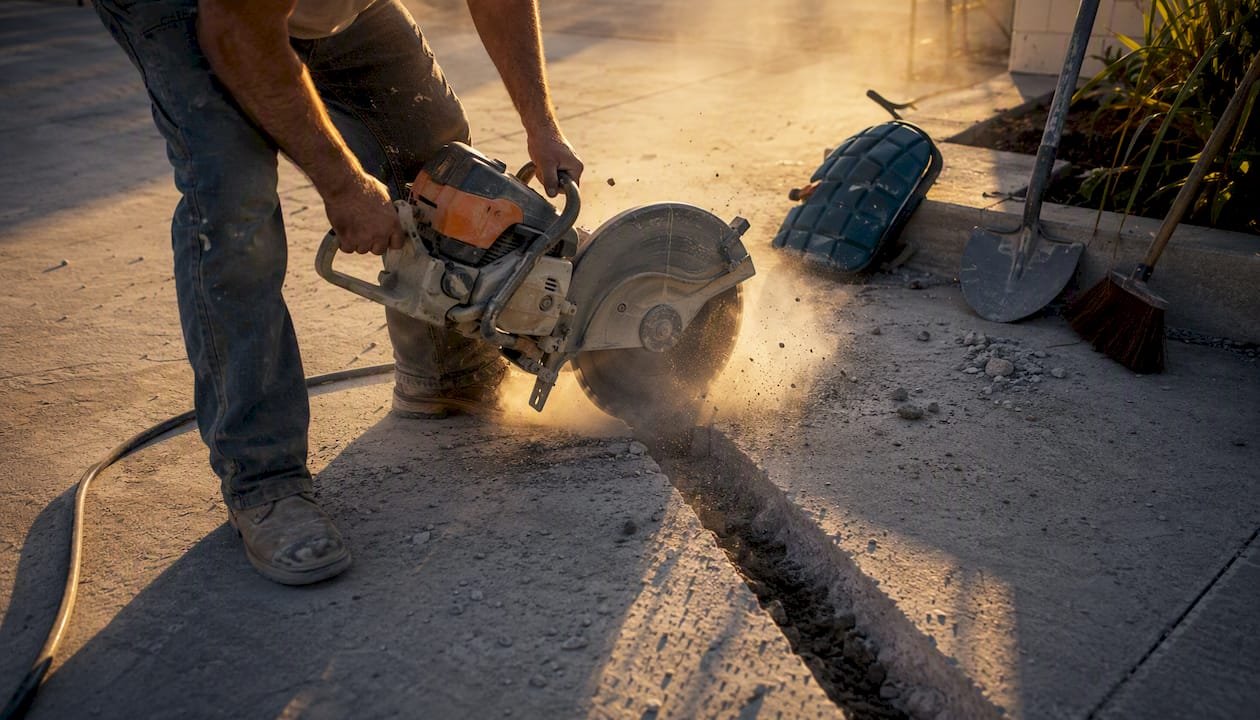
Trenching surface. Soft soil is cheap to trench. Compacted clay, root-filled ground, or a concrete slab is not. Cutting through a concrete driveway or patio can add $300–$800 in labor alone, plus patching costs afterward. Directional boring under a driveway (no surface cut) costs more per foot than open trenching but avoids the patching bill.
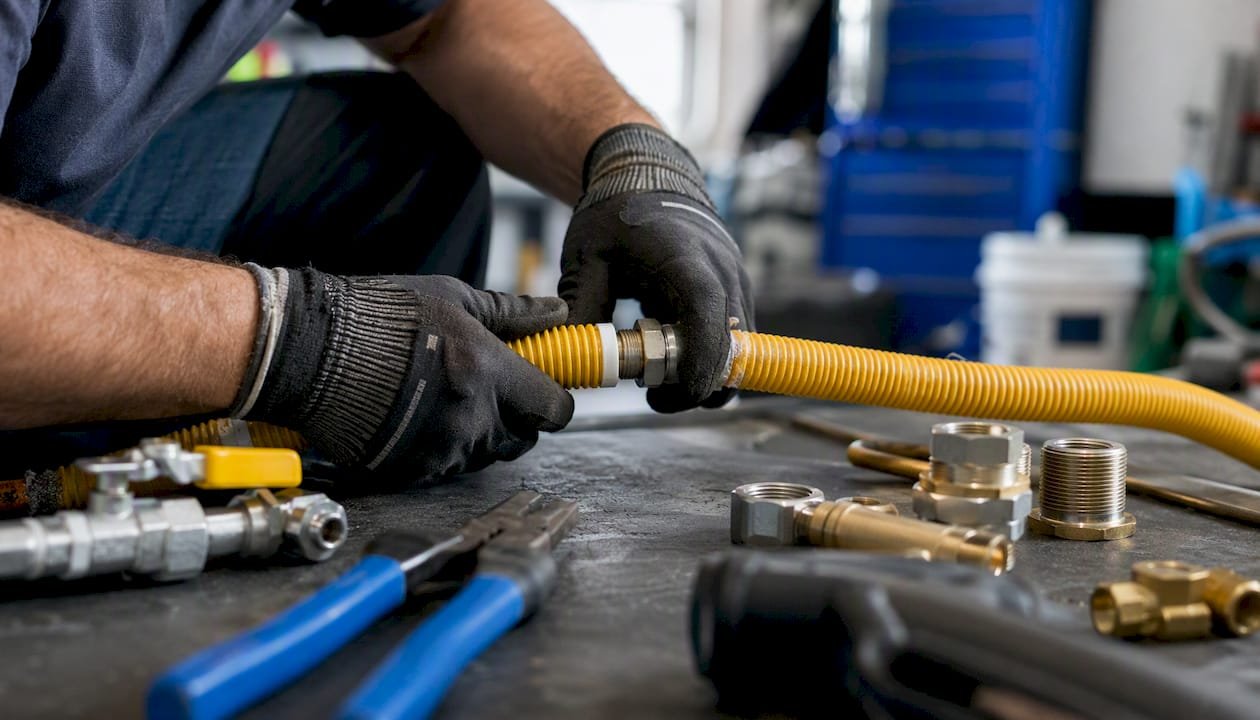
Pipe material. Black iron pipe is the standard for indoor exposed runs and costs less per foot than corrugated stainless steel tubing (CSST). CSST is faster to install in tight spaces, which can offset its higher material cost on complex indoor jobs. High-density polyethylene (HDPE) is used for underground service lines and has its own pricing tier. Material choice also affects what the inspector will look for during the pressure test.
Appliance BTU load and pipe sizing. Adding a high-BTU range, a whole-home generator, or multiple appliances on one run forces the contractor to upsize the pipe diameter. Larger pipe costs more per foot and may require a meter upgrade if the existing meter cannot supply the added load.
Meter and utility work. If your project requires a new meter, a meter relocation, or a service upgrade, that work is coordinated with the utility and priced separately. This is often the biggest single line item on a new-construction or major-retrofit estimate.
Existing piping condition. Older homes sometimes have corroded or undersized piping that must be replaced before a new appliance line can be added. A contractor who does a proper pressure test before starting work may discover leaks at old shutoff valves. San José’s permit guidance notes that older wedge-type shutoff valves can leak under test pressure, requiring replacement before the system passes inspection.
Pro Tip: Ask your contractor whether they pressure-test the existing system before starting new work. If they do, budget $100–$300 for potential valve replacements on older piping. It is far cheaper to find and fix a leaky shutoff before the inspector arrives than to fail the test and reschedule.
Permits, inspections, and why your utility won’t turn on the gas without them
This is the part most homeowners underestimate. Many jurisdictions require a plumbing or mechanical permit for any addition or alteration to gas piping, and final inspections must be cleared before the utility will activate service. In California, this is not optional.
SoCalGas will not activate gas service until the homeowner or contractor provides proof that the installed piping passed the required local building inspection. That single dependency makes inspection scheduling the true critical-path item on any gas project, not the physical installation.
Permit fees vary by municipality. In most Southern California cities, a gas piping permit runs $75–$200 for a residential job, though complex projects with plan check requirements can cost more. The contractor typically pulls the permit, but some jurisdictions allow homeowner-pulled permits. Confirm in writing who is responsible.
Here is what to confirm on any written quote:
- Permit application: Is the permit fee included in the quote, or billed separately?
- Gas-sizing worksheet: For jobs adding significant BTU load, the inspector may require a sizing calculation. Roseville’s 2025 gas piping handout requires a piping schematic showing new vs. existing piping, linear footage, pipe diameters, and appliance BTU ratings.
- Pressure test witness: Will the inspector witness the pressure test, or is a contractor-certified test sufficient in your jurisdiction?
- Utility coordination: If the job involves a new meter or service connection, who contacts the utility and manages the activation timeline?
- Inspection scheduling: Who books the inspection appointment, and what is the typical wait time in your ZIP code?
The permit is not a formality. A gas line installed without a permit cannot be inspected, which means the utility may refuse activation, your homeowner’s insurance may deny a related claim, and you may face a costly rework order if the unpermitted work is discovered during a home sale.
How long does a gas line installation actually take?
The physical work is usually the shortest part. A licensed plumber can run a new indoor appliance branch in two to six hours for a straightforward job. A more complex retrofit with multiple appliances, wall penetrations, or outdoor trenching might take one to two full days on-site.
Total project time is a different number. Here is where the delays actually live:
- Permit issuance: Online permit portals in many California cities issue permits same-day or next-day for simple jobs. Plan-check-required projects can take one to three weeks.
- Inspector availability: Residential gas inspections are typically scheduled through the city building department. Wait times range from next-day to two weeks depending on the municipality and season.
- Utility service tie-in: New meter installations or service upgrades require a utility appointment. SoCalGas schedules these separately from the building inspection, and lead times can run two to four weeks for new service applications.
- Pressure test and re-test: If the system fails the initial pressure test, the contractor must repair the issue and reschedule. Budget an extra two to five business days for this scenario.
Questions to ask your contractor before signing:
- How do you handle permit applications in this city?
- Who schedules the inspection, and what is the typical wait time here?
- Do you coordinate directly with the utility for meter work, or does the homeowner manage that?
- What happens if the pressure test fails? Is re-testing included in the quote?
Can you install your own gas line? The honest answer on DIY
No, for most homeowners. The short version: DIY gas-line work is unsafe, often illegal without a license, and can void your homeowner’s insurance.
BobVila’s guidance is direct on this point: licensed professionals are strongly recommended over DIY for gas piping work because of the safety risks and code-compliance consequences. NFPA 54, the National Fuel Gas Code, governs piping system design, sizing, materials, installation in concealed spaces, safety shutoffs, and venting. Most municipalities adopt NFPA 54 or a local equivalent, and inspectors use it as their checklist.
The insurance risk is real and often overlooked. If a gas leak causes a fire or carbon monoxide event and the piping was installed without a permit by an unlicensed person, your homeowner’s insurance carrier has grounds to deny the claim. The cost of a licensed installation is a fraction of an uninsured loss.
What homeowners can reasonably handle without a license:
- Connecting a flexible appliance connector (the last 3–6 feet of flex line) to an existing, capped stub-out, in jurisdictions that allow it
- Replacing a shutoff valve on an existing line, in some jurisdictions, after confirming local code
What always requires a licensed plumber or mechanical contractor:
- Any new pipe run, regardless of length
- Any work that requires a permit (which is most gas piping work)
- Pressure testing and inspection witness
- Meter or service work
Check your gas appliance safety checklist before starting any appliance project to confirm which steps require a licensed pro in your area.
Which pipe materials and installation methods affect your cost most?
Material choice is not just a cost question. It affects how the inspector evaluates the job, how long the system lasts, and what happens if the pipe is ever damaged.
Black iron pipe is the traditional choice for indoor exposed gas runs. It is durable, widely accepted by inspectors, and relatively inexpensive at roughly $1–$3 per foot for the pipe itself. The labor cost is higher than CSST because each joint must be threaded and assembled. Black iron is not suitable for underground use.
CSST (corrugated stainless steel tubing) is a flexible tubing system that runs through walls and floors without threaded joints at every turn. It costs more per foot in materials ($2–$5) but installs faster in complex interior routing, which can reduce labor on jobs with many bends or tight spaces. NFPA 54 and most local codes require CSST to be bonded to the home’s electrical grounding system to reduce arc-flash risk. An inspector will check for this.
HDPE (high-density polyethylene) is used for underground service lines from the street to the meter. It is flexible, corrosion-resistant, and the standard material for buried utility-side piping. Homeowners rarely choose this material directly; the utility or a licensed contractor specifies it for underground runs.
| Material | Best Use | Relative Cost per Foot | Key Inspection Point |
|---|---|---|---|
| Black iron | Indoor exposed runs | Low ($1–$3 material) | Thread integrity, joint compound |
| CSST | Indoor concealed routing | Medium ($2–$5 material) | Bonding to electrical ground |
| HDPE | Underground service lines | Varies by utility | Burial depth, tracer wire |
Trenching vs. directional boring. Open trenching is cheaper per linear foot but requires surface restoration afterward. Boring under a driveway or patio costs more per foot but avoids cutting and patching hardscape. For a 20-foot bore under a concrete driveway, expect to add $400–$800 to the base pipe cost. Burial depth requirements vary by jurisdiction; California generally requires a minimum of 18 inches for residential gas lines, though local codes may specify more.
- Open trench in soft soil: $4–$8 per linear foot for excavation
- Open trench in compacted soil or clay: $8–$15 per linear foot
- Directional bore under hardscape: $20–$50 per linear foot
For gas appliance conversions that require new piping, material selection is part of the permit application, so confirm the contractor’s material plan before work begins.
How to hire the right contractor for gas piping work
The hiring decision matters more here than on most home projects. A bad electrical outlet is annoying. A bad gas line is dangerous.
- Verify the license. In California, gas piping work requires a C-36 (Plumbing) or C-20 (HVAC) contractor license, or a general B license with documented gas-piping experience. Check the Contractors State License Board (CSLB) database before signing anything.
- Confirm insurance. Ask for a certificate of general liability insurance and workers’ compensation. If a worker is injured on your property and the contractor has no workers’ comp, you may be liable.
- Require an itemized written estimate. The quote should list: linear feet of pipe, material type, permit fee (or state it is excluded), pressure test, inspection scheduling, and any utility coordination fees. A one-line total is a red flag.
- Ask about local permit experience. A contractor who regularly works in your city knows the inspector’s preferences, the permit portal, and the typical inspection wait times. That local knowledge saves days on the back end.
- Confirm the pressure test procedure. Ask whether they test the new line only or the full system, what pressure they test to, and whether the inspector witnesses the test or accepts a contractor-signed report.
- Get a gas-sizing calculation for large jobs. If you are adding a high-BTU range, a generator, or multiple new appliances, ask the contractor to show you the sizing worksheet. Local permit handouts in many California cities require this documentation at permit application.
Red flags to walk away from:
- Vague estimate with no line items for permits or pressure testing
- Refusal to pull a permit (“we can skip the permit and save you money”)
- Cash-only payment with no written contract
- No local references or verifiable license number
- Inability to explain what pipe material they plan to use or why
Pro Tip: *Get at least two itemized quotes. The difference between them often reveals which contractor is cutting corners on permits or using cheaper materials.
For a step-by-step overview of what a professional installation involves, the appliance installation guide covers the key milestones from site visit to final hookup.
Retail installer hookups vs. full gas-line work: know the difference
Big-box retailers and appliance stores often offer “installation” when you buy a gas range or dryer. That service typically covers connecting the appliance to an existing, properly located gas stub-out with a flexible connector. It does not include running new pipe, pulling permits, or pressure testing the system.
If your kitchen already has a capped gas stub in the right location and the right size, a retail hookup is a reasonable option for a straightforward appliance swap. If there is no stub, the stub is in the wrong location, or the existing line is undersized for a new high-BTU range, you need a licensed contractor for the piping work first.
Common add-on fees to watch for on any gas installation quote:
- Meter upgrade: $300–$800, required when adding significant BTU load
- Curb or driveway boring: $400–$1,000 depending on width and material
- Existing pipe replacement or upgrade: $200–$600 for corroded or undersized sections
- Appliance disconnection and reconnection: $75–$150 per appliance
- Pressure test witness fee (some jurisdictions charge separately): $50–$150
- Permit expedite fee (some cities offer this): $50–$200
A retail hookup fee typically runs $100–$200 and covers only the final flex-connector connection. Any piping work beyond that stub-out is a separate, licensed-contractor job.
Statistic to keep in mind: Thumbtack’s aggregated data shows the national range for gas line installation runs $268–$841. A retail hookup fee sits well below that range because it is not a gas-line installation. If a quote for “gas line installation” comes in at $100, ask exactly what it covers.
Realistic price scenarios: what common jobs actually cost
These scenarios map typical project types to expected price bands. Use them to sanity-check bids, not as fixed prices. Local labor rates, permit fees, and site conditions all shift the numbers.
Scenario 1: 10-foot indoor run to a new gas stove
Existing gas service, no trenching, short run from a nearby manifold. Typical range: $200–$450. Permit and pressure test included in most licensed bids.
Scenario 2: 30-foot run under a lawn to an outdoor grill
Soft-soil trenching, HDPE or black iron, no hardscape cutting. Typical range: $500–$900. Add $200–$400 if the contractor must bore under a walkway.
Scenario 3: New service from the street including meter tie-in
Utility coordination required, HDPE service line, new meter set. Typical range: $1,500–$3,500+. SoCalGas or your local utility provides a cost estimate for the service-side work; the contractor prices the in-home piping separately.
Scenario 4: Retrofit with concrete cutting (slab home)
Cutting through a concrete slab to run pipe to a new kitchen island or relocated range. Typical range: $800–$2,000 depending on slab thickness, run length, and patching requirements.
Scenario 5: Full outdoor kitchen with fire pit and grill
Long trench (50+ feet), multiple appliance connections, possible boring under a driveway. Typical range: $1,200–$3,000+.
| Scenario | Typical Low | Typical High | Main Cost Driver |
|---|---|---|---|
| 10-ft indoor stove run | $200 | $450 | Labor, permit |
| 30-ft outdoor grill run | $500 | $900 | Trenching, material |
| New service from street | $1,500 | $3,500+ | Utility work, meter |
| Retrofit through concrete slab | $800 | $2,000 | Concrete cutting, patching |
| Full outdoor kitchen | $1,200 | $3,000+ | Distance, multiple connections |
To convert these to a local estimate: ask your contractor for a linear-foot breakdown and a separate line item for any meter or utility service work. Those two numbers tell you whether the quote is priced fairly for your specific job.
Why licensed local pros are the only sensible choice here
Gas work is one of the few home projects where the gap between a licensed pro and an unlicensed one is not about quality of finish. It is about whether the system is safe, whether it passes inspection, and whether your insurance covers you if something goes wrong.
At Appliancesrepairmdtech, the position on this is straightforward: every gas piping job in Orange County and Los Angeles County should be handled by a licensed technician who knows the local permit process, pulls the permit as part of the job, and treats the pressure test and inspection as non-negotiable steps, not optional add-ons.
The practical reason is local code familiarity. NFPA 54 sets the national floor, but California and individual municipalities layer additional requirements on top of it. An installer who works regularly in Irvine, Anaheim, or Long Beach knows what the local inspector will flag, how to prepare the gas-sizing worksheet, and how to coordinate with SoCalGas for activation. That knowledge cuts days off the project and reduces the chance of a failed inspection.
Written, itemized estimates matter too. A homeowner who receives a vague one-line quote has no way to verify whether the permit fee is included, whether the pressure test is part of the scope, or whether the contractor plans to use code-compliant materials. Insisting on an itemized quote is not being difficult. It is the only way to compare two bids honestly.
For routine gas line checks and safety inspections, the same principle applies: a licensed technician who documents the work protects you if a question ever comes up with your insurer or a future buyer.
Appliancesrepairmdtech handles gas line work in Orange and LA Counties
Gas line installation in Southern California comes with a specific set of requirements: California code, SoCalGas coordination, and municipal permit processes that vary city by city. Appliancesrepairmdtech covers Orange County and Los Angeles County with licensed technicians who handle the full scope, from the initial site visit and itemized quote through permit application, pressure testing, and utility coordination for activation.
The process is straightforward. You describe the job, a technician visits to assess the run length, material requirements, and any existing piping conditions. You receive a written, itemized estimate that separates the pipe work, permit fees, and any utility coordination costs. No surprises at the end of the job. For homeowners adding a gas range, outdoor grill, water heater, or fireplace, or for property managers dealing with a retrofit in an older building, that transparency matters.
Book a gas line estimate with Appliancesrepairmdtech to get a written quote and confirm permit handling for your specific project.
Sources
These primary sources back the key claims in this article. Use them to verify permit requirements, utility policies, and code references for your specific jurisdiction.
- How much does a gas line cost? — BobVila
- Natural Gas Service — SoCalGas Gas Service Guidebook
- Gas Line Installation Cost — Thumbtack