
If your refrigerator isn’t cooling, check the power connection, temperature settings, and condenser coils first. Those three checks resolve the majority of cases without a technician. If the freezer is still cold but the fridge section is warm, the problem is almost always a blocked evaporator fan or a failed damper, not a compressor. Start there.
Immediate actions to take right now:
- Check that the unit is fully plugged in and the circuit breaker hasn’t tripped.
- Confirm the thermostat is set between 35°F and 38°F for the fridge, 0°F for the freezer.
- Open the door and listen: you should hear a fan running within a few seconds.
- Check door seals by closing the door on a dollar bill. If it slides out easily, the gasket is failing.
- Move perishables to a cooler with ice if the fridge has been warm for more than two hours.
- Do NOT attempt to open refrigerant lines or work on electrical components with the unit plugged in.
Safety note: Always unplug the refrigerator before working behind or beneath it. Refrigerant handling requires EPA Section 608 certification and is not a DIY task. Unauthorized refrigerant work can also void your warranty.
After a reset or a major fix, temperature stabilization can take up to 24 hours. Don’t judge the repair until the unit has had a full day to recover.
Pro Tip: If you just had a power outage and the fridge isn’t cooling, the compressor’s thermal overload protector may have tripped. Unplug the unit for 10 minutes, then plug it back in. Many “fridge not working after power outage” calls resolve this way.
Key Takeaways
A refrigerator that isn’t cooling is most often a dirty-coil, failed-fan, or defrost-system problem, all of which are fixable at home before a technician is ever needed.
| Point | Details |
|---|---|
| Start with the cheap fixes | Check power, settings, coils, and fans before assuming a compressor or refrigerant problem. |
| Read the frost pattern | Even heavy frost means defrost failure (cheap); partial or no frost points to a sealed-system issue (expensive). |
| Allow 24 hours to stabilize | After any reset or repair, wait a full day before concluding the fix didn’t work. |
| Use the 50% rule | If the repair quote exceeds roughly half the replacement cost, replacement is usually the better financial decision. |
| Appliancesrepairmdtech | Serves Orange and Los Angeles counties with on-site diagnostics and warranty-safe repairs, most completed in a single visit. |
Table of Contents
- What usually causes a refrigerator to stop cooling?
- Step-by-step checks you can safely do at home
- How to tell if the sealed refrigeration system is the problem
- When should you call a refrigerator technician?
- How to safely reset your refrigerator
- Everyday maintenance that prevents most cooling problems
- What MDTECH sees most often on refrigerator calls
- The advice most guides get wrong about a fridge not cooling
- Appliancesrepairmdtech handles the repairs that go beyond the checklist
- Sources
What usually causes a refrigerator to stop cooling?
Most refrigerator cooling failures trace back to dirty condenser coils, a failed evaporator fan, or a defrost system problem. Understanding which subsystem is involved tells you whether you’re looking at a $15 fix or a $600 sealed-system repair.
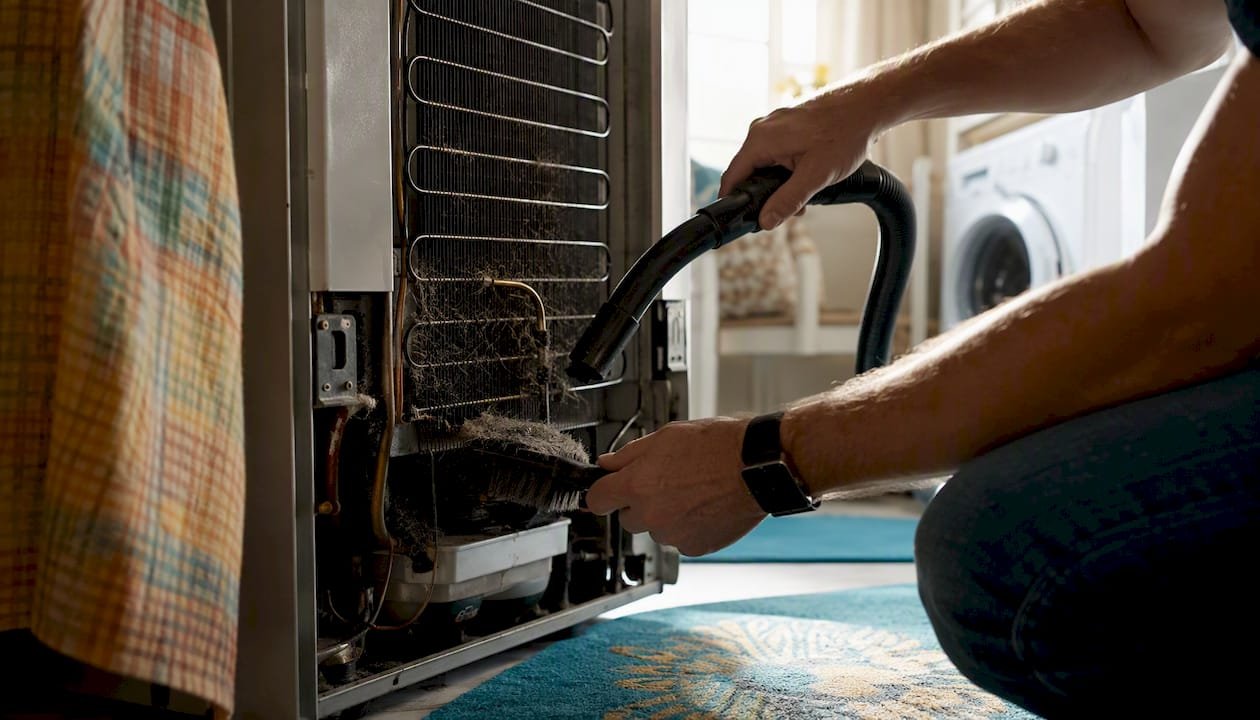
Dirty condenser coils
Condenser coils release heat from the refrigerant. When they’re coated in dust and pet hair, the compressor runs constantly but can’t shed heat fast enough. The fridge gets warm gradually over weeks. Cleaning coils every 2–3 months in dusty or pet-heavy homes is one of the cheapest maintenance habits you can build. A vacuum and a coil brush cost under $20.
Condenser fan failure
The condenser fan pulls air across the coils. If it fails, the compressor overheats and shuts down on thermal protection. You’ll hear the compressor cycle on and off more than usual, and the back of the unit will feel unusually hot. Replacement fans are generally affordable.
Evaporator fan failure
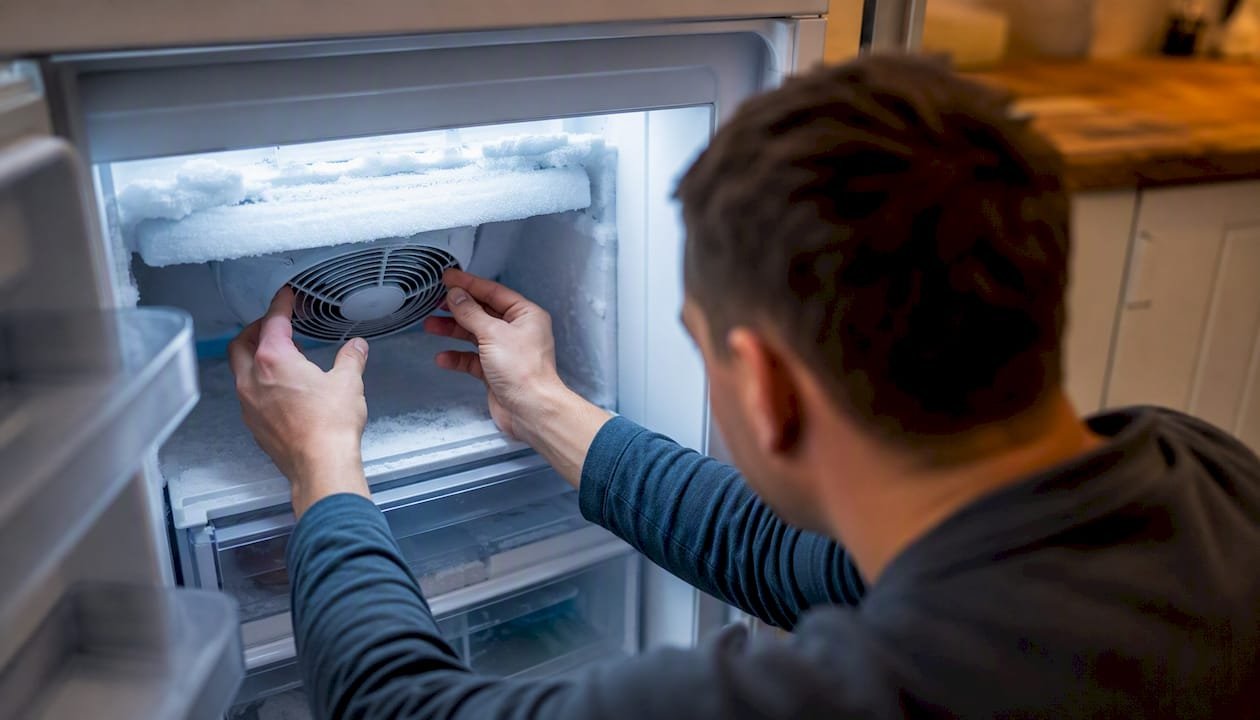
This is the most common cause of a fridge warm freezer cold scenario. The evaporator fan circulates cold air from the freezer into the refrigerator compartment. When it fails, the freezer stays cold but the fridge section climbs toward room temperature. Open the freezer and listen. No fan noise means this fan is your likely culprit. Parts cost $20–$60; it’s a straightforward swap.
Defrost system failure
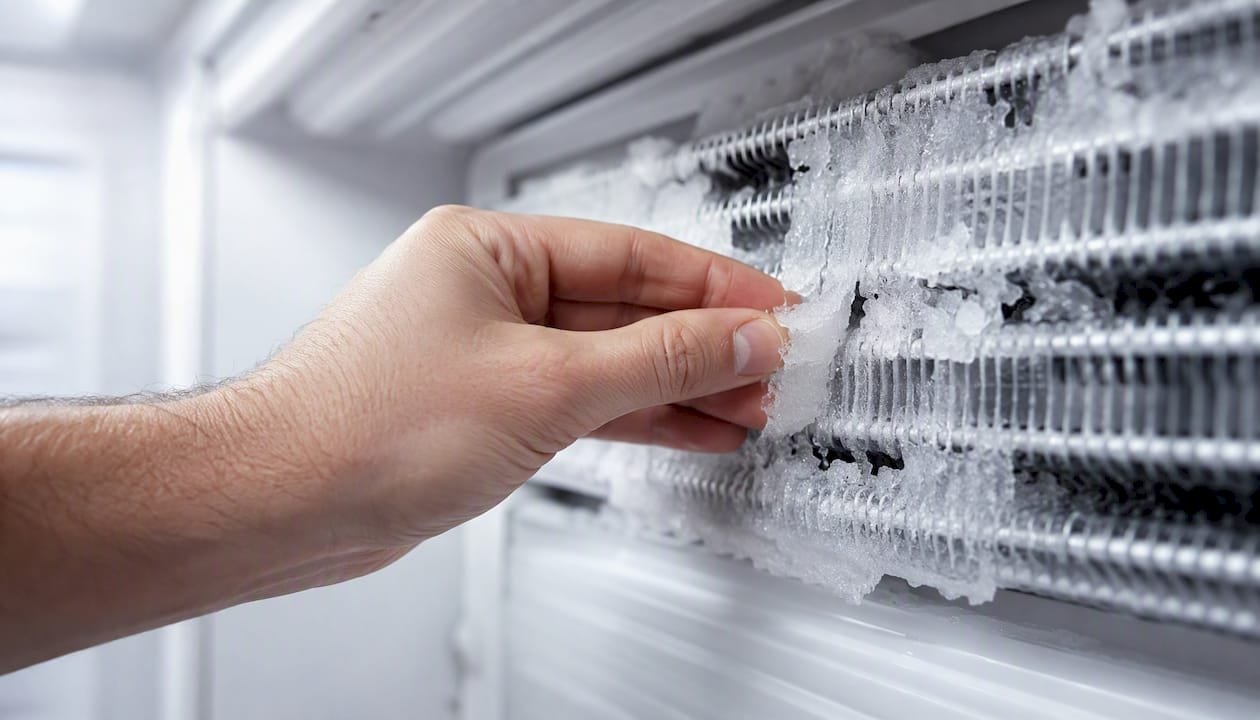
A failed defrost heater lets ice accumulate on the evaporator coil until airflow is completely blocked. This is one of the most frequently misdiagnosed problems in refrigerator repair because the symptoms, a warm fridge with a running compressor, look identical to a refrigerant leak. The fix is a low-cost repair involving a heater kit, far cheaper than sealed-system work.
Door gaskets and blocked vents
A torn or compressed gasket lets warm air seep in continuously, forcing the compressor to run overtime. Blocked interior vents, usually from overpacking the fridge, cut off cold-air circulation to specific shelves. Both are free or near-free fixes.
Start relay and capacitor problems
The start relay kicks the compressor on. A failed relay produces a distinctive click-hum-click pattern every few minutes as the compressor tries and fails to start. You can test this yourself (see the checklist section below).
Sealed-system faults
Compressor failure, refrigerant leaks, and restricted refrigerant lines are the expensive tier. Repairs typically run $400–$1,000 or more depending on the model. On a unit older than 10 years, these repairs often push past the 50% replacement-cost threshold where replacement makes more financial sense.
Technicians consistently find that a refrigerator running constantly is almost always an airflow or coil problem, not imminent compressor failure. Catching it early prevents the compressor from overheating into an actual breakdown.
Pro Tip: The dividing line between cheap and expensive repairs is the sealed system. If the compressor runs, fans run, coils are clean, and the unit still won’t cool, you’re likely looking at a refrigerant restriction or leak. That’s the point to stop DIY and call a certified technician.
Step-by-step checks you can safely do at home
Follow this in order. Each step takes 5–15 minutes. Manufacturer guidance confirms that power, thermostat, door seals, coils, and airflow checks solve a large share of cases before a technician is ever needed.
-
Check power and the breaker. Confirm the plug is fully seated. Check your breaker panel for a tripped breaker. Reset it once. If it trips again immediately, stop and call an electrician.
-
Verify temperature settings. Set the fridge and freezer to recommended temperature ranges. Someone may have accidentally bumped the dial. Wait 30 minutes and recheck.
-
Test the door gaskets. Test door gaskets by checking for a proper seal at several points. Replacement gaskets cost $20–$50 and are model-specific.
-
Clear blocked vents. Pull everything away from the back wall and the vents on the interior ceiling or rear panel. Overpacking is a surprisingly common cause of uneven cooling.
-
Clean the condenser coils. Unplug the unit. Pull it away from the wall or remove the kick plate at the bottom front. Vacuum the coils with a brush attachment. This single step can restore normal operation in cases where the fridge has been gradually losing efficiency.
-
Check the condenser fan. With the unit unplugged, locate the fan near the compressor at the back bottom. Spin the blade by hand. It should turn freely. Plug the unit back in briefly and listen for the fan to run when the compressor starts.
-
Check the evaporator fan. Open the freezer and press the door switch (the button the door normally presses). You should hear the evaporator fan running. No sound means the fan is likely failed or the motor is seized.
-
Test the start relay. Unplug the unit. Pull the start relay off the side of the compressor (it’s a small plug-in component). Shake it. A failed relay often rattles; a working one is usually silent. Replacement relays cost $10–$30.
-
Manual defrost if you see heavy frost. If the freezer rear panel is coated in thick ice, unplug the unit and let it defrost for 24–48 hours with the doors open. If cooling returns after defrost, the defrost heater or thermostat is the culprit.
Time expectations: After cleaning coils or replacing a relay, plug the unit in and wait at least 4–6 hours before judging results. After a full manual defrost, allow up to 24 hours.
Pro Tip: The click-hum-click pattern every few minutes is the start relay’s distress signal. If you hear it, the relay is almost certainly failed. It’s a $15–$30 part and a 10-minute fix. Order the part by model number before calling a technician.
How to tell if the sealed refrigeration system is the problem
A stepwise diagnostic order helps avoid wasted labor: check coils, test fans, test the start relay, then inspect the evaporator frost pattern before assuming a sealed-system leak. The frost pattern on the evaporator coil is the most useful visual diagnostic available to a homeowner.
How to read the evaporator frost pattern:
- Even, heavy frost across the entire coil: The defrost system has failed. Ice has blocked airflow. This is a defrost heater, thermostat, or timer problem. Low-cost repair.
- Frost on only part of the coil (partial frost): A restriction in the refrigerant lines or a partial refrigerant loss. This points toward sealed-system work.
- Little or no frost on the coil: The compressor isn’t pumping refrigerant, or there’s a significant refrigerant leak. Sealed-system diagnosis required.
- Normal light frost on the coil, but no airflow: The evaporator fan has failed. The coil is fine; the fan is the fix.
To inspect the evaporator, unplug the unit, remove the freezer contents, and unscrew the rear panel inside the freezer. The evaporator coil sits behind it. Take a photo before reassembling.
A heavy, uniform frost block on the evaporator is almost always a failed defrost heater, not a refrigerant leak. Replacing the heater kit costs a fraction of sealed-system work. Always check the frost pattern before authorizing a refrigerant diagnosis.
Quick tests that distinguish airflow from sealed-system problems:
- Compressor running, fans running, coils clean, but no cooling: likely sealed-system restriction or leak.
- Compressor not starting, click-hum pattern: start relay failure (cheap fix) or compressor failure (expensive).
- Compressor running, evaporator iced solid, fans blocked: defrost system failure (cheap fix).
- Freezer cold, fridge warm: evaporator fan or damper failure (moderate fix).
Safety and legal note: Once the frost pattern points to a refrigerant issue, stop. Sealed-system work requires EPA Section 608 certification. Handling refrigerants without certification is a federal violation and creates real safety hazards.
When should you call a refrigerator technician?
Call a technician when the DIY checklist is done and the unit still isn’t cooling, or when any of these conditions apply:
- The compressor produces a click-hum-click pattern and the start relay tests good (compressor failure).
- The frost pattern shows partial or no frost, pointing to a refrigerant restriction or leak.
- You detect a chemical smell near the unit (refrigerant leak).
- The unit sparks, trips the breaker repeatedly, or shows visible wiring damage.
- The control board displays error codes you can’t clear. Smart models often allow remote diagnostics or error-code checks that narrow the cause before a technician arrives.
What a technician will do on a service visit:
- Confirm your DIY findings and run a full diagnostic sequence.
- Check refrigerant pressure with manifold gauges.
- Test the compressor’s start and run windings with a multimeter.
- Inspect the defrost timer, heater, and thermostat.
- Check the electronic control board for fault codes.
- Perform a leak test if refrigerant loss is suspected.
Typical repair cost ranges (parts and labor, U.S. market):
- Evaporator fan motor: $120–$250
- Start relay: $75–$150
- Defrost heater kit: $100–$250
- Condenser fan motor: $120–$250
- Sealed-system repair (compressor, refrigerant recharge, restriction): $400–$1,000+
Repair vs. replacement: If the quoted repair cost is less than about half of the replacement cost, repair is generally considered the better option. A sealed-system repair on a 12-year-old refrigerator that costs $700 against a $900 replacement price is a clear case for replacement. You can also use the repair vs. replacement decision framework to think through the numbers before committing.
Before the technician arrives, have ready:
- The model and serial number (inside the door frame or on the back panel).
- Photos of the frost pattern and any visible damage.
- A short list of the DIY checks you already completed.
This preparation alone can cut 15–20 minutes off a diagnostic visit and reduce the labor charge.
How to safely reset your refrigerator
A reset clears electronic faults and gives the compressor’s thermal overload a chance to recover. It’s worth doing before any other step when the fridge stops cooling suddenly after a power event.
- Unplug the refrigerator from the wall outlet, or switch off the dedicated circuit breaker.
- Wait 5–10 minutes. This allows capacitors to discharge and the thermal overload to reset.
- Plug back in (or flip the breaker back on).
- Set temperatures: 37°F for the fridge, 0°F for the freezer.
- Wait up to 24 hours before concluding the reset didn’t work. The compressor needs time to bring the cabinet back to temperature, especially if the doors were open for a while.
Electrical safety checklist before you reset:
- Confirm the outlet is a standard 120V dedicated circuit (most refrigerators require one).
- Check for GFCI outlets in the area. A tripped GFCI, not a failed fridge, is a common cause of sudden power loss.
- Inspect the power cord for visible damage, kinks, or scorch marks.
- Never use an extension cord with a refrigerator.
Do NOT reset or work on the unit if you smell refrigerant (a faint chemical or sweet odor), see sparking near the outlet or cord, or notice water pooling near electrical components. These require a technician, not a reset.
When NOT to reset: If the compressor is making a loud grinding or knocking noise, a reset won’t help and may worsen the damage. Unplug the unit and call a technician.
Everyday maintenance that prevents most cooling problems
The majority of refrigerator cooling problems are preventable. A simple maintenance routine catches the issues that become expensive repairs.
Monthly:
- Wipe down door gaskets with a damp cloth. Gasket failure is often caused by food residue that prevents a full seal.
- Check that nothing is blocking the interior vents.
Every 2–3 months:
- Clean the condenser coils. In homes with pets or high dust, do this more frequently. A coil brush and vacuum take about 10 minutes.
- Verify the unit has at least 1 inch of clearance on the sides and 2 inches at the back for airflow.
Seasonally:
- Test door gaskets with the dollar-bill method at all four sides.
- Check that the unit is level. A refrigerator that tilts forward slightly allows doors to swing open on their own, wasting energy and straining the compressor.
- Inspect the drain pan under the unit for mold or standing water.
Annually:
- Check the evaporator fan by pressing the door switch in the freezer and listening for the motor.
- If your model has a water filter, replace it on schedule. A clogged filter affects ice maker performance and can mask other cooling issues.
Pro Tip: Set a phone reminder every 90 days labeled “fridge coils.” It takes 10 minutes and is the single maintenance task most likely to prevent a service call.
What MDTECH sees most often on refrigerator calls
The most common misdiagnosis we encounter is a homeowner convinced they need a new compressor when the actual problem is a failed defrost heater. Heavy frost on the evaporator looks alarming, but it’s a $40–$100 parts fix, not a $600 sealed-system job. The frost pattern is the first thing our technicians check.
At Appliancesrepairmdtech, the diagnostic sequence starts with the evaporator frost pattern, the start relay, and the fan motors before any sealed-system gauges come out. Most calls resolve at that first tier.
When you book a service visit, bring your model number, a photo of the frost pattern if you’ve already pulled the freezer panel, and a list of the DIY steps you’ve already tried. That information cuts diagnostic time and reduces your labor charge. Our technicians serve Orange County and Los Angeles County and carry the most common replacement parts on the truck, so most repairs complete in a single visit.
The advice most guides get wrong about a fridge not cooling
Most troubleshooting guides send homeowners straight to “call a technician” the moment the fridge stops cooling. That’s the wrong default. The majority of cases, dirty coils, a failed start relay, a blocked evaporator fan, resolve with a $10–$100 part and 30 minutes of work. Skipping the DIY checklist costs you a $150 diagnostic fee for a problem you could have fixed yourself.
The opposite mistake is just as costly. Homeowners who keep resetting and waiting when the frost pattern clearly shows a refrigerant restriction waste days of spoiled food and delay a repair that only gets more expensive. The frost pattern test is the decision point. Learn to read it, and you’ll know within 20 minutes whether you’re dealing with a cheap fix or a sealed-system call.
One more thing the guides underplay: stabilization time. After any fix or reset, the fridge needs up to 24 hours to reach target temperature. Judging a repair after two hours and calling it a failure is one of the most common reasons homeowners end up paying for a second service visit that wasn’t necessary.
Appliancesrepairmdtech handles the repairs that go beyond the checklist
When the DIY steps are done and the fridge still isn’t cold, you need a technician who shows up with the right parts and the diagnostic experience to read a frost pattern correctly the first time.
Appliancesrepairmdtech serves Orange County and Los Angeles County with on-site refrigerator diagnostics, certified technicians, and warranty-safe repairs that won’t void your manufacturer coverage. Most common parts, evaporator fans, start relays, defrost heater kits, travel on the truck, so repairs typically complete in one visit. Before you book, pull the model number from inside the door frame, take a photo of the evaporator frost pattern if you’ve already opened the freezer panel, and note which DIY steps you’ve already completed. That prep cuts diagnostic time and keeps your bill lower. Schedule a fridge repair visit and get your refrigerator back to temperature.
Sources
Consult these resources for model-specific reset sequences, part numbers, and manufacturer-recommended temperature ranges:
- Refrigerator Not Cooling: Complete Diagnostic Guide for Every Fridge Style | ServiceMag
- Should You Repair or Replace a Broken Refrigerator? | Consumer Reports
- Should You Repair or Replace a Broken Refrigerator? | Angi
- Why Is My Refrigerator Not Cooling and How Can I Fix It? | KitchenAid
- Refrigerator acting up? Here’s how to fix it yourself | CNET
- How to diagnose common refrigerator problems at home — Fridge Mentor
- 10 Reasons Your Refrigerator is Not Cooling | Maytag