TL;DR:
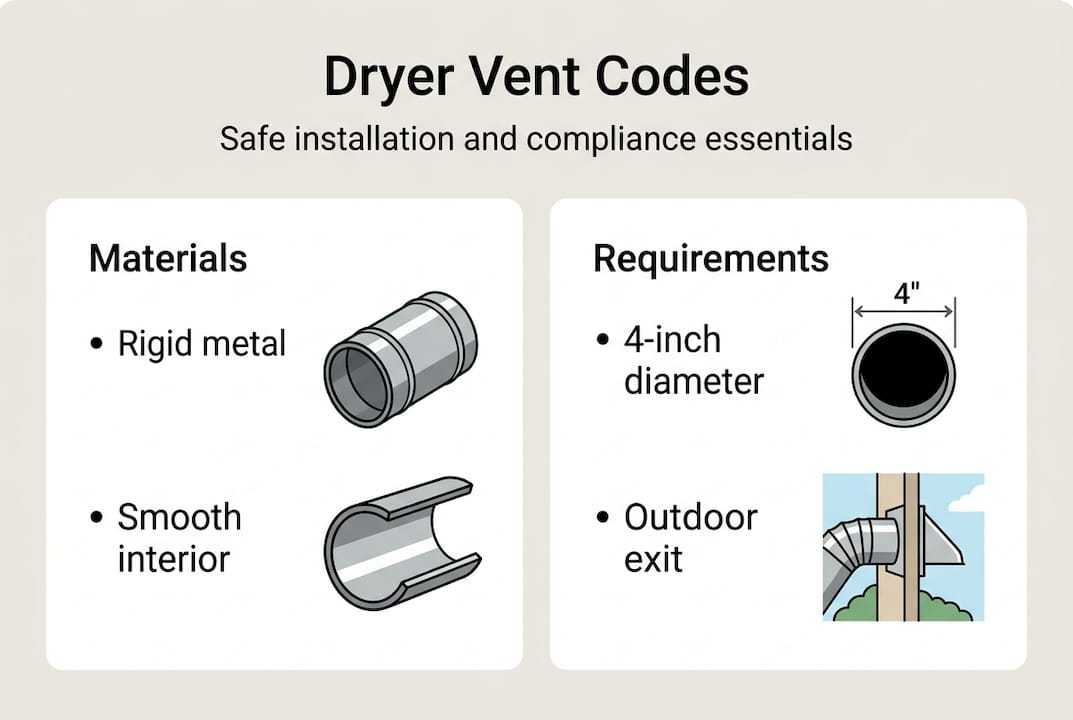
- California code requires rigid metal ducts with smooth interior walls for dryer venting.
- Proper installation includes outdoor termination at least 3 feet from property lines and openings.
- Routine cleaning and inspections are essential to prevent lint buildup and fire hazards.
Your dryer takes longer than usual, your laundry room feels muggy, and lint keeps building up behind the machine. These are classic signs of a poorly installed dryer vent. In Orange and Los Angeles Counties, improper venting is one of the most common code violations found during home inspections, and it creates a real fire risk. This guide walks you through code requirements, the right materials, a step-by-step installation process, and how to test and maintain your vent so your dryer runs safely and efficiently for years.
Table of Contents
- Understanding dryer vent codes and requirements
- Tools, materials, and preparation steps
- Step-by-step guide to installing your dryer vent
- Testing, maintenance, and troubleshooting
- Why most dryer vent installs miss crucial details
- Get expert help with dryer vents and appliances
- Frequently asked questions
Key Takeaways
| Point | Details |
|---|---|
| Code compliance matters | Strict California codes require proper vent materials and placement to prevent fires and ensure safety. |
| Preparation is essential | Gather the right tools, check for permits, and plan your route before installing a dryer vent. |
| Follow step-by-step process | Careful installation and termination ensure optimal efficiency and code acceptance. |
| Maintain your vent regularly | Annual cleaning and inspection keep your dryer performing safely and efficiently. |
| Professional help available | If installation or troubleshooting exceeds your skill or code knowledge, expert local services can assist. |
Understanding dryer vent codes and requirements
Before you touch a single duct, you need to know what the law requires. California Mechanical Code Section 504 sets the rules for dryer venting across the state, and both Orange County and Los Angeles County enforce these standards with local amendments.
The core rule is straightforward: rigid metal ducts with smooth interiors, a minimum 4-inch diameter, and at least 0.016 inches thick (26 gauge) are required for the main duct run. Plastic ducts, foil accordion-style flex ducts, and standard flexible materials are prohibited for the permanent run. The transition duct (the short connector between your dryer and the wall) can be semi-rigid metal, UL 2158A listed, but it must not exceed 6 feet and cannot be concealed inside walls or floors.
Why does any of this matter? Lint is highly flammable. Rough or corrugated duct interiors trap lint at every ridge, and foil flex ducts can collapse or kink, restricting airflow and turning your duct into a slow-burning fire starter.
Here is a quick comparison of allowed and prohibited duct types:
| Duct type | Allowed? | Notes |
|---|---|---|
| Rigid galvanized steel | Yes | Preferred material for all runs |
| Semi-rigid metal (UL 2158A) | Transition only | Max 6 ft, not concealed |
| Foil accordion flex duct | No | Traps lint, fire hazard |
| Plastic duct | No | Prohibited by California code |
| Vinyl flex duct | No | Not rated for dryer exhaust heat |
Key material requirements to remember:
- Minimum 4-inch diameter for the entire vent run
- Smooth interior walls to prevent lint accumulation
- 26 gauge or thicker metal for durability
- No screws inside the duct that can catch lint
- Foil tape only for joints, never standard duct tape
“Dryer vents must use rigid metal ducts with smooth interiors, minimum 4-inch diameter, 0.016 inches thick; transition duct max 6 feet, semi-rigid metal UL 2158A listed, not concealed.” This is the California dryer vent code standard every homeowner in our area must follow.
For additional context on keeping your dryer operating safely, review these dryer safety tips that cover everything from lint trap cleaning to load size.
Tools, materials, and preparation steps
Now that you know the requirements, let’s prepare for installation. Skipping the prep phase is where most DIY dryer vent projects go wrong, and it can mean a failed inspection or a vent you have to tear out and redo.
Tools you will need:
- Hole saw (4.25 inches for a clean 4-inch duct fit)
- Drill and drill bits
- Tin snips
- Tape measure
- Pencil or chalk for marking
- Screwdriver (flathead and Phillips)
- Utility knife
- Safety glasses and gloves
Materials to purchase:
| Item | Specification | Purpose |
|---|---|---|
| Rigid galvanized duct | 4-inch diameter, 26 gauge | Main vent run |
| Semi-rigid transition duct | UL 2158A, max 6 ft | Dryer to wall connection |
| Exterior vent hood | With backdraft damper, no screen | Wall termination |
| Foil HVAC tape | Not standard duct tape | Sealing all joints |
| Duct elbows (90 degree) | 4-inch, smooth interior | Turns in the run |
Before purchasing anything, measure your planned duct route from the dryer to the exterior wall. Keep the total run as short as possible. Every 90-degree elbow you add is equivalent to about 5 feet of straight duct in terms of airflow resistance, so plan turns carefully.
On permits: Title 24 Part 4 of the California Mechanical Code requires that permits are likely needed for new installs or alterations. In Orange and Los Angeles Counties, your local Authority Having Jurisdiction (AHJ) can confirm exactly what is required. If you live in a zero-lot-line property or an HOA community, additional rules may apply, so check before you cut any holes.
Pro Tip: Call your local building department before starting. Many cities in LA County offer over-the-counter permits for dryer vent work, and the inspection process is quick. It protects you at resale and keeps your homeowner’s insurance valid.
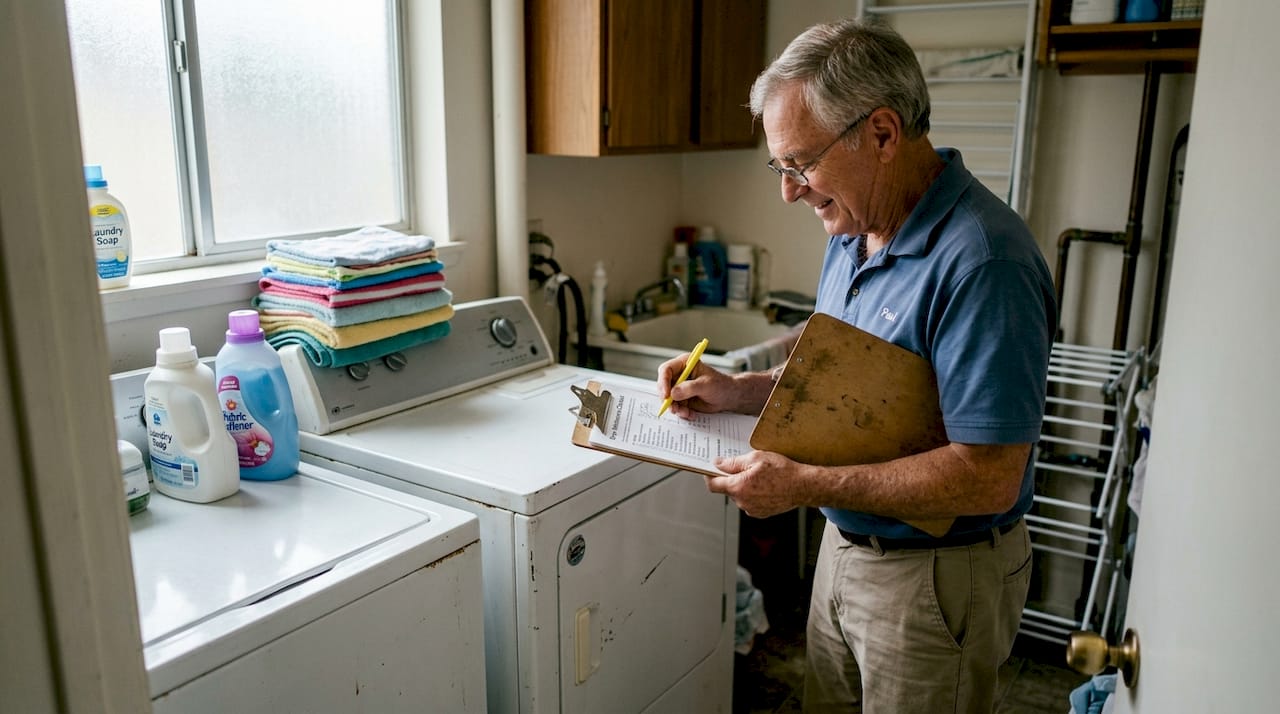
Before you start cutting, review a dryer maintenance checklist to make sure your appliance itself is in good shape. A new vent on a dryer with a worn drum seal or blocked lint trap will not solve your efficiency problems. If your dryer has existing issues, the dryer repair guide covers common fixes before you begin.
Step-by-step guide to installing your dryer vent
Let’s get hands-on with the installation process. Work slowly, measure twice, and do not skip the foil tape step.
- Mark and cut the exterior wall opening. Use your 4.25-inch hole saw to cut through the exterior wall at the planned termination point. Work from inside out to avoid splintering siding. Keep the cut as low and direct as possible.
- Install the exterior vent hood. Insert the hooded cap with its built-in backdraft damper into the opening from the outside. The damper keeps cold air, pests, and moisture out when the dryer is off. Secure with exterior screws and seal around the flange with weatherproof caulk.
- Run the rigid duct from the wall inward. Connect rigid duct sections back toward the dryer location. Use 90-degree elbows only where necessary. Secure each joint with foil tape, not screws inside the duct.
- Connect the transition duct to the rigid run. Attach your UL 2158A semi-rigid transition duct between the rigid wall duct and the dryer exhaust port. Keep it under 6 feet, with no sharp kinks, and do not hide it inside a wall or cabinet.
- Tape all joints. Every connection point on the rigid duct run needs foil HVAC tape applied firmly over the seam. This prevents lint from escaping into wall cavities.
- Check clearances at termination. Per vent termination standards, the vent must exit at least 3 feet from any property line, window, door, or ventilated soffit, and at least 10 feet from any air intake. Never terminate in an attic, crawlspace, garage, or chimney.
“Termination must be outside the building, at least 3 ft from property lines and openings, at least 10 ft from air intakes. No screens on the cap, only a backdraft damper.” This rule catches many homeowners off guard, especially in dense neighborhoods common throughout LA and Orange County.
Pro Tip: Avoid running the duct up and over ceiling joists if you can go straight or slightly downward to the exterior. Moisture condenses in upward-sloping sections and can accelerate lint buildup. For long-term performance, revisit the dryer maintenance steps to build a routine around your new installation.
Testing, maintenance, and troubleshooting
Once installation is complete, it’s time to ensure everything works and stays safe. A vent that looks right but flows poorly is just as dangerous as one that was never installed.
How to test your new vent:
- Run the dryer on high heat for 10 minutes
- Go outside and hold your hand near the vent cap. You should feel a strong, steady stream of warm air
- Check the backdraft damper flap is opening fully during operation
- Look for any foil tape lifting or joint gaps showing warm air escaping inside the wall cavity
- Use a tissue or anemometer (airflow meter) near the cap to confirm strong exhaust
If airflow feels weak, the most common causes are a kinked transition duct, a duct run that is too long, or a partially closed or screen-blocked vent cap. Remove any screen from the cap immediately. Screens are prohibited by California code Section 504 because they catch lint and restrict airflow.
“Local amendments in LA and Orange Counties add requirements beyond state code. Check your AHJ before assuming your install is final.” Your city’s building department may have a specific inspection step before you close walls.
For ongoing maintenance, schedule routine dryer vent cleaning at least once a year. In households with heavy laundry loads or pets, twice a year is smarter. Signs you need cleaning sooner:
- Clothes take more than one cycle to dry
- The dryer exterior feels very hot to the touch
- A burning smell during operation
- Visible lint near the exterior vent cap
If you notice any of those warning signs, do not run another load. A partial blockage can overheat the dryer and ignite accumulated lint. For issues beyond a simple cleaning, professional vent repair services can inspect the full run, check for hidden damage, and restore proper flow.
Pro Tip: Set a phone reminder every January and July for vent cleaning. Pairing it with a seasonal task makes it easy to remember and keeps your warranty and insurance documentation current.
Why most dryer vent installs miss crucial details
After years of handling appliance repairs and vent work across Orange and Los Angeles Counties, we have seen a pattern: most failed installations are not caused by laziness. They are caused by confidence in the wrong information.
Homeowners read a general DIY guide, buy flex foil duct from a hardware store because it is easy to work with, and install what seems like a functional vent. The problem is not visible until lint builds up, airflow drops, and a repair technician finds a collapsed duct inside the wall.
The shortcut that shows up most often is the foil flex duct. It is cheap, it bends easily, and it looks like it fits. But it violates California code, it traps lint at every ridge, and it is almost impossible to clean effectively once installed.
The second most common failure is improper termination, specifically venting into a garage or under a raised floor. Builders sometimes do this on older homes to avoid cutting through siding. It seeds moisture and lint in enclosed spaces and creates serious air quality issues.
Investing in rigid duct and a code-compliant install means fewer dryer repair calls, lower energy bills, and a safer home. These dryer safety tips reinforce exactly why cutting corners on venting costs more over time than doing it right the first time.
Get expert help with dryer vents and appliances
Dryer vent installation looks manageable until you hit a concrete exterior wall, a tight chase, or an HOA with specific rules about exterior modifications. That is where professional help pays off fast.

MDTECH APPLIANCE REPAIR serves homeowners across Orange and Los Angeles Counties with expert dryer vent installation, cleaning, and full appliance service. Whether you need guidance before starting or a technician to handle the entire job, we have licensed professionals ready to help. Our appliance installation guide walks through safe setup for all major appliances, and our appliance parts repair guide covers part replacement when your dryer needs more than a new vent. We also handle Samsung appliance repairs and all major brands. Book your appointment online today.
Frequently asked questions
What type of duct material is allowed for dryer vents in California?
Only rigid metal ducts with a smooth interior are allowed for the main run. Flexible, foil, and plastic ducts are prohibited under the California Mechanical Code.
Where should the dryer vent terminate?
The vent must exit outside the building at least 3 feet from property lines, windows, and openings. Terminating inside attics, garages, or crawlspaces is never allowed.
Is a permit required for dryer vent installation in Orange and LA Counties?
Yes, a permit is typically required for new or altered dryer vent installs. Contact your local building department to confirm the exact process for your city.
How often should dryer vents be cleaned and checked?
Clean and inspect your dryer vent at least once a year. Households with pets or heavy laundry use should schedule cleaning twice yearly to maintain safe airflow.
What is the maximum length for transition ducting?
The transition duct max is 6 feet, and it must be semi-rigid metal rated UL 2158A. It cannot be hidden inside walls, floors, or ceilings.