TL;DR:
- Many homeowners confuse the refrigerator’s inlet valve with the wall shut-off valve, which often leads to unnecessary repairs and incorrect diagnoses.
- The inlet valve inside the refrigerator controls automatic water flow to the ice maker, while the wall shut-off valve only controls the home’s water supply manually during maintenance or emergencies.
- Proper troubleshooting starts with checking the wall valve, water pressure, filter condition, and fill tube before replacing expensive refrigerator parts.
Your refrigerator’s ice maker seems simple until it suddenly stops producing ice or starts leaking water onto the kitchen floor. At that point, most homeowners begin searching for answers and quickly run into confusing advice about valves, water lines, and refrigerator components. The biggest misunderstanding involves the ice maker valve itself. Many people assume the refrigerator inlet valve and the wall shut-off valve are the same thing, but they serve completely different purposes. Understanding the difference can save homeowners across Orange County and Los Angeles County time, money, and unnecessary appliance repairs.
Table of Contents
- What is an ice maker valve?
- Understanding the difference between refrigerator valves
- How the ice maker valve works
- Common signs of ice maker valve problems
- How to inspect and maintain an ice maker valve
- Common homeowner mistakes with ice maker valves
- Professional ice maker valve repair services
- Frequently asked questions
Key Takeaways
| Point | Details |
|---|---|
| Two different valves | The refrigerator inlet valve and wall shut-off valve perform different functions. |
| Common symptoms | Leaks, no ice, or frozen fill tubes may indicate valve problems. |
| Proper diagnosis matters | Checking water pressure and valve position prevents unnecessary repairs. |
| Safety is important | Always close the wall shut-off valve before working on refrigerator water lines. |
| Maintenance helps | Cleaning filters and inspecting lines can prevent future valve failures. |
What is an ice maker valve?
The ice maker valve, also called the refrigerator water inlet valve, is an electrically operated component inside your refrigerator. Its job is to control water flow into the ice maker whenever the appliance requests water for a new ice cycle.
The valve usually sits behind the refrigerator near the lower rear panel. It connects directly to your home’s water supply line and uses a small solenoid coil to open and close automatically during the ice-making process.
When the ice maker finishes ejecting a batch of ice cubes, the control board sends power to the inlet valve. The valve opens for several seconds, allowing water to flow into the mold tray. Once the tray fills, the electrical signal stops and the valve closes immediately.
Without a functioning inlet valve, the refrigerator cannot produce ice properly. The system may stop making ice completely or create undersized cubes due to restricted water flow.
Many homeowners begin troubleshooting without fully understanding the refrigerator water system. Reviewing basic icemaker repair information first can help prevent confusion during diagnosis.
Understanding the difference between refrigerator valves
One of the biggest causes of refrigerator repair mistakes is confusing the inlet valve with the wall shut-off valve behind the appliance.
Refrigerator inlet valve
The inlet valve sits inside or behind the refrigerator. It operates automatically using electrical signals from the ice maker control system.
- Controls automatic water flow
- Uses an electrical solenoid
- Opens during ice-making cycles
- Located on the refrigerator itself
Wall shut-off valve
The wall shut-off valve is a completely separate manual valve connected to your home plumbing line. Homeowners use it only during maintenance, repairs, or emergencies.
- Controls household water supply to the fridge
- Operated manually by hand
- Used during maintenance or leaks
- Located behind or beside the refrigerator
These two valves work together but perform different tasks. The wall valve supplies water to the refrigerator, while the inlet valve controls automatic dispensing during ice production.
Many service calls in Orange County happen because the wall shut-off valve is partially closed. Reduced water pressure then creates symptoms that look exactly like a failing inlet valve.
Pro Tip: Always verify the wall shut-off valve is fully open before replacing any refrigerator parts.
How the ice maker valve works
Understanding the full water cycle makes troubleshooting much easier for homeowners.
The ice-making cycle
- The ice maker ejects frozen cubes into the storage bin.
- The control board detects the empty mold tray.
- An electrical signal travels to the inlet valve.
- The solenoid activates and opens the valve.
- Water flows into the fill tube and mold tray.
- The valve closes after several seconds.
- The freezer begins freezing the new batch of water.
The entire process depends on proper water pressure and a functioning electrical signal. Even a small restriction inside the valve can reduce ice production dramatically.
Why water pressure matters
Most refrigerator ice makers require at least 20 PSI of water pressure to operate correctly. Low pressure causes:
- Small ice cubes
- Slow ice production
- Hollow cubes
- Incomplete fill cycles
- Frozen fill tubes
Hard water conditions across parts of Southern California also contribute to mineral buildup inside refrigerator valves. Over time, calcium deposits clog the internal screen filter and restrict water flow.
Homeowners dealing with recurring refrigerator ice issues can review additional icemaker installation guidance to understand proper valve and line setup.
Common signs of ice maker valve problems
Ice maker valve failures can produce several different symptoms. Some issues appear suddenly, while others develop slowly over time.
No ice production
If the refrigerator has power but produces no ice, the valve may not be opening correctly. However, homeowners should first confirm the wall valve is fully open.
Small or hollow ice cubes
Restricted water flow often creates undersized cubes. Mineral buildup inside the valve is a common cause in areas with hard water.
Water leaking behind the refrigerator
A cracked valve housing or loose fitting can allow water to leak slowly behind the appliance.
Frozen fill tube
A valve that drips after closing may allow excess water into the fill tube. That water then freezes and blocks future fill cycles.
Clicking or humming noises
The solenoid may activate properly while the mechanical gate inside the valve fails to open.
| Symptom | Possible Cause | DIY Check |
|---|---|---|
| No ice production | Closed wall valve or failed inlet valve | Yes |
| Small cubes | Low water pressure | Yes |
| Frozen fill tube | Dripping inlet valve | Partial |
| Water leak | Loose line or cracked valve | Yes |
| Clicking sound | Failed solenoid | Professional recommended |
Some symptoms may also point toward broader ice maker malfunction issues unrelated to the valve itself.
How to inspect and maintain an ice maker valve
Basic maintenance can extend the lifespan of your refrigerator water system and prevent expensive appliance repairs.
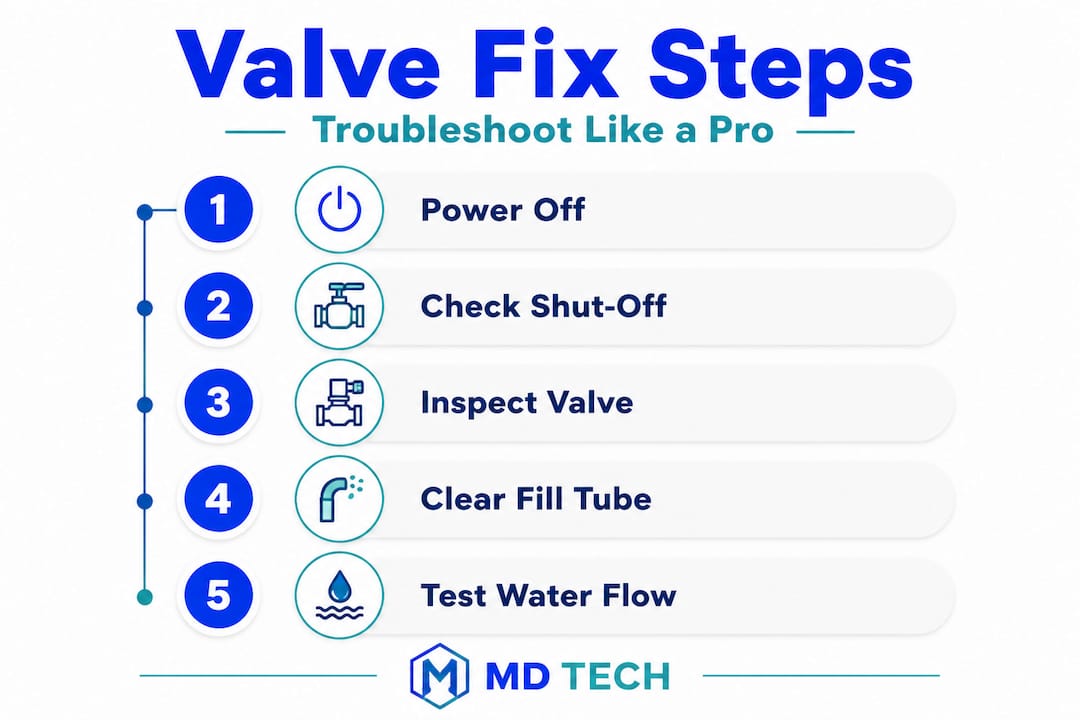
Step 1: Turn off the wall shut-off valve
Always close the manual valve before disconnecting water lines or servicing the refrigerator.
Step 2: Disconnect power
Unplug the refrigerator before working near electrical components.
Step 3: Inspect water connections
Look for:
- Loose compression fittings
- Mineral buildup
- Cracked tubing
- Water stains
- Corrosion around fittings
Step 4: Check the valve screen filter
Many refrigerator valves contain a small mesh filter screen that traps sediment. Hard water deposits can clog this filter and reduce water flow.
Step 5: Test for leaks after reconnecting
After restoring water and power, monitor all fittings carefully before pushing the refrigerator back into place.
When homeowners should call a professional
Some repairs become more complicated on high-end refrigerators with dual valves, electronic boards, or custom water systems.
Professional appliance service is recommended for:
- Electrical testing
- Solenoid diagnosis
- Repeated valve failures
- Built-in refrigerator systems
- Major water leaks
Homeowners across Southern California frequently schedule refrigerator ice machine repair after unsuccessful DIY troubleshooting attempts.
Common homeowner mistakes with ice maker valves
Years of appliance repair experience reveal the same refrigerator repair mistakes over and over again.
Replacing the wrong valve
Many homeowners replace the refrigerator inlet valve when the real issue is a partially closed wall shut-off valve.
Ignoring water filters
Clogged refrigerator water filters reduce pressure and mimic valve failure symptoms.
Skipping basic pressure checks
Low household water pressure affects ice production even if the refrigerator itself is functioning correctly.
Overtightening fittings
Compression fittings only need to be snug. Overtightening can crack the valve housing and create leaks.
Misdiagnosing frozen fill tubes
A frozen fill tube does not always mean the valve is defective. Temperature regulation problems can also cause freezing issues.
Many homeowners save time and money by reviewing appliance troubleshooting resources before replacing parts unnecessarily.
Professional ice maker valve repair services
When refrigerator water issues become difficult to diagnose, professional help prevents further damage and unnecessary part replacements.

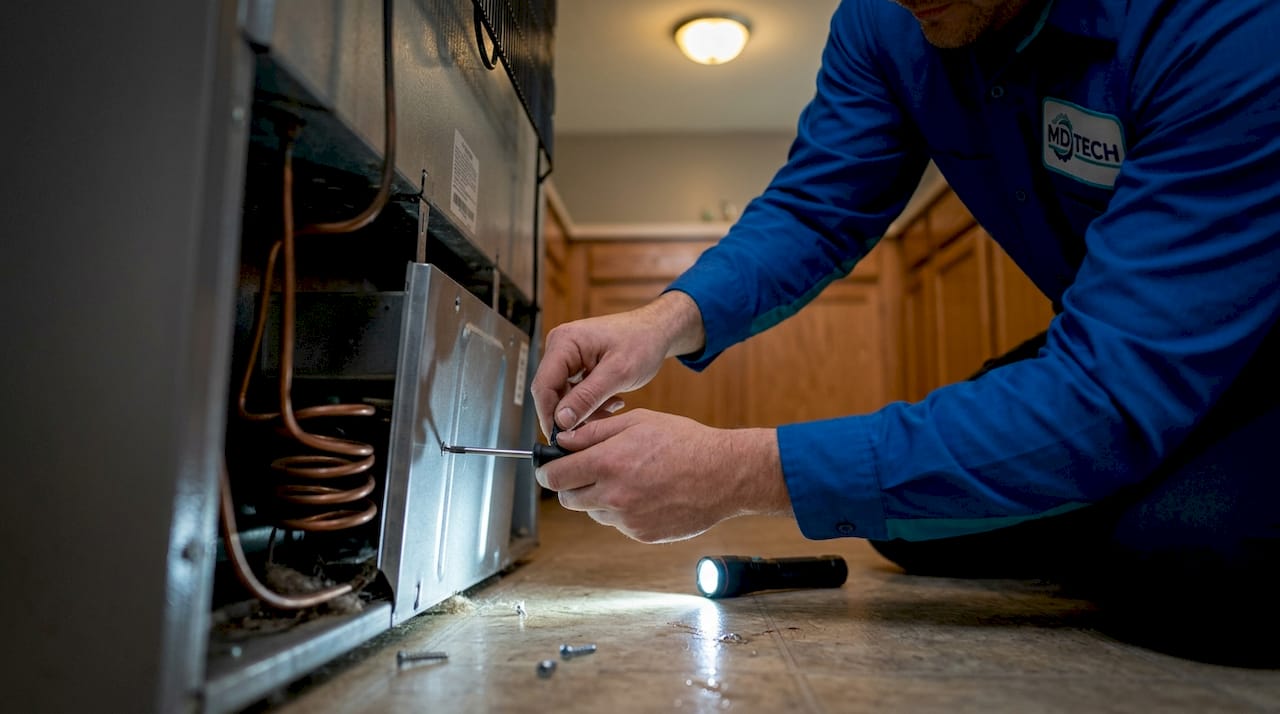
Our team at Appliances Repair MD Tech provides professional refrigerator and ice maker repair services throughout Orange County and Los Angeles County. We handle inlet valve replacement, leak diagnosis, water line repairs, and complete refrigerator troubleshooting for major appliance brands. Homeowners can also review our appliance repair parts guide for additional maintenance and replacement information before scheduling service.
Frequently asked questions
Is the ice maker valve the same as the wall shut-off valve?
No. The inlet valve inside the refrigerator controls automatic water flow during the ice-making cycle. The wall shut-off valve only controls the home water supply manually.
What causes an ice maker valve to fail?
Common causes include mineral buildup, electrical solenoid failure, worn seals, clogged filter screens, and hard water deposits.
Can I replace an ice maker valve myself?
Basic valve replacement is possible for experienced DIY homeowners, but high-end refrigerators or electrical diagnosis are usually safer with professional appliance technicians.
Why is my ice maker making small cubes?
Small cubes usually indicate restricted water flow caused by low water pressure, clogged filters, or mineral buildup inside the inlet valve.
What is the most important safety step before repair?
Always close the wall shut-off valve and unplug the refrigerator before disconnecting any water lines or electrical components.