Over 30 percent of american households experience refrigerator issues each year, from poor cooling to rising energy bills. A well-maintained fridge not only protects your groceries but also saves money and helps prevent unexpected breakdowns. Learning how to handle simple maintenance and troubleshooting gives you confidence to keep your appliance running smoothly. This guide walks you through practical, step-by-step methods to tackle the most common refrigerator problems and ensure your american kitchen stays cool and efficient.
Table of Contents
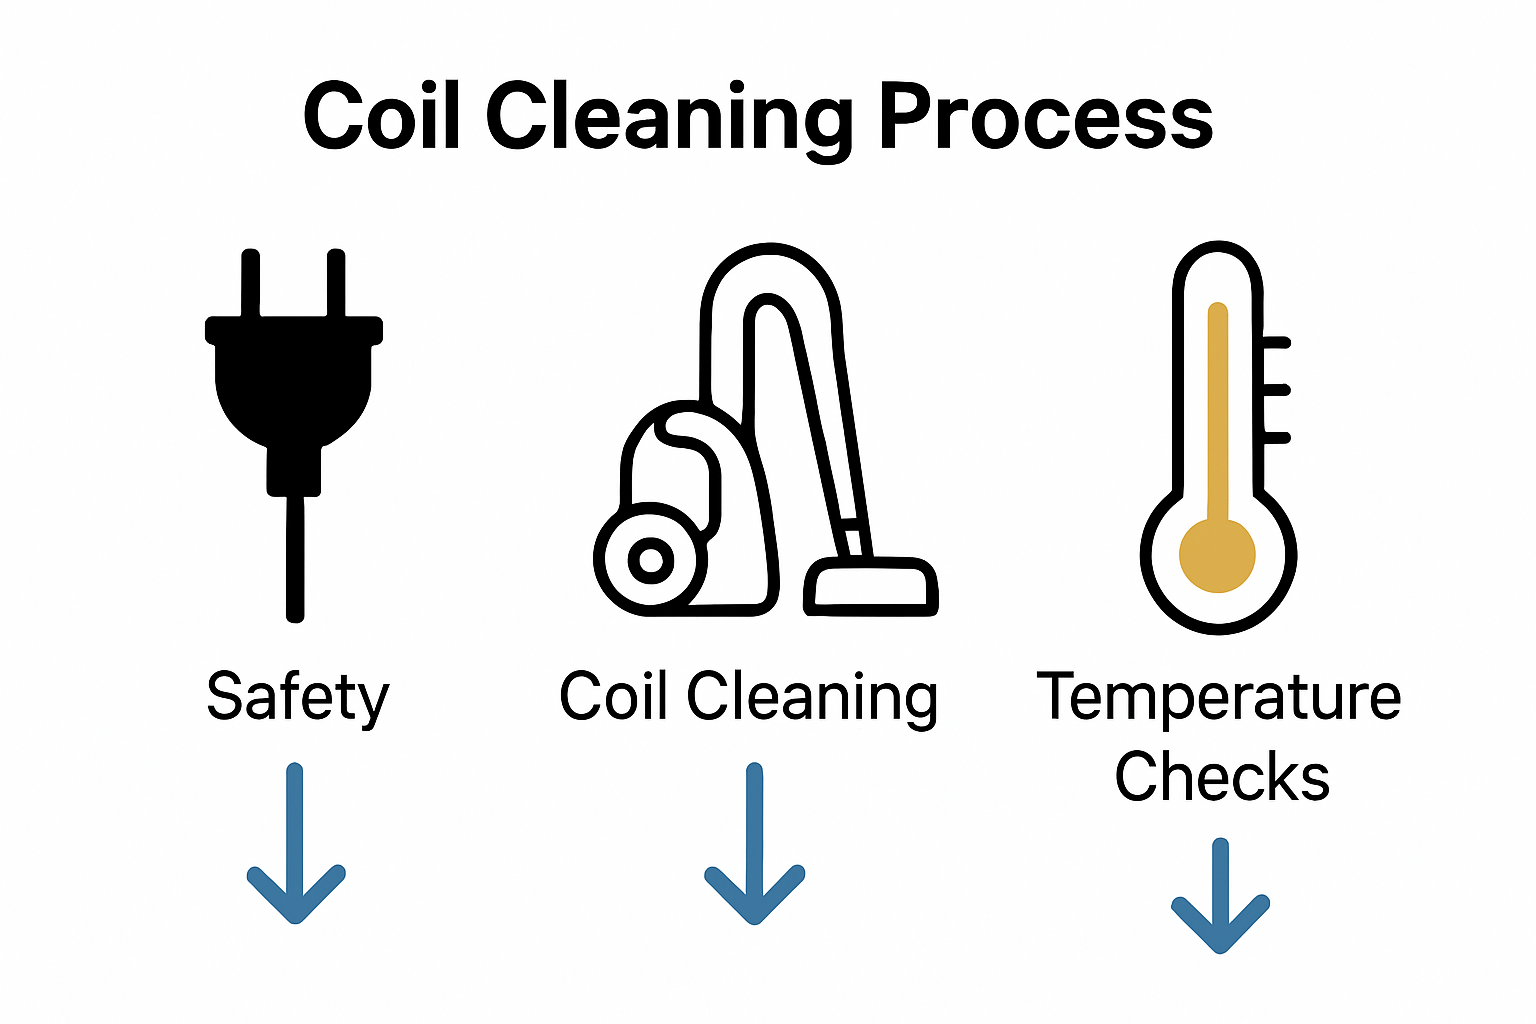
- Step 1: Prepare and Unplug Your Refrigerator
- Step 2: Inspect and Clean Condenser Coils
- Step 3: Check and Replace Faulty Door Seals
- Step 4: Diagnose and Fix Cooling Issues
- Step 5: Test Refrigerator for Proper Operation
Quick Summary
| Key Point | Explanation |
|---|---|
| 1. Unplug and Empty Your Refrigerator | Ensure safety by disconnecting power and removing all contents before starting repairs to create a clean workspace. |
| 2. Clean Condenser Coils Regularly | Dusty coils can hinder performance; clean them at least twice a year to maintain efficiency and reduce energy consumption. |
| 3. Inspect and Replace Door Seals | Damaged gaskets can allow cold air to escape; test their effectiveness and replace if needed to improve energy efficiency. |
| 4. Diagnose Cooling Issues Early | Check temperature settings and inspect for dust buildup or faulty parts if cooling problems arise to prevent further issues. |
| 5. Test Operation After Maintenance | Monitor temperature stability and appliance sounds for 24 hours post-maintenance to ensure proper operation and identify any new issues. |
 |
|
Step 1: Prepare and Unplug Your Refrigerator
Before diving into refrigerator repairs, you need to safely prepare your appliance for maintenance. The first crucial step involves disconnecting power and removing all contents to create a clean workspace for your repair project. According to energy.gov, turning off power by unplugging the appliance or switching off the circuit breaker is essential for safety.
Start by emptying your refrigerator completely. Transfer perishable items to a cooler with ice packs to maintain their temperature and prevent spoilage. Carefully remove shelves, drawers, and any removable components. If your refrigerator has an ice or water dispenser, pay special attention to water supply lines when moving the appliance. As news.maryland.gov warns, being cautious during this process helps prevent potential leaks or damage.
Pro tip: Take a moment to wipe down the interior surfaces with a mild cleaning solution while everything is removed. This gives you a chance to clean hard-to-reach areas and inspect for any potential issues before proceeding with your repair. Your refrigerator will be prepped and ready for the next maintenance steps.
Step 2: Inspect and Clean Condenser Coils
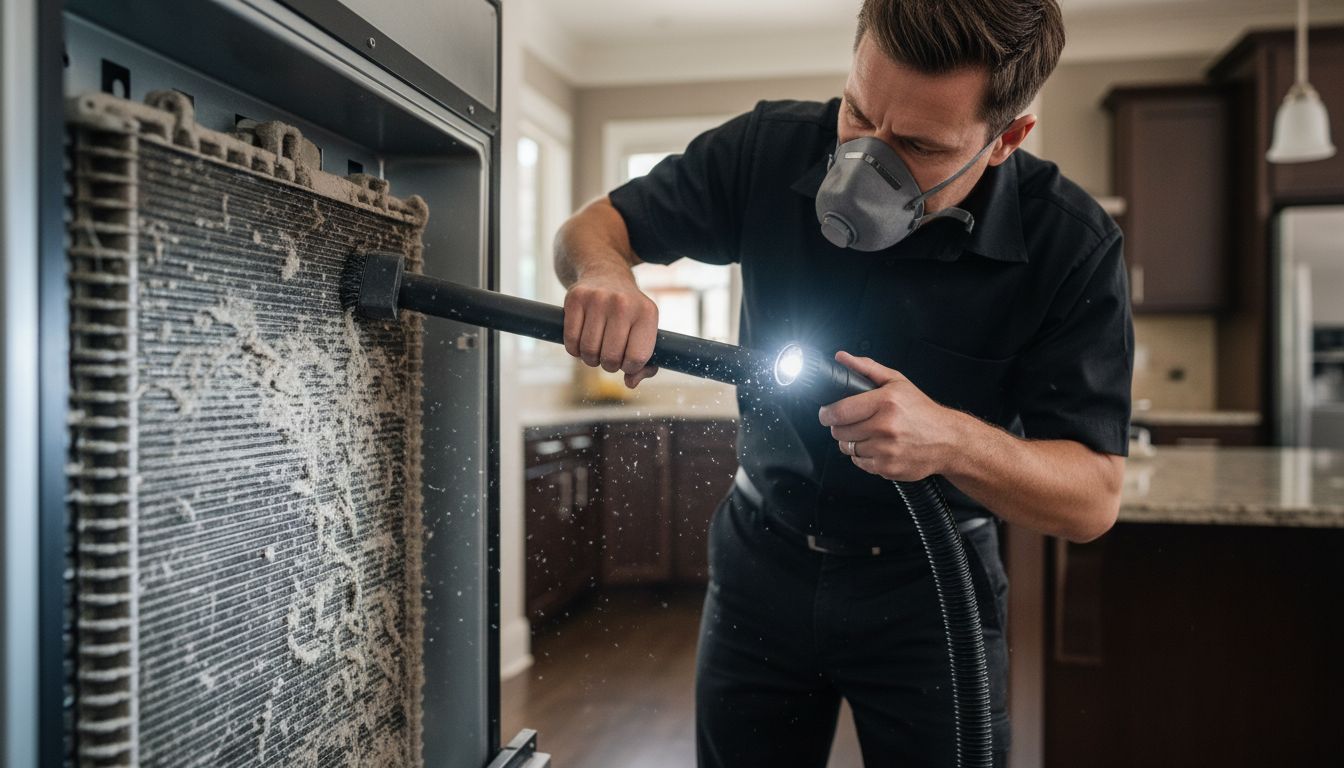
The condenser coils are your refrigerator’s hidden performance champions that often collect dust and debris, silently impacting your appliance’s efficiency. According to Consumer Reports, these coils typically sit on the back or underneath the refrigerator and require regular cleaning to maintain optimal operation.
To clean the condenser coils, you will need a vacuum with a soft brush attachment and some careful maneuvering. Unplug the refrigerator first for safety, then gently remove the protective panel covering the coils. As research.columbia.edu warns, accumulated dust and lint can cause the unit to work harder, potentially leading to increased energy consumption and even fire hazards. Start by using the soft brush attachment to loosen dust, then carefully vacuum away the debris. Work methodically and gently to avoid bending or damaging the delicate coils.
Pro tip: Wear a dust mask and consider using a flashlight to help you see hard-to-reach areas. Aim to clean your refrigerator’s condenser coils at least twice a year to keep your appliance running smoothly and efficiently. With clean coils, your refrigerator will cool more effectively and consume less energy.
Step 3: Check and Replace Faulty Door Seals
Your refrigerator’s door seals are critical for maintaining internal temperature and energy efficiency. According to Diamond Certified, you can easily test the effectiveness of these gaskets by performing a simple paper test: close the door on a sheet of paper and try to pull it out. If the paper slides out easily, your door seal is likely worn and needs replacement.
To thoroughly inspect and potentially replace the door seals, start by cleaning the existing gasket. Consumer Reports recommends using a damp sponge or cloth to press into the folds and wipe thoroughly. After cleaning, dry the gaskets completely to prevent potential mold growth. Look for signs of wear such as cracks, brittleness, or areas where the seal no longer makes full contact with the refrigerator frame. If significant damage is present, you will need to purchase a replacement gasket specific to your refrigerator model.
Pro tip: When installing a new door seal, warm it slightly with a hairdryer to make the material more pliable and easier to fit around the door frame. This small trick can help ensure a tight, uniform seal that keeps your refrigerator running efficiently and prevents cold air from escaping.
Step 4: Diagnose and Fix Cooling Issues
When your refrigerator starts struggling to maintain its cool, it is time to play detective and uncover the root of the cooling problem. According to Energy.gov, one of the primary culprits behind poor cooling is dirty condenser coils that impede heat dissipation and force the appliance to work much harder than necessary.
Start your diagnostic process by checking the temperature settings. Diamond Certified recommends maintaining the optimal temperature range of 37 to 40 degrees Fahrenheit for the refrigerator and 0 to 5 degrees Fahrenheit for the freezer. Verify your settings and use a standalone thermometer to confirm actual temperatures. Next, inspect the door seals for any gaps or wear that might allow cold air to escape. Check the condenser coils for dust buildup and clean them thoroughly. If these basic steps do not resolve the cooling issue, you may need to examine the internal components like the evaporator fan, compressor, or thermostat.
Pro tip: Keep a log of temperature readings and any unusual sounds or behaviors. This diagnostic information can be incredibly helpful if you need to consult a professional repair technician. Remember that consistent maintenance is key to preventing major cooling problems and extending your refrigerator’s operational lifespan.
Step 5: Test Refrigerator for Proper Operation
After completing your refrigerator maintenance, the final and most critical step is ensuring everything works correctly. Consumer Reports emphasizes the importance of monitoring internal temperature to confirm the appliance maintains its desired settings consistently.
To thoroughly test your refrigerator, start by placing a standalone thermometer in both the refrigerator and freezer compartments. Diamond Certified recommends observing the refrigerator’s performance over the next 24 hours. Check that the temperatures remain stable at 37 to 40 degrees Fahrenheit for the refrigerator and 0 to 5 degrees Fahrenheit for the freezer. Listen for any unusual sounds from the compressor or fans, and verify that the doors seal properly and the interior lights function correctly. Pay attention to how quickly the refrigerator returns to the correct temperature after opening the door and ensure no warm spots exist inside the compartments.
Pro tip: Take detailed notes during this testing period. If you notice any persistent issues like inconsistent cooling, strange noises, or temperature fluctuations, these observations will be invaluable when consulting a professional repair technician. Your careful testing can help diagnose potential problems before they become major repairs.
Ready to Fix Your Refrigerator Troubles with Expert Help
Repairing your refrigerator at home can feel overwhelming when faced with issues like faulty door seals, dirty condenser coils, or inconsistent cooling. You want your appliance to run efficiently without wasting energy or risking food spoilage. Whether you are struggling to diagnose cooling problems or need guidance with maintenance steps like inspecting seals or cleaning coils, professional support can make all the difference.

Take the stress out of refrigerator repairs by connecting with reliable local technicians at Appliances Repair MD Tech. Our licensed experts specialize in comprehensive appliance repairs including refrigerator maintenance and emergency servicing in Orange County and Los Angeles County. Don’t wait until a small issue turns into a costly replacement. Book your appointment today at Appliances Repair MD Tech for fast, trusted service you can count on.
Frequently Asked Questions
How do I safely prepare my refrigerator for repairs?
To prepare your refrigerator for repairs, first unplug the appliance to disconnect the power. Then, empty all contents into a cooler to keep them safe, and remove any shelves or drawers to create a clean workspace.
What should I do to clean the condenser coils on my refrigerator?
To clean the condenser coils, start by unplugging the refrigerator for safety. Use a vacuum with a soft brush attachment to gently remove dust and debris from the coils, typically located on the back or underneath the appliance, at least twice a year to maintain efficiency.
How can I check if my refrigerator door seals are working properly?
To test your refrigerator door seals, close the door on a sheet of paper and pull. If the paper slides out easily, the seal may be worn and needs replacement; clean the gasket and inspect for any visible wear or damage.
What steps should I take to diagnose cooling issues with my refrigerator?
Begin diagnosing cooling issues by checking the temperature settings; the optimal range is 37 to 40 degrees Fahrenheit for the refrigerator. Next, inspect the door seals and condenser coils, and monitor for any unusual sounds that may indicate internal problems.
How can I test my refrigerator for proper operation after maintenance?
After completing refrigerator maintenance, place a standalone thermometer in both the refrigerator and freezer compartments. Monitor the temperatures over the next 24 hours to ensure they remain stable, ideally at 37 to 40 degrees for the refrigerator and 0 to 5 degrees for the freezer.
MK motors | Kıbrıs araç kiralama Kıbrıs araç kiralama , Kıbrıs araç satın al , Kıbrıs araç destek , Kıbrıs araç bakım