
When water pressure in your house drops, start here: attach a pressure gauge to an outdoor hose bibb, read the static pressure, then walk through every fixture to compare hot vs. cold and indoor vs. outdoor. That three-minute check tells you whether the problem is a single clogged aerator or something bigger upstream.
First 10 minutes: what to check
- Turn off all water inside and outside, then watch the water meter dial. If it moves, you have a leak somewhere.
- Test pressure at the hose bibb with an inexpensive gauge (under $15 at any hardware store). A reading below the lower acceptable limit indicates a whole-house issue.
- Run the kitchen cold tap, then the hot. If cold is fine but hot is weak, the water heater or its inlet valve is the likely culprit.
- Check the main shutoff valve (usually near the water meter or where the supply line enters the house) and the meter valve. Both must be fully open.
- Ask a neighbor. If they have the same problem, call your water utility before touching anything inside.
Pro Tip: The hose bibb on the side of the house closest to the street gives you the most accurate reading of incoming pressure before household plumbing adds any resistance.
Key Takeaways
Low water pressure in a house almost always traces to one of five causes: a clogged fixture, a partially closed valve, a failing PRV, a hidden leak, or corroded supply piping, and a $15 pressure gauge identifies which category you are dealing with in under five minutes.
| Point | Details |
|---|---|
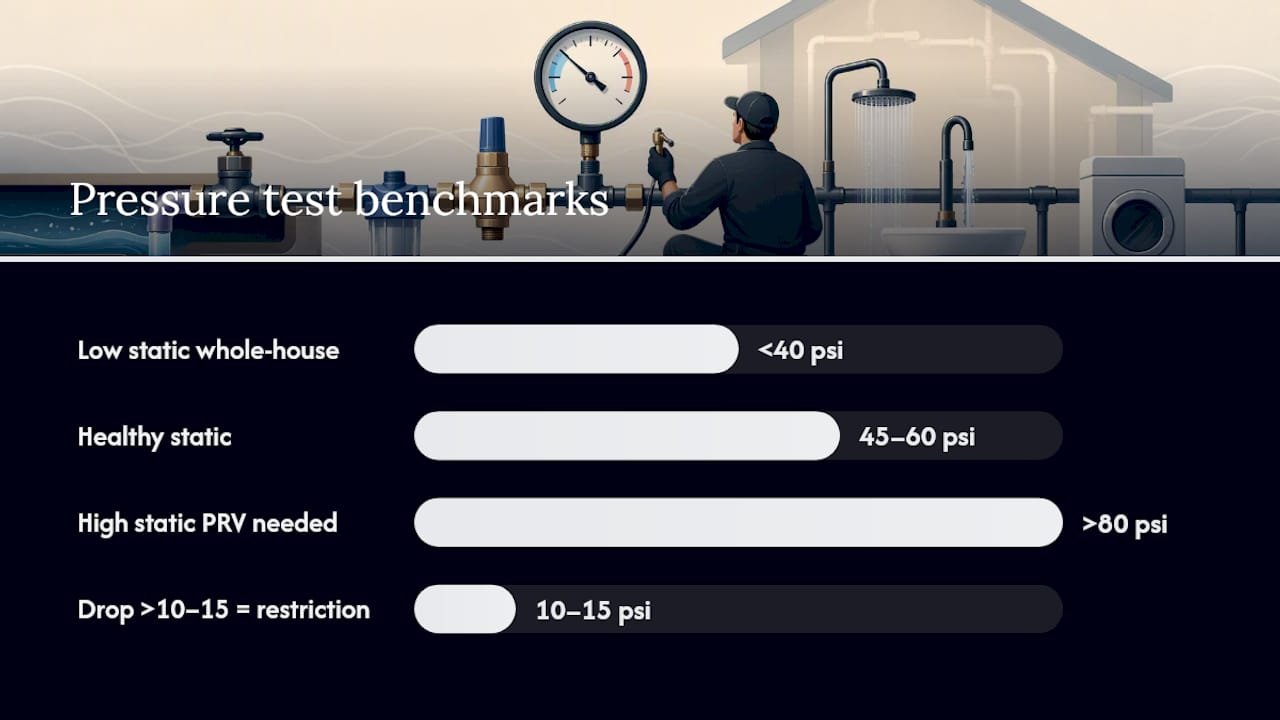
| Target pressure range | Aim for 45–60 psi; below 40 psi is a whole-house problem, above 80 psi risks pipe damage. |
| Test before you fix | Run the meter leak test with all fixtures off before adjusting any valve or installing a booster. |
| PRV is a licensed-plumber job | Improper PRV adjustment can spike pressure and rupture pipes or appliance hoses. |
| Galvanized pipes need repiping | Corroded galvanized lines narrow from the inside; cleaning does not restore flow. |
| Appliancesrepairmdtech | Licensed technicians in Orange and LA counties handle diagnostics, PRV replacement, leak detection, and repipe. |
Table of Contents
- What is normal water pressure, and how do you measure it?
- What causes low water pressure in a house?
- How to troubleshoot low water pressure step by step
- Safe, low-cost fixes you can try yourself right now
- PRV failure, leaks, corroded pipes, and booster pumps: what a pro fixes
- A simple maintenance schedule to keep pressure stable
- What Appliancesrepairmdtech technicians see most often in Orange County homes
- Appliancesrepairmdtech handles the pressure problems DIY cannot fix
- Sources
What is normal water pressure, and how do you measure it?
The practical target for a residential home is 45–60 psi. EPA WaterSense guidance sets that window specifically because it balances fixture efficiency with system safety. Residential plumbing codes treat 40–80 psi as the acceptable range, and most codes require a pressure-reducing valve (PRV) when incoming supply exceeds 80 psi.
Anything below 40 psi will feel noticeably weak at the shower and slow to fill a bathtub. Above 80 psi, you are stressing pipe joints, washing machine hoses, and water heater connections every time a faucet opens.
How to test static and running pressure
| Step | What to do | What to look for |
|---|---|---|
| 1. Get a gauge | Buy a hose-thread pressure gauge ($10–$15) | Fits standard hose bibb or washing machine cold inlet |
| 2. Close all fixtures | Shut off every faucet, appliance, and irrigation zone | Eliminates demand so you read true static pressure |
| 3. Attach and read | Screw gauge onto hose bibb; read dial after 30 seconds | 45–60 psi = healthy; below 40 = whole-house problem; above 80 = PRV needed |
| 4. Run a fixture | Open a nearby faucet fully; re-read the gauge | A drop of more than 10–15 psi under load suggests a supply restriction |
| 5. Jug flow test | Hold a 1-gallon jug under a faucet, count seconds to fill | Under 8 seconds = healthy flow rate; over 20 seconds = weak flow worth investigating |
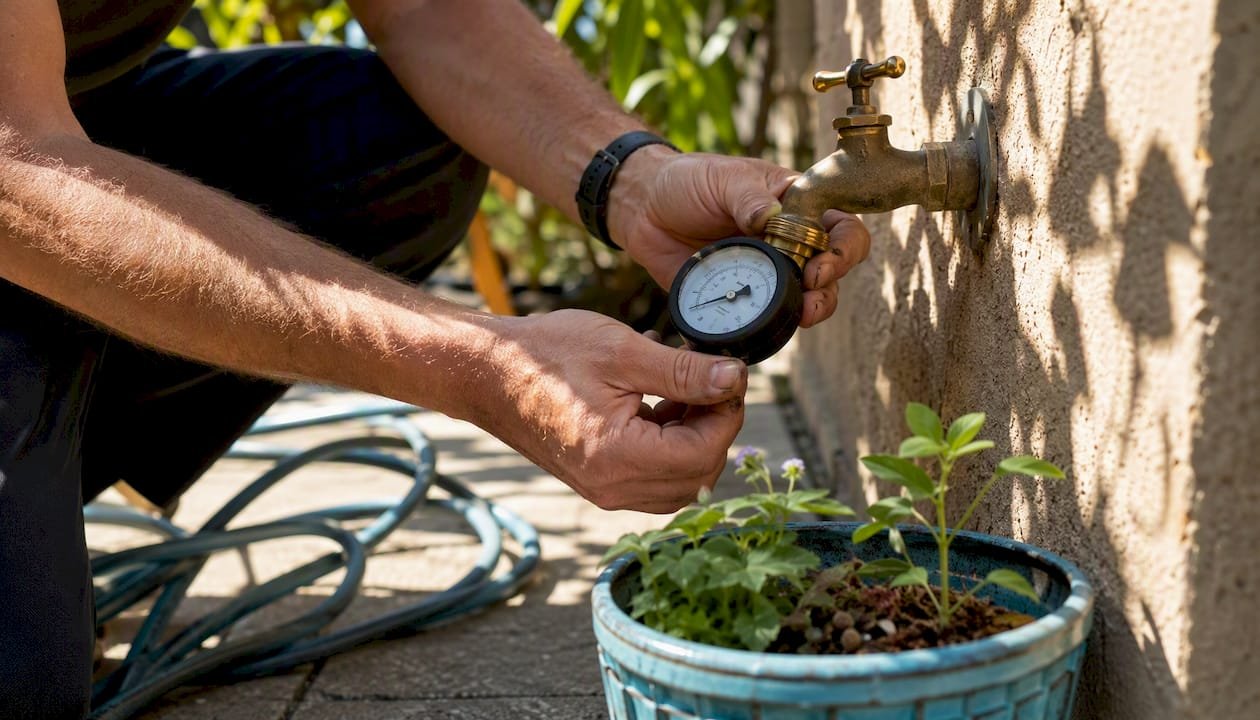
Pro Tip: The washing machine cold-water inlet is an excellent gauge attachment point because it is indoors, protected from weather, and sits close to the main supply line.
What causes low water pressure in a house?
The pattern of symptoms is the fastest diagnostic tool you have. One weak fixture points to a local blockage. Weak hot water only points to the water heater. Every tap in the house running weak at the same time points upstream, toward the main valve, PRV, service line, or the utility itself.
Portland Water Bureau guidance recommends comparing hot and cold at multiple faucets, including outdoor hose bibs, to determine whether the problem is fixture-level or whole-house. That comparison alone eliminates half the possible causes before you touch a single tool.
Common causes by symptom pattern:
- One fixture weak (cold and hot both): Clogged aerator, mineral-scaled showerhead, or a partially closed fixture isolation valve. These are the easiest and cheapest fixes.
- Hot water only weak: Sediment buildup in the water heater tank, a nearly closed heater inlet valve, or scale in the hot-side supply lines.
- All fixtures weak, cold and hot: Failing PRV, partially closed main shutoff or meter valve, corroded galvanized supply pipes, or a leak in the service line. Galvanized pipes corrode from the inside out over decades, narrowing the interior diameter until flow drops house-wide.
- Pressure drops when a second fixture opens: Undersized supply lines or a shared service line that cannot handle simultaneous demand.
- Pressure fine in the morning, weak by midday: Municipal peak-demand dips. Your utility is delivering lower pressure during high-use hours.
- Sudden pressure drop, no obvious cause: Hidden leak or slab leak. Watch the meter.
Pressure vs. flow: they are not the same thing. Pressure (psi) is the force pushing water through the pipe. Flow rate (gpm, gallons per minute) is the volume delivered. A clogged aerator reduces flow without changing the pressure reading at the gauge. A failing PRV reduces pressure, which then reduces flow everywhere. Knowing which one is low tells you where to look.
How to troubleshoot low water pressure step by step
Work through this in order. Each step either solves the problem or narrows it down so the next step is faster.
-
Walk every fixture. Run cold, then hot, at the kitchen sink, a bathroom sink, the shower, and an outdoor hose bibb. Note which are weak and whether hot or cold is worse. This single walk eliminates fixture-level vs. whole-house in under five minutes.
-
Check the main shutoff valve. Find it where the supply line enters the house (often in a utility room, crawl space, or near the water heater). A ball valve should be parallel to the pipe; a gate valve should be turned fully counterclockwise. A valve that is even a quarter-turn closed can cut pressure noticeably.
-
Check the meter valve. This valve sits at the water meter, usually at the street or in a sidewalk box. It is typically the utility’s valve, but you can visually confirm it is fully open. If it looks partially closed after recent utility work, call your water company.
-
Attach a pressure gauge and read static pressure. Below 40 psi confirms a whole-house supply problem. Between 40 and 60 psi with weak flow suggests a restriction (clogged pipes, aerators, or PRV). Above 80 psi means the PRV may have failed open, which is a different problem but still needs attention.
-
Run the meter leak test. Turn off every water source in the house, including the ice maker and irrigation. Go to the meter and watch the low-flow indicator (a small triangle or dial). If it moves at all, water is escaping somewhere. Do not adjust pressure or install a booster until you find and fix that leak.
-
Check whether neighbors are affected. A quick conversation or a call to your water utility’s outage line takes two minutes. If the whole street is low, the fix is on their side of the meter.
Safety warning: Do not adjust the PRV yourself. The adjustment screw looks simple, but a small turn can spike pressure high enough to rupture a washing machine hose or blow a pipe joint. Experts are clear that improper PRV adjustments create damaging pressure spikes that risk appliances and plumbing. PRV work belongs with a licensed plumber.
For a broader look at what these symptoms can signal, the types of plumbing issues at home guide covers the full range of leak, corrosion, and valve failures worth knowing.
Safe, low-cost fixes you can try yourself right now
Most single-fixture pressure problems resolve with a cleaning or a valve adjustment. These fixes cost almost nothing and take under an hour.
- Clean the aerator. Unscrew the aerator from the faucet tip (hand-tight, counterclockwise). Soak it in white vinegar for 30 minutes, rinse, and reinstall. Mineral scale is the most common cause of single-faucet weak flow, especially in areas with hard water.
- Clean the showerhead. Fill a zip-lock bag with white vinegar, submerge the showerhead, and secure with a rubber band overnight. Rinse in the morning. If the showerhead is old and heavily scaled, replacement costs $20–$60 and takes 10 minutes.
- Open all valves fully. Check the main shutoff, the meter valve (visually), the water heater inlet valve, and every fixture isolation valve under sinks and behind toilets. Any valve that is not fully open is restricting flow.
- Flush the water heater. If hot-water flow is weak throughout the house, sediment may be blocking the tank outlet or the dip tube. Turn the heater to “pilot” or off, connect a garden hose to the drain valve, and flush until the water runs clear. Always let the tank cool for at least an hour before draining to avoid scalding.
- Check appliance inlet screens. Washing machines and dishwashers have small mesh screens where the supply hose connects. Unscrew the hose, pull out the screen with needle-nose pliers, rinse it, and reinstall.
- Test outdoor hose bibs. A single weak hose bib with strong indoor pressure usually means a partially closed bib valve or a worn washer inside the bib itself.
Stop and call a licensed plumber when:
- The water meter is spinning with all fixtures off (active leak).
- Water is brown or rust-colored (corroded pipe interior).
- Pressure has been declining steadily over months with no obvious cause.
- You see wet spots on the floor, ceiling, or foundation (possible slab leak signs that need professional leak detection).
BobVila’s low-pressure guide confirms that aerator cleaning, valve checks, and water heater flushing are the right DIY starting points before escalating to a pro.
PRV failure, leaks, corroded pipes, and booster pumps: what a pro fixes
When DIY steps do not move the needle, the problem is almost always one of four things: a failing PRV, a hidden leak, corroded supply pipes, or genuinely insufficient municipal pressure.
PRV diagnosis and replacement
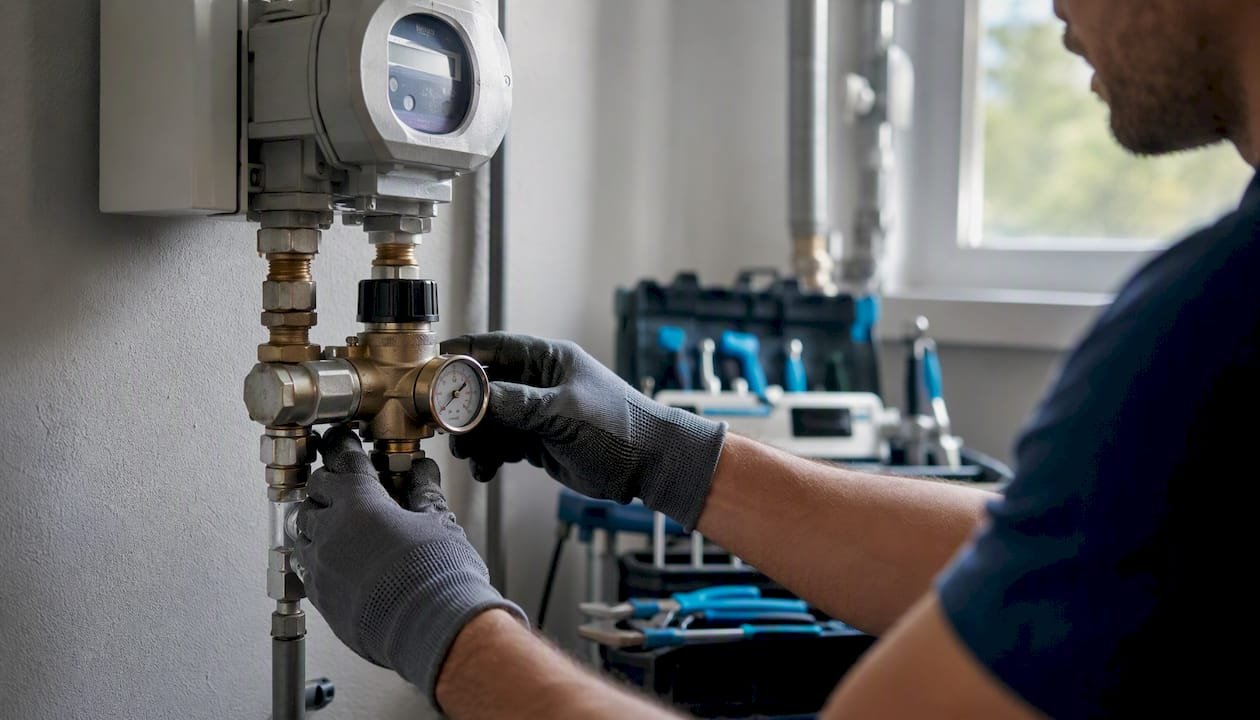
A PRV typically lasts 10–15 years. Signs it is failing include sudden whole-house pressure changes, pressure that fluctuates without any change in demand, or a gauge reading that does not match what you would expect from the utility. Replacement of a pressure-reducing valve (PRV) usually involves moderate parts and labor costs and can be completed by a licensed plumber within a few hours. PRVs placed downstream of the service connection should be set to 45–60 psi, and the technician will also check for thermal-expansion requirements if a check valve is present.
Hidden and slab leaks
A spinning meter with all fixtures off is the clearest sign of a hidden leak. Slab leak signs include warm spots on the floor, the sound of running water with everything off, and unexplained spikes in your water bill. Professional leak detection uses acoustic equipment or thermal imaging to locate the break without tearing up the floor unnecessarily. Repair costs vary widely: a simple accessible pipe repair may run $300–$800, while a slab leak repair can reach $2,000–$5,000 depending on location and access. Confirm there are no leaks before installing a booster pump; boosting pressure over an active leak accelerates the damage.
Corroded galvanized supply lines
Galvanized steel pipe was standard in homes built before the 1970s and tends to corrode internally over time, reducing flow. Cleaning does not fix this, so replacement may be necessary. Partial or whole-house repipe costs vary based on home size and access. The plumbing pipe repair service Appliancesrepairmdtech offers in Orange County covers both partial and full repipe work.
Booster pump systems
A booster pump is the right fix when the utility delivers less than 40 psi at the meter and there is no leak or pipe restriction causing the shortfall. Homes at higher elevation than the nearest water tower also benefit. Installation of a residential inline booster pump usually costs a moderate amount depending on system specifications. Safety note: size the pump to your actual demand. An oversized booster can push pressure above 80 psi, stressing every fixture and appliance in the house.
Pro Tip: Ask the technician to document the static pressure reading at the meter and at the PRV outlet before and after any repair. That before/after record is useful if you ever need to make a warranty claim on an appliance damaged by pressure fluctuations.
A simple maintenance schedule to keep pressure stable
Pressure problems rarely appear overnight. They build slowly, and a quarterly check catches them before they become expensive.
Quarterly:
- Clean aerators on kitchen and bathroom faucets.
- Run every hose bib and check for drips or reduced flow.
- Visually inspect under-sink valves and supply hoses for corrosion or mineral deposits.
- Check the water meter with all fixtures off for 15 minutes. A moving dial means a slow leak.
Annually:
- Test static pressure with a gauge and record the reading. A drop of more than 5 psi from the prior year is worth investigating.
- Flush the water heater tank to remove sediment.
- Inspect the PRV: check its age (replace proactively after 10–15 years), look for moisture around the valve body, and confirm the outlet pressure matches the set point.
- If you have hard water, inspect aerators and showerheads for scale buildup and consider a whole-house water softener or descaler if cleaning is becoming a monthly chore.
When to schedule a professional inspection:
- The home is over 40 years old and still has original supply piping.
- You have replaced the PRV more than once in 10 years.
- Pressure readings have declined two years in a row.
Pro Tip: Keep a simple log: date, static pressure reading, and any fixtures cleaned or valves adjusted. A one-page record over two or three years makes it easy for a technician to spot a trend that a single visit cannot reveal.
For a broader preventive approach, the regular plumbing checks guide for OC homeowners covers what to look for between service visits.
What Appliancesrepairmdtech technicians see most often in Orange County homes
Orange County has a specific mix of plumbing challenges. Homes built in the 1950s through 1970s in cities like Anaheim, Santa Ana, and Garden Grove often still have original galvanized supply lines. PRVs in many of these homes have never been replaced, putting them well past their service life. And homes in hillside communities above Laguna Beach or Yorba Linda regularly deal with elevation-related pressure shortfalls that no amount of valve adjustment will fix.
When an Appliancesrepairmdtech technician arrives, the first step is always a gauge reading at the hose bibb and at the PRV outlet. That two-minute test tells the technician whether the problem is on the utility’s side of the meter or inside the home. From there, the diagnostic sequence follows the same logic as this guide: compare fixtures, check valves, inspect the PRV, run the meter leak test, and assess pipe material and age.
What homeowners consistently tell us is that they want a clear explanation of what was found and what the options are, not just a repair bill. Appliancesrepairmdtech technicians document gauge readings, photograph any visible corrosion or valve issues, and present repair vs. replace options with honest cost ranges before any work begins. That process takes the guesswork out of a stressful situation.
Appliancesrepairmdtech handles the pressure problems DIY cannot fix
When the gauge reading is low, the meter is spinning, or the pipes are original galvanized, the fix goes beyond what a vinegar soak and a valve check can accomplish. Appliancesrepairmdtech’s licensed plumbing technicians serve Orange County and Los Angeles County with same-week appointments for diagnostic visits, PRV inspection and replacement, leak detection (including slab leak location), partial and full repipe in copper or PEX, and booster pump installation.
Before you call, pull together your gauge reading if you have one, a note on which fixtures are affected (hot, cold, or both), and any recent changes like utility work or a new appliance. That information cuts diagnostic time in half. For pipe repair and repipe work in Orange County, book directly online or call to get a licensed technician on-site with a written quote before any work starts.
Sources
- EPA Service water pressure tech sheet (WaterSense guidance)
- Portland
- Low Water Pressure in the Home: Causes and Solutions | BobVila
- Why is my water pressure low? A guide for homeowners – Grundfos
- Low Water Pressure Causes and Fixes – Barnett Plumbing & Water Heaters