TL;DR:
- A slow drip from appliances can cause extensive water damage and mold before detection.
- Regular manual inspections, combined with smart sensors, provide effective leak prevention and early warning.
A single slow drip behind your refrigerator can quietly ruin flooring, rot drywall, and invite mold over weeks before you notice anything wrong. Household leaks waste thousands of gallons of water every year, and appliance leaks are among the most common culprits. The good news is that most leaks give early warning signs you can catch with a flashlight and about 30 minutes of your time. This guide walks you through exactly what to check, how to check it, and when to call in a professional before a small drip turns into a major repair bill.
Table of Contents
- What you’ll need to detect appliance leaks
- Step-by-step: How to identify leaks in household appliances
- Comparing manual methods and smart leak detectors
- Troubleshooting: Common mistakes and hidden leak sources
- Our perspective: Why routine DIY checks beat waiting for disaster
- Need help with appliance leaks? Your local experts are ready
- Frequently asked questions
Key Takeaways
| Point | Details |
|---|---|
| Early detection saves money | Spotting appliance leaks early prevents costly damage and water waste. |
| Use both manual and tech tools | Combining hands-on checks with smart sensors provides the best leak protection. |
| Check hoses and seals regularly | Annual hose and gasket inspections prevent most sudden leaks. |
| Act on hidden warning signs | Unusual odors or spikes in your bill can signal leaks even if there’s no visible water. |
What you’ll need to detect appliance leaks
Now that you understand the urgency, gather the right tools to inspect your appliances efficiently. Walking into this process without the right equipment wastes time and leaves gaps in your inspection.
Here is what you need before you start:
- Flashlight or headlamp to see behind and beneath appliances clearly
- Dry towels or paper towels to wipe surfaces and spot new moisture
- Adjustable wrench for tightening or removing hose connections
- Replacement gaskets or hoses if you suspect worn seals (keep spares on hand)
- Bucket to catch residual water when you disconnect lines
- Smartphone to photograph anything suspicious for reference later
- Optional: smart water sensor placed under appliances for continuous monitoring
Safety comes first. Before you touch anything, turn off the power at the wall or circuit breaker for any appliance you plan to inspect. Shut off the water supply valve behind the appliance as well. Never skip this step, even for a quick look.
| Tool | Purpose | Priority |
|---|---|---|
| Flashlight | Illuminate dark areas under and behind appliances | Essential |
| Dry towels | Confirm active moisture vs. old stains | Essential |
| Wrench | Tighten or disconnect hose fittings | Essential |
| Replacement hoses | Swap out cracked or bulging supply lines | Recommended |
| Smart water sensor | Continuous drip detection between manual checks | Optional |
| Moisture meter | Measure moisture in walls or floors near appliances | Advanced |
When it comes to hoses, age matters a lot. Inspect supply hoses for bulges or cracks and replace washer hoses every 3 to 5 years regardless of how they look. Rubber degrades from the inside out, meaning a hose can look fine but be weeks away from bursting. Staying current on washer hose maintenance is one of the simplest ways to avoid a flooded laundry room.
Pro Tip: Buy a two-pack of stainless steel braided hoses and keep the unopened one in a cabinet. When you replace one, you already have the next one ready to go.
Step-by-step: How to identify leaks in household appliances
With your supplies handy, start the step-by-step process to thoroughly check for leaks. Move through each appliance systematically so nothing gets skipped.
-
Pull the appliance forward. Carefully slide your refrigerator, dishwasher, or washing machine away from the wall. Even a few inches gives you access to the back connections and enough light to see the floor underneath.
-
Inspect the floor and walls visually. Look for discoloration, warped flooring, water stains, or rust rings. These marks often mean a slow leak has been running for weeks or longer. If the floor feels soft or spongy underfoot, water damage has already started.
-
Feel along every hose. Run your hand slowly along the full length of each supply and drain hose. You are feeling for moisture on the outside, soft spots, cracks, or bulges. A hose that is wet to the touch when the appliance has not been used recently is a red flag.
-
Check door gaskets and seals. For dishwashers and refrigerators, press your fingers along the full perimeter of the door seal. Gaps, tears, or hard brittle spots allow water to escape during operation. A seal that peels away from the door frame even slightly needs replacing.
-
Inspect the drain pan. Most refrigerators have a drip pan underneath that collects condensate. Pull it out and look for standing water, algae, or mineral buildup. A drain pan that overflows frequently points to a blocked defrost drain or a failing ice maker line. You can learn more about refrigerator leak tips to understand the most common sources in detail.
-
Run the water meter test. This is the most reliable method for catching hidden leaks. Shut off every water-using fixture and appliance in the house. Write down your water meter reading, then wait one to two hours without using any water. If the meter moves after waiting, water is escaping somewhere in your system. This test catches slow leaks that produce no visible pooling.
-
Use your nose. A musty, earthy odor near a dishwasher or under a sink cabinet often signals moisture that has been sitting long enough to grow mold. Follow the smell to narrow down the source before you start pulling things apart.
“Water is patient. It finds the smallest path and works on it quietly for months. By the time you see damage, it has usually been leaking far longer than you realize.” This is why the meter test and smell check matter just as much as the visual inspection.
Addressing issues early is far less disruptive than a full repair later. If the dishwasher step above turns up pooled water or a compromised seal, knowing how to fix dishwasher leaks quickly can prevent the problem from spreading to your cabinetry and subfloor.

Comparing manual methods and smart leak detectors
While hands-on inspection is the first line of defense, tech can take leak detection even further. Understanding both approaches helps you decide how much protection your home actually needs.
| Feature | Manual inspection | Smart leak sensor |
|---|---|---|
| Cost | Low (tools you likely own) | $20 to $100+ per sensor |
| Detection timing | Only when you inspect | Continuous, real-time |
| Works without power/WiFi | Yes | No |
| Catches leaks while away | No | Yes |
| Catches slow hidden leaks | With meter test | Yes, with moisture sensing |
| Setup time | 30 to 60 minutes per session | 5 to 10 minutes per device |
| Best for | One-time deep check | Ongoing monitoring |
Manual inspections are fast, require no setup, and give you direct feedback on hose condition and seal integrity that a sensor cannot provide. A sensor sitting under your refrigerator will tell you water is present. It will not tell you whether the supply hose has a bulge or the door gasket is starting to tear. That physical context comes only from hands-on checking.
Smart sensors shine in situations where continuous coverage matters. Smart sensors offer real-time alerts but require a working power source and WiFi connection, making them most valuable for property managers overseeing multiple units or homeowners who travel frequently. If a pipe connection loosens at midnight or a supply hose finally gives out while you are at work, a sensor sends a phone alert before water spreads across the floor.
The best approach combines both:
- Perform a full manual inspection every six months, ideally before summer and before winter
- Place a smart sensor under high-risk appliances like the refrigerator, washing machine, and dishwasher
- Test your sensors monthly by briefly wetting a finger and touching the probes to confirm the alert fires
Property managers in Orange County and Los Angeles County deal with this regularly. A single flooded unit in a multi-family building can displace tenants and trigger insurance claims. Running a routine check program across all units, supported by sensors in each kitchen and laundry area, keeps those situations rare rather than routine.
Troubleshooting: Common mistakes and hidden leak sources
Even with careful inspection, leaks can hide in subtle ways or be overlooked. Here is what trips up most homeowners and how to avoid it.
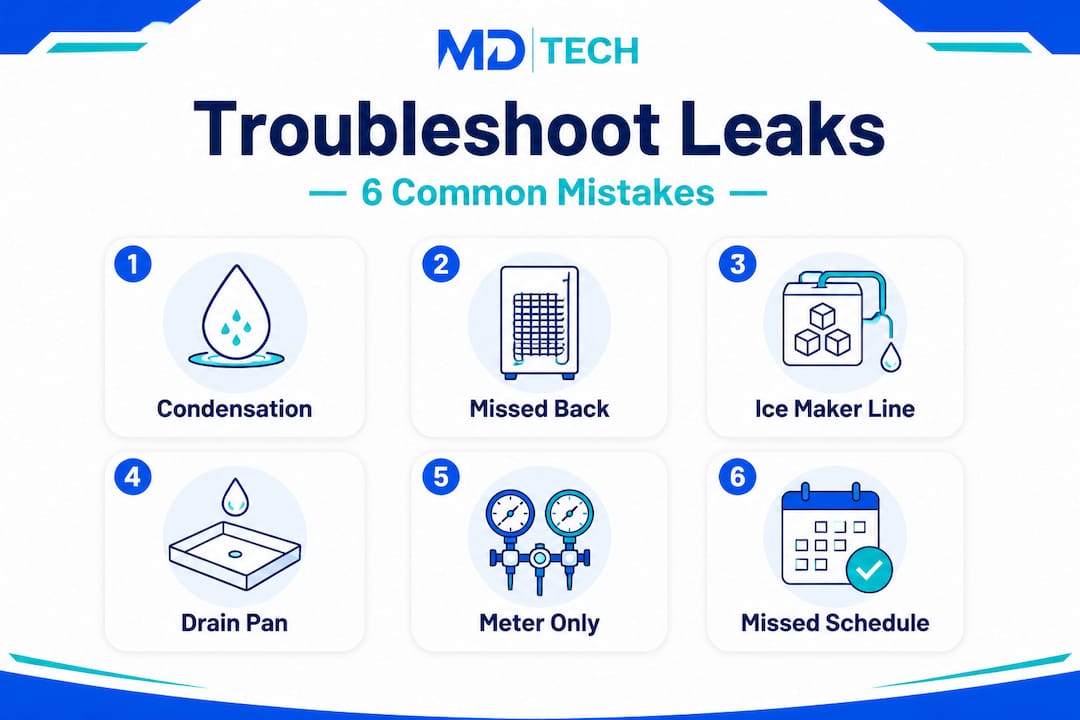
Mistaking condensation for a leak. On humid days, cold supply lines and refrigerator exteriors collect condensation that looks exactly like a drip. Dry the surface completely, wait 10 minutes without running any water, and check again. If moisture returns quickly and the surface is cold to the touch, it is likely condensation rather than a leak.
Skipping the back and sides of the appliance. Most homeowners check the front and immediate floor area but miss the wall connection point at the back. This is where supply hoses connect to the shutoff valve, and it is one of the most common spots for slow seepage. Always check fittings at both ends of every hose.
Ignoring the ice maker line. The water supply line running to your refrigerator’s ice maker is typically a narrow plastic or copper tube. Silent leaks from ice makers and drain pans in fridges go unnoticed visually, making the meter test or odor check the only reliable way to catch them early. A tiny pinhole in that line can drip for months behind the fridge without producing a visible puddle on the floor.
Forgetting the refrigerator drain pan. This is one of the most overlooked hidden leak sources in any kitchen. Pull the pan out twice a year, empty it if needed, and check for cracks. If it is overflowing regularly, the defrost drain tube is likely clogged with debris or ice and needs to be cleared. You can also explore hidden fridge leaks for a full breakdown of less obvious refrigerator failure points.
Trusting a single meter reading. One meter test tells you whether a leak exists right now. It does not confirm the leak is fixed after a repair. Always run a second meter test 24 to 48 hours after any repair to confirm the reading stays flat.
Pro Tip: Keep a simple log of your water meter reading on the first of every month. If usage creeps up without any change in household habits, a slow leak is the most likely cause. You will catch it weeks earlier than if you wait for a visible sign.
Not checking the annual hose and gasket schedule. Many homeowners only look at hoses after something goes wrong. Building a simple six-month reminder into your phone calendar takes 10 seconds and prevents the majority of emergency leak calls we receive across Orange and Los Angeles counties.
Our perspective: Why routine DIY checks beat waiting for disaster
After years of responding to appliance repair calls throughout Orange County and Los Angeles County, one pattern stands out clearly. The homeowners who call us for a quick hose swap or a gasket replacement almost always pay a fraction of what neighbors pay after waiting for visible damage to appear. The ones who wait face floor replacement, mold remediation, and sometimes structural repairs on top of the appliance fix itself.
There is a common belief that leaks are obvious. That if something were seriously wrong, you would know. In reality, most of the damaging appliance leaks we see developed over months before the homeowner ever noticed a problem. Water moved quietly along the underside of flooring, behind the toe kick of cabinets, and into wall cavities long before it ever produced a stain or a smell.
The counterintuitive truth is that a 20-minute manual inspection every six months takes less total time than a single hour spent on the phone coordinating an emergency repair. Pair that with regular hose replacement on schedule and a smart sensor under your riskiest appliance, and you have eliminated 90% of the scenarios that lead to those emergency calls.
For property managers, the math is even clearer. One flooded unit easily costs thousands of dollars in tenant relocation, restoration, and lost rent. A routine inspection program across all units, even quarterly, costs a fraction of a single incident.
The technology is useful, but it is not a replacement for knowing your appliances personally. Running your hand along a hose, checking a gasket with your fingers, and smelling near the toe kick of your dishwasher cabinet are actions no sensor replicates. Build the habit first, then add the sensors as backup. That combination is what keeps homes dry in the long run.
Need help with appliance leaks? Your local experts are ready
If you have followed these steps and found an active leak, a damaged hose, or a seal you are not comfortable replacing yourself, do not wait and hope it holds. Small leaks get worse, not better, on their own.

Our licensed technicians serve homeowners and property managers throughout Orange County and Los Angeles County, offering same-day diagnosis, parts replacement, and full appliance repair for all major brands. Whether you need Samsung appliance repairs, a quick appliance parts replacement, or honest guidance on whether a repair or replace decision makes financial sense for your situation, we are ready to help. Book an appointment online or call us directly. Getting an expert on-site early is always the less expensive path.
Frequently asked questions
What is the quickest way to tell if an appliance is leaking water?
Run a water meter test by shutting off all water use and checking your meter after one to two hours for any movement. A reading that changes indicates an active leak somewhere in the system.
How often should I replace appliance hoses and seals?
Replace washer hoses every three to five years and inspect door gaskets and seals on dishwashers and refrigerators annually for cracks, gaps, or stiffness.
Are smart leak detectors better than manual inspections?
Smart sensors offer real-time continuous alerts but cannot assess hose condition or gasket wear the way a hands-on check can. Both methods work best when used together.
What hidden signs might indicate a silent leak?
Musty odors, soft flooring, discoloration on walls or cabinets, and a rising water bill are all common indicators. Silent leaks from ice makers and drain pans rarely produce visible puddles until the damage is already significant.
Can leaking appliances cause major water loss?
Yes, household leaks waste thousands of gallons annually, and appliance leaks are a leading contributor. A slow drip that goes unrepaired for months adds up to significant water loss and substantial damage costs.
Recommended
- Fix dishwasher leaks fast: 2026 guide with 60% seal tips
- Protect your home: why timely gas line checks matter
- What is smart home plumbing? A 2026 guide for homeowners
- Why Refrigerators Leak Water: Expert Repair Tips
- Leak detection explained: Protect your home from water leaks
- Spotting pipe leaks: Practical signs and solutions for UK homes