
If your P trap is leaking, the cause is almost always a worn slip-joint washer or a loose slip nut, both fixable in under 30 minutes. Set a bucket under the trap now, then try hand-tightening the slip nuts first. If the washer looks flattened or cracked, swap it out. If the trap itself is cracked or corroded, replace the whole piece rather than patching it.
TL;DR:
- Replacing worn slip-joint washers or tightening slip nuts usually stops leaks within 30 minutes; cracked traps or improper alignment require full replacement.
- Use a full two-minute water test and tissue wraps to identify slow leaks or siphoning that may mimic joint seepage.
- For cracked or corroded traps, replacement kits under $30 are faster and more effective than trying to patch the damage.
- Persistent leaks after washer replacement often indicate structural damage or incorrect sizing, requiring professional intervention.
- Regular inspection, careful tightening, and keeping spare washers and traps on hand can prevent most leaks from recurring.
Table of Contents
- What normally causes a P trap to leak
- Fast diagnostic checklist to find where the leak is
- Practical step-by-step repair for slip-joint P trap leaks
- When to replace the trap instead of just swapping washers
- Red flags that mean it’s time to call a licensed plumber
- Routine maintenance to avoid repeat leaks
- Our practical advice and when we step in
- Why speed matters more than perfection here
- How we can help if you’d rather not DIY
- FAQ
- Sources
What normally causes a P trap to leak
Most leaking drain trap problems trace back to one of four things, and recognizing which one you have saves time and money.
- Worn slip-joint washers: rubber or nylon washers flatten or crack over time and stop sealing the joint.
- Loose or cross-threaded slip nuts: a nut that was never fully tightened, or one threaded at an angle, let’s water seep past.
- Cracked or corroded traps: PVC traps get brittle with age and sun exposure, while metal traps corrode and pit.
- Misalignment: a tailpiece that’s too long, too short, or angled wrong puts stress on the joints and keeps them from seating.
There’s also a difference between a true leak and a trap that simply looks wet. If water sits in the bend and slowly evaporates, or if a dry trap lets sewer gas back up through plumbing vent issues, that’s siphoning, not a leak at the joint. The plumbing code requires a trap seal of 2 to 4 inches of standing water to block sewer gas, and a seal that drops below 2 inches from slow evaporation will smell like a leak even when the joints are dry.
Fast diagnostic checklist to find where the leak is
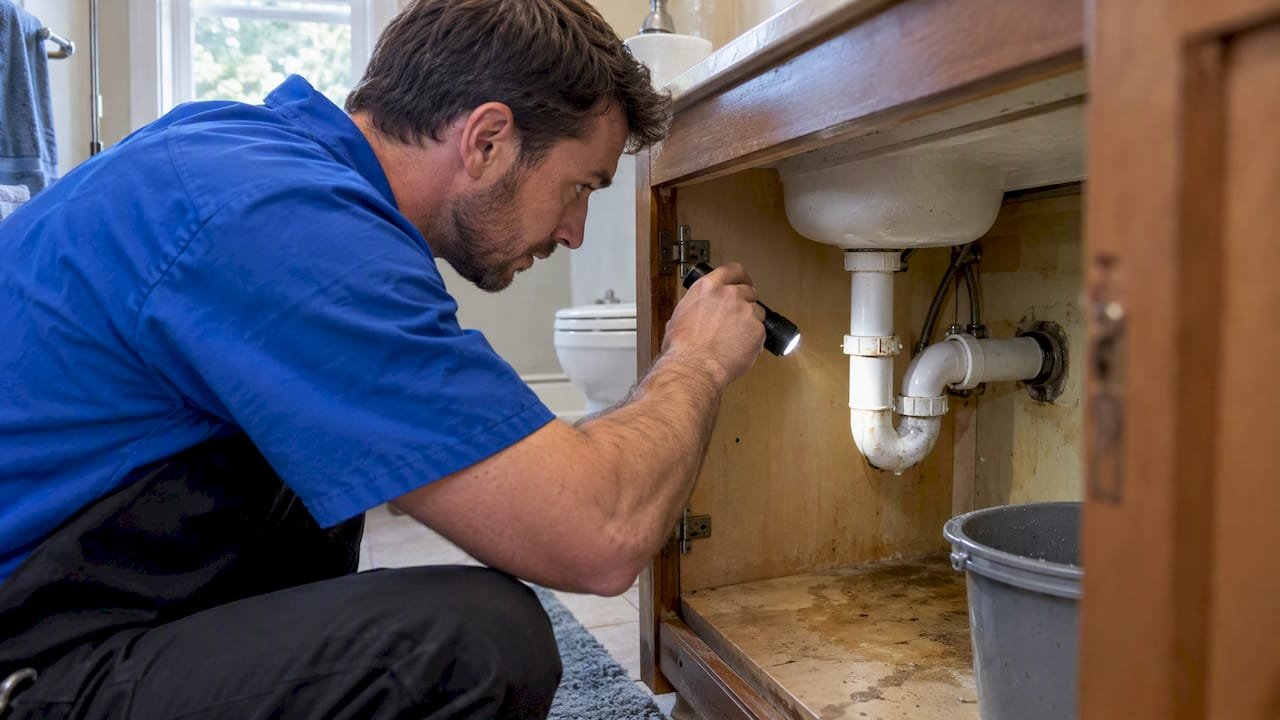
Before you buy a single part, spend ten minutes tracking down the exact leak point.
- Gather a bucket, a towel, a flashlight, and a pair of adjustable pliers.
- Dry every joint and seam on the trap completely with the towel.
- Run water steadily while you watch each slip-joint connection and the trap bend itself.
- Wrap a dry piece of tissue around suspected joints. A wet spot on the tissue pinpoints a weep you’d otherwise miss by eye.
- Dry the area again and run a second test. Some leaks only show up under sustained flow or with hot water, so one pass isn’t always enough.
- Run your fingers along the pipe below each joint. A hairline crack often feels damp before it’s visible.
Pro Tip: Run the water for a full two minutes on the second test, not a quick burst. Slow weeps often need sustained flow before they show.
Practical step-by-step repair for slip-joint P trap leaks
Once you know where the leak is, the repair itself is usually fast.
Before you start:
- Clear the cabinet space and lay down towels.
- Place a bucket directly under the trap. Extension plumbing guidance recommends this step before loosening any slip nut, since the trap holds standing water that will spill out.
- If your sink has a shutoff valve, closing it isn’t required for trap work, but it keeps someone from running water while you’re mid-repair.
The repair:
- Loosen the slip nuts on both ends of the trap by hand. Pliers help start a stuck nut, but avoid forcing it.
- Slide the trap down and off, keeping the bucket underneath to catch residual water.
- Pull out the old washers and inspect them. A worn washer looks flattened, cracked, or has lost its round shape.
- Seat the new washer with the beveled edge facing the direction the manufacturer specifies, usually toward the nut.
- Slide the trap back into place, checking that the tailpiece and drain arm line up without forcing an angle.
- Hand-tighten the slip nuts until snug, then add a quarter turn with pliers. Overtightening cracks plastic nuts and compresses washers unevenly.
- Run hot and cold water for a few minutes, watching every joint.
- Check again after 24 hours, since some joints seep only under repeated use.
Replacement trap kits, like a 1-1/2 inch slip-joint PVC P-trap with a solvent-weld adapter, typically run under $30 and come with everything needed for a full swap when the old trap is cracked rather than just worn at the joints.
When to replace the trap instead of just swapping washers
Washers fix most leaks, but some situations call for replacing the whole trap instead.
- Cracks, brittleness, or corrosion: a trap that’s gone brittle or developed pitting won’t reseal no matter how new the washer is.
- Permanent deformation: a trap that’s been overtightened or dropped can warp out of round, leaving a gap no washer closes.
- Wrong size or damaged tailpiece: if the trap diameter doesn’t match your drain arm or the tailpiece is cracked, washers won’t solve a fit problem.
- Code or alignment issues: an outlet height or trap arm grade that’s off will keep causing leaks until the geometry is corrected.
Parts costs stay low either way. Slip washers typically run $2 to $8, slip nuts $3 to $10, and a full plastic replacement trap $8 to $30. Labor only enters the picture if access is tight or the stub-out is damaged.
Red flags that mean it’s time to call a licensed plumber
Some situations are better left to a professional, especially where forcing a fix risks turning a small repair into a bigger one.
- Seized or stuck fittings: if a slip nut won’t budge by hand and pliers risk cracking it, stop before you break the tailpiece.
- Leaks behind the wall or at the tailpiece: these often point to a damaged stub-out, not a simple joint problem.
- Visible mold or soaked cabinetry: moisture that’s sat for a while needs remediation, not just a tightened nut.
- Repeated leaks after reassembly: a joint that keeps weeping after a proper washer swap usually means a misaligned stub-out or an incompatible trap size.
When you do call for help, ask about licensing, a written estimate, and whether labor carries a warranty. Our plumbing repair services cover exactly these cases, and a plumbing repair guide walks through more general troubleshooting if you want a second opinion before booking.
Routine maintenance to avoid repeat leaks
A few habits keep traps sealed for years instead of months.
- Check under the sink every few months for dampness, even if nothing looks wrong.
- Avoid pouring grease or harsh chemical cleaners down the drain, since both stress the washers and pipe walls over time.
- Tighten slip nuts by hand first, and stop at a quarter turn with pliers. Plastic traps crack easily under too much torque.
- Dry any spill or leak within 24 to 48 hours to keep mold from taking hold in cabinetry or flooring.
- Keep a spare washer and a replacement trap kit on hand so a weep doesn’t turn into a weekend project.
Pro Tip: Snap a photo of your trap setup before disassembly. It makes reassembly faster and helps you order the right parts if something needs replacing.
Our practical advice and when we step in
We recommend licensed technicians for plumbing and sink repairs, and most slip-joint leaks are well within reach of a motivated homeowner with basic tools. Where we recommend calling in help is when the leak points to structural damage, hidden piping behind a wall, or moisture that’s already sitting long enough to raise mold concerns.
Why speed matters more than perfection here
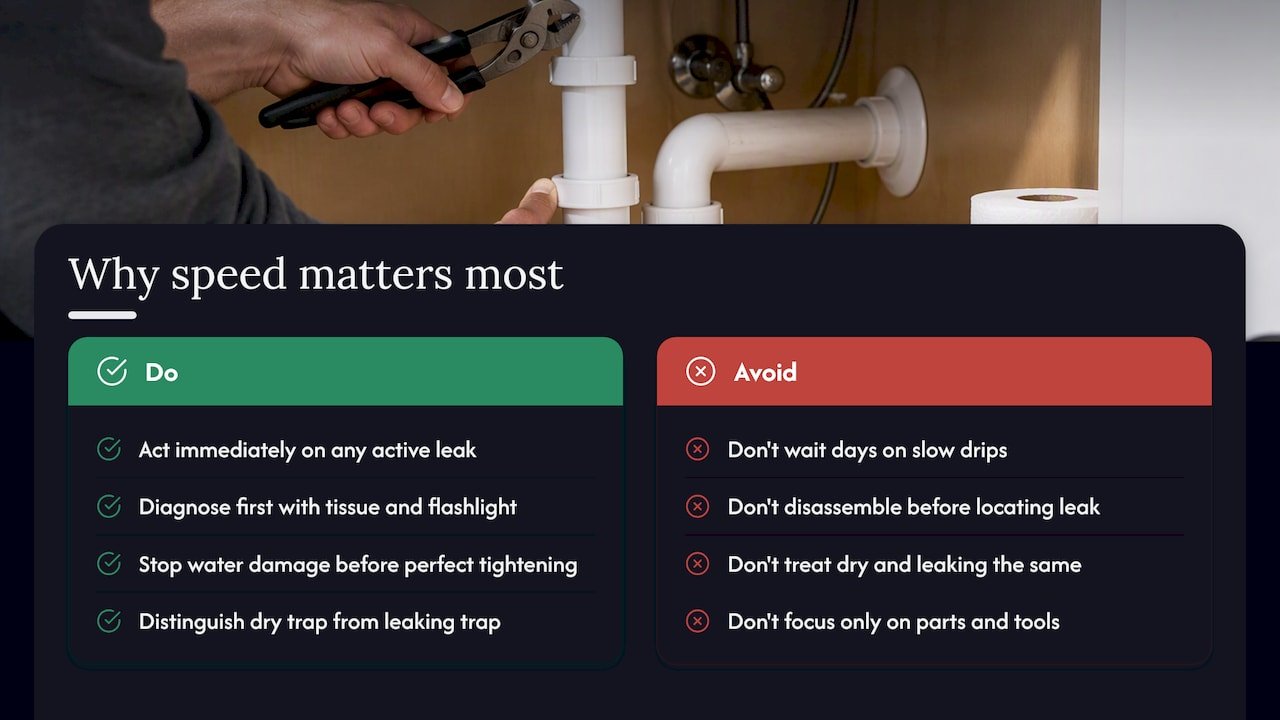
The biggest mistake homeowners make with a leaking trap isn’t choosing the wrong part, it’s waiting. A slow drip that gets ignored for a week does more damage than a rushed repair with slightly uneven tightening. Conventional advice tends to focus heavily on parts and tools, but the real variable that determines whether this stays a $10 fix or turns into cabinet replacement is how fast you catch it.
Prioritize diagnosis over disassembly. Pulling a trap apart before you know where the leak actually originates wastes washers and risks damaging good gaskets for no reason. Spend the extra five minutes with tissue paper and a flashlight first. The second thing worth doing differently: don’t treat a dry trap and a leaking trap as the same emergency. One is an odor problem tied to evaporation, the other is active water damage. Treating both with the same urgency, or the same fix, misses what’s actually going on.
— MDTECH
How we can help if you’d rather not DIY
If the stuck nut won’t budge, or the leak keeps coming back after a clean washer swap, professional technicians can finish the job without the trial and error. They handle on-site diagnosis, parts replacement, and repairs backed by warranty options, so you’re not guessing twice.
To book, visit our plumbing repair services page or call ahead with your sink type and how long the leak has been happening. That one detail alone often tells a technician whether it’s a five-minute washer swap or something tied to the stub-out behind the wall. For readers comparing quotes first, SolvPro’s plumbing estimate directory is a reasonable place to see typical local pricing before you decide which route to take.
FAQ
Why is there water sitting in my P trap?
Standing water in the trap is normal and intentional. It creates the water seal, 2 to 4 inches deep, that blocks sewer gas from entering your home through the drain.
My P trap won’t seal. What can I do to fix it?
Start by checking the slip washers at each joint, since a flattened or misaligned washer is the most common cause of a seal that won’t hold. Remove the nut, reseat or replace the washer with the beveled edge facing correctly, then hand-tighten before adding a light quarter turn with pliers.
How much does it cost to replace a P trap?
Parts alone are inexpensive: slip washers run $2 to $8, slip nuts $3 to $10, and a full plastic replacement trap kit $8 to $30. Labor costs apply only if you hire a plumber, which is worth it for stuck fittings or damaged stub-outs.
Do P traps have washers?
Yes, slip-joint P traps use washers or gaskets at each connection point to create a watertight seal around the pipe. These washers wear out over time and are the first thing to check and replace when a trap starts leaking.
Sources
- Mold Hazards during Disaster Cleanup (OSHA)
- eCFR :: 24 CFR Part 3280 Subpart G – Plumbing Systems
- JONES STEPHENS 1-1/2 in. Slip Joint PVC P-Trap with Solvent Weld Marvel Adapter (product page)
- Open PRAIRIE extension guide: trap removal and gasket replacement