
TL;DR:
- Most garbage disposal problems are simple to fix with proper tools and correct procedures.
- DIY repairs like clearing jams or tightening leaks save time and avoid unnecessary costs.
A garbage disposal fix guide is a step-by-step system for diagnosing and repairing the most common disposal failures, including jams, leaks, and power faults, without calling a technician for every problem. Most homeowners can resolve these issues safely with basic tools and the right sequence of steps. The Plumbing-Heating-Cooling Contractors Association (PHCC) recommends cold-water-only operation as a baseline safety standard, and Appliancesrepairmdtech technicians confirm that the majority of service calls involve problems a prepared homeowner could have fixed in under an hour. This guide covers every major failure type, from a humming motor to a dripping flange, so you know exactly what to do and when to stop.
What tools and safety steps do you need before any repair?
Gathering the right tools before you start saves time and prevents injury. You need an Allen wrench (typically 1/4 inch), a flashlight, long-handled tongs or needle-nose pliers, plumber’s putty, and a bucket for catching water under the sink. Keep a dry towel nearby too.
Safety rules come first, and they are non-negotiable:
- Disconnect power completely. Unplug the disposal from the outlet under the sink or switch off the circuit breaker that feeds it. Never rely on the wall switch alone.
- Never put your hand inside the disposal. Even with the power off, the grinding blades are sharp. Use tools to remove debris, not your fingers.
- Use cold water only. Cold water prevents grease from liquefying and coating the inside of your drain pipes. Hot water does the opposite.
- Check the circuit breaker first. If the outlet under the sink has no power, the breaker may have tripped before you even start.
- Wear safety glasses. Debris can fly out of the drain opening when you work the grinding plate.
Pro Tip: Before touching anything inside the cabinet, run your hand along the power cord under the sink and confirm it is unplugged. Many homeowners skip this and assume the wall switch is enough. It is not.
The PHCC cold-water protocol applies during operation and during any test run after a repair. Running hot water while the disposal is on liquefies grease, which then coats the pipe walls and causes slow drains over time.
Step-by-step guide to fixing a jammed or humming disposal
A humming disposal with no grinding action means the motor is running but the grinding plate is stuck. This is the most common disposal problem, and it is almost always fixable in under 30 minutes.
- Turn off and unplug the unit. Flip the wall switch off, then unplug the disposal from the outlet under the sink. Do not skip the unplug step.
- Locate the hex socket on the bottom of the unit. Most disposals have a small hex socket at the very center of the bottom housing. This is where your Allen wrench goes.
- Work the wrench back and forth. Insert the Allen wrench and rock it in both directions until you achieve a full 360-degree rotation. Forcing it in one direction only risks snapping internal parts.
- Remove visible debris with tongs. Shine your flashlight into the drain opening and pull out any food scraps, bones, or foreign objects with long-handled tongs or needle-nose pliers. Never use your hands.
- Wait at least 20 minutes before pressing reset. The disposal’s thermal overload protector needs time to cool. Pressing reset too soon after an overload causes it to trip again immediately because the motor is still hot.
- Press the reset button. The small red or black button is on the bottom of the unit. Press it firmly until you feel a click.
- Test with cold water and power on. Turn the water on first, then flip the wall switch. Listen for smooth grinding. If it hums again, repeat steps 2 through 4.
Pro Tip: If the Allen wrench socket is missing or stripped, you can insert a wooden broom handle into the drain opening from above and manually push the grinding plate back and forth. This works in a pinch but replace the unit soon if the socket is damaged.
The 20-minute wait in step 5 is the step most homeowners skip. A 3-to-5-minute wait feels like enough, but the thermal overload protector on most units requires a full 20 minutes to reset reliably.
How do you diagnose and fix garbage disposal leaks?
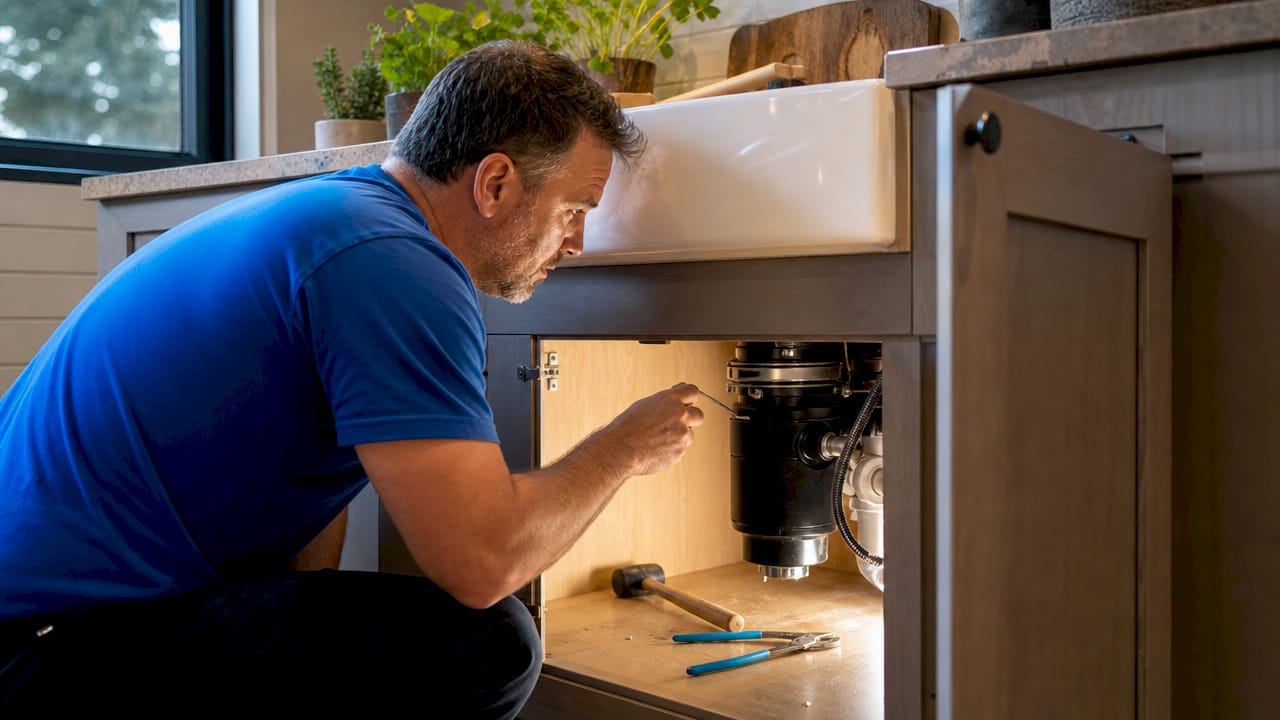
Leak location tells you everything about whether a repair is worth attempting. A leak in the wrong spot means the unit is done.
Leak at the top flange
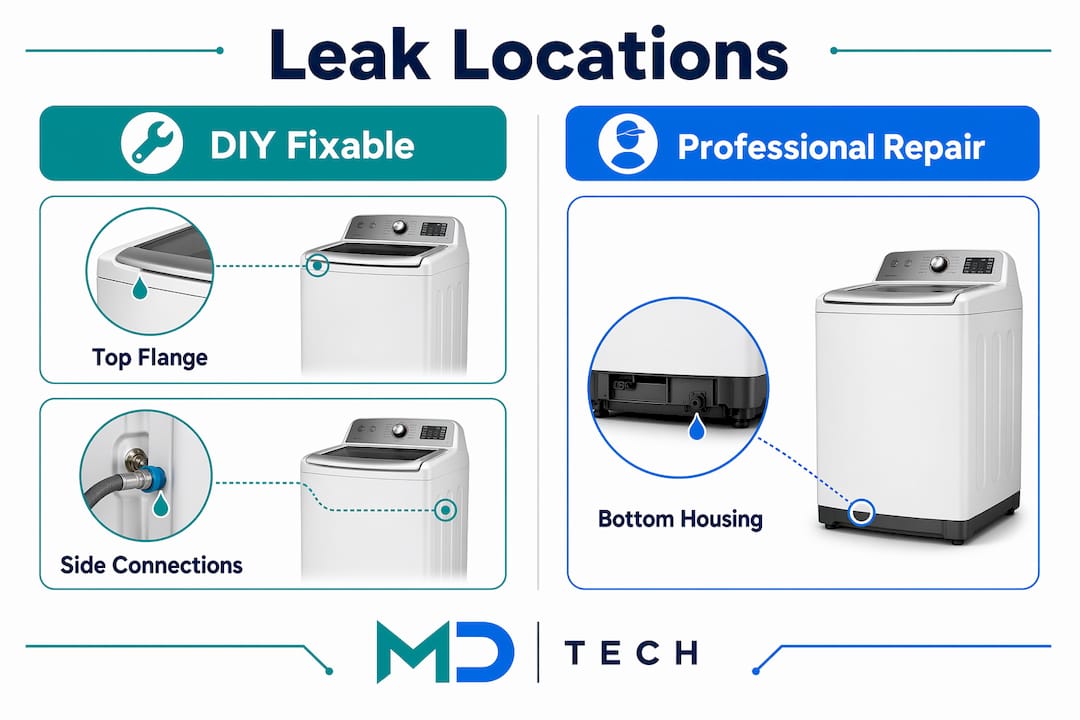
The top flange is the metal ring that connects the disposal to the sink drain. When the plumber’s putty seal between the flange and the sink basin dries out, water seeps down the outside of the unit. Fixing a top-flange leak costs about $3–$8 in plumber’s putty and takes roughly 45 minutes. You remove the disposal, clean the old putty off the flange, apply a fresh ring of putty, and reinstall. This is the most cost-effective DIY fix on the list.
Leaks at the side connections
Side leaks come from two spots: the dishwasher inlet hose and the drain outlet hose. Both connect to the disposal body with hose clamps and rubber gaskets. Tighten the clamps first. If water still drips, replace the gasket. Replacement gaskets cost under $10 at any hardware store and take about 15 minutes to swap out. For related guidance on appliance hose leaks, the dishwasher leak repair guide from Appliancesrepairmdtech covers the same clamp-and-gasket process in detail.
Leaks from the bottom housing
A leak from the bottom of the disposal body means the internal seals have corroded. Internal seal failure is not repairable. The unit must be replaced. No amount of putty or clamp tightening fixes a cracked internal seal. If you see water dripping from the bottom center of the housing, stop troubleshooting and start shopping for a replacement.
| Leak location | Likely cause | DIY fix? | Estimated cost |
|---|---|---|---|
| Top flange | Dried plumber’s putty | Yes | $3–$8 |
| Side hose connections | Loose clamp or worn gasket | Yes | Under $10 |
| Bottom housing | Failed internal seals | No, replace unit | Varies |
How do you troubleshoot garbage disposal power issues?
No power is the second most common complaint after jams. Work through these checks in order before assuming the unit is dead.
- Check the plug under the sink. Homeowners frequently overlook whether the disposal is actually plugged in. The cord can work loose over time from vibration.
- Press the reset button on the bottom of the unit. A tripped thermal overload cuts all power to the motor. Press the button firmly until it clicks. If it does not stay in, wait 20 minutes and try again.
- Check the circuit breaker. Go to your electrical panel and look for a tripped breaker. A tripped breaker sits between the ON and OFF positions. Flip it fully to OFF, then back to ON. For a deeper explanation of why breakers trip, the circuit breaker guide from Appliancesrepairmdtech walks through the most common causes.
- Test the outlet with another device. Plug a phone charger or lamp into the same outlet. If it does not work either, the outlet itself may be faulty.
- Do not attempt internal wiring repairs yourself. If all of the above checks pass and the unit still has no power, the motor or wiring inside the disposal has failed. This requires a licensed technician.
Pro Tip: The reset button only works after the motor has cooled. If you press it and it pops back out immediately, the motor is still hot. Give it the full 20 minutes.
Unsafe DIY electrical work on a disposal can void your home insurance and create a shock hazard. When the problem is beyond the reset button and the breaker, call a professional.
Maintenance tips to prevent future disposal problems
Consistent maintenance prevents most of the problems covered in this guide. These habits take less than five minutes a week.
- Always run cold water during and after use. Cold water keeps grease solid so the grinding chamber can process it properly. Run water for at least 30 seconds after turning the disposal off to flush debris through the drain line.
- Avoid grease, hot water, and chemical cleaners. Chemical drain cleaners damage internal components and corrode the pipes connected to the unit. Mechanical cleaning is always the better choice.
- Clean the grinding chamber monthly with ice and salt. Pour a cup of ice cubes and a tablespoon of coarse salt into the disposal and run it dry for 30 seconds. The ice scours the grinding plate and the salt scrubs the chamber walls. This removes buildup and keeps the unit smelling clean.
- Check hose clamps and mounting bolts every six months. Vibration loosens connections over time. A quick tighten with a screwdriver prevents the side leaks described earlier.
- Know the signs that replacement is smarter than repair. Frequent resets, persistent odors after cleaning, cracked housing, and age over 10 years are all signals that a new unit will cost less in the long run than continued repairs. For help making that call, the repair vs. replacement guide from Appliancesrepairmdtech lays out the decision criteria clearly.
For broader drain cleaning advice beyond the disposal itself, Appliancesrepairmdtech covers the full range of clearing methods and when professional hydro-jetting makes more sense than DIY.
Key Takeaways
A successful garbage disposal repair depends on identifying the exact problem first, using the right tools, and knowing which failures are worth fixing versus which ones require a replacement.
| Point | Details |
|---|---|
| Safety before everything | Unplug the unit and use tools, never hands, before any repair attempt. |
| Rock the wrench both ways | Work the Allen wrench back and forth to clear jams without snapping internal parts. |
| Wait 20 minutes before reset | The thermal overload protector needs a full 20-minute cool-down to reset reliably. |
| Leak location decides repairability | Top and side leaks are fixable; a bottom-housing leak means the unit must be replaced. |
| Cold water is non-negotiable | Use cold water during operation and after every use to prevent grease buildup in drain lines. |
What I’ve learned from years of disposal calls
Most disposal problems are not mysterious. They follow a short list of causes, and the fix is almost always simpler than the homeowner expected. What I see go wrong most often is not the repair itself. It is the sequence.
Homeowners skip the unplug step because the wall switch feels like enough. They force the Allen wrench in one direction because it feels like progress. They press the reset button after two minutes because waiting 20 feels excessive. Every one of those shortcuts either fails or creates a new problem.
The other pattern I see is spending money on chemical cleaners. Chemical products feel like a solution because they are easy to pour. But they corrode the rubber gaskets inside the unit and weaken the drain pipes below it. Mechanical clearing with an Allen wrench and tongs costs nothing and does not damage anything.
The honest cost-saving advice is this: check the plug, check the reset button, and check the breaker before you do anything else. Those three steps resolve a surprising number of calls. If those do not work, follow the jam-clearing sequence exactly as written. If you have a bottom-housing leak, stop there and replace the unit. Patience and the right sequence are the only tools that actually matter.
— MDTECH
When a professional makes more sense than DIY
Some disposal problems go beyond what a wrench and a reset button can fix. If your unit leaks from the bottom housing, hums after multiple jam-clearing attempts, or shows no power after all the basic checks, the repair has moved past DIY territory.
Appliancesrepairmdtech serves homeowners across Orange County and Los Angeles County with licensed technicians who diagnose disposal problems on the first visit. Whether you need a repair or a full garbage disposal replacement, the team carries the parts and tools to handle it the same day. For homeowners weighing whether to fix or replace, the repair vs. replacement guide on the Appliancesrepairmdtech site walks through the exact cost thresholds that make replacement the smarter call. Book online or call to get a same-day quote.
FAQ
How do I fix a garbage disposal that just hums?
A humming disposal means the motor runs but the grinding plate is jammed. Unplug the unit, insert a 1/4-inch Allen wrench into the hex socket on the bottom, and rock it back and forth until the plate rotates freely.
Why does my garbage disposal keep tripping the reset button?
The thermal overload protector trips when the motor overheats. Wait a full 20 minutes for the motor to cool, then press the reset button firmly until it clicks and stays in.
Can I fix a leaking garbage disposal myself?
Top-flange and side-connection leaks are DIY-fixable with plumber’s putty or a replacement gasket. A leak from the bottom housing means internal seals have failed and the unit needs to be replaced.
Is it safe to use chemical drain cleaners in a garbage disposal?
Chemical drain cleaners damage the internal components and corrode the pipes connected to the disposal. Use mechanical methods like an Allen wrench and tongs instead.
When should I call a professional for disposal repair?
Call a professional when the unit has no power after checking the plug, reset button, and circuit breaker, or when the grinding plate will not free up after multiple Allen wrench attempts. Appliancesrepairmdtech offers same-day disposal repair across Orange County and Los Angeles County.