You discover a puddle under your dishwasher after dinner, and panic sets in. Water damage spreads quickly, threatening your flooring and cabinets. Faulty door gaskets cause about 60% of dishwasher leaks, making this the most common culprit homeowners face. This guide walks you through identifying leak sources, preparing for safe repairs, and executing fixes that stop leaks fast. You’ll learn which problems you can tackle yourself and when calling a licensed technician in Orange or Los Angeles County makes sense. By following these practical steps, you’ll protect your home from water damage and restore your dishwasher’s performance without unnecessary stress or expense.
Table of Contents
- Understanding Common Causes of Dishwasher Leaks
- Preparing to Fix Your Dishwasher Leak Safely and Effectively
- Step-by-Step Guide to Fixing Common Dishwasher Leaks
- Verifying Repairs and When to Seek Professional Help
- Get Expert Dishwasher Repair Service in Orange and Los Angeles Counties
- FAQ
Key takeaways
| Point | Details |
|---|---|
| Door seal failure leads leaks | Worn gaskets account for 60% of dishwasher leaks and need replacement every 5 to 7 years |
| Hose issues cause 20% of leaks | Loose or cracked connections at inlet and drain hoses require immediate tightening or replacement |
| Professional help for pumps | Pump and motor seal leaks constitute 15% of cases and demand licensed technician expertise |
| Proper maintenance prevents damage | Regular inspections and correct detergent use reduce leak risk by up to 20% |
Understanding common causes of dishwasher leaks
Identifying why your dishwasher leaks helps you fix the problem quickly and prevents future issues. Most leaks stem from a handful of predictable causes that homeowners can diagnose with basic observation.
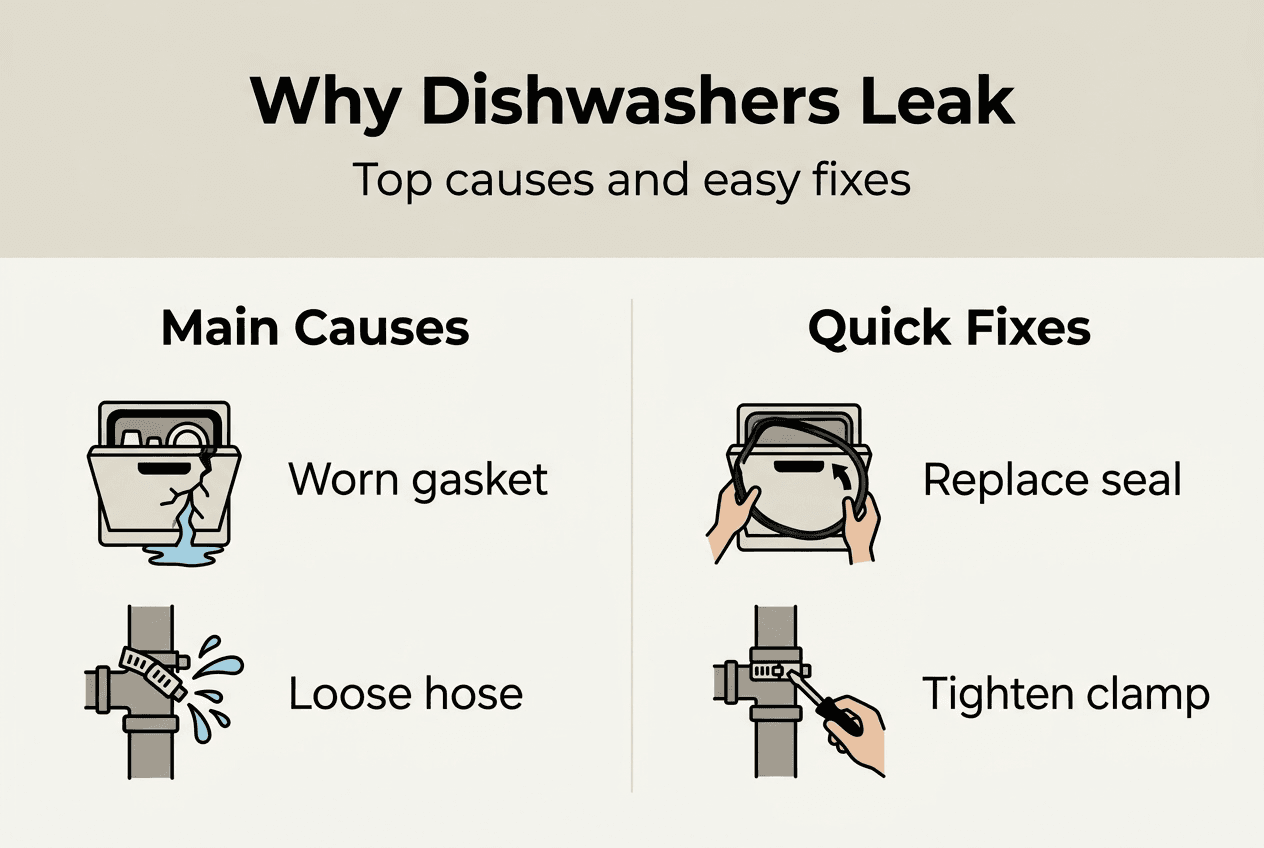
Door gaskets degrade over time, especially after five to seven years of regular use. Heat, detergent exposure, and constant opening and closing harden the rubber seal, creating gaps that allow water to escape during wash cycles. Faulty door gaskets cause about 60% of dishwasher leaks, making this the top issue you’ll encounter. Inspect your gasket for cracks, tears, or stiffness by running your fingers along the entire perimeter.
Incorrect detergent creates excessive suds that overwhelm door seals and force water through small gaps. Using regular dish soap instead of dishwasher-specific detergent or adding too much product generates foam that pushes against seals with unusual pressure. This problem compounds existing gasket wear and accelerates seal failure. Always measure detergent according to manufacturer guidelines and choose products designed for automatic dishwashers.
Hose connections loosen from vibration or crack from age, allowing water to drip or spray during fill and drain cycles. Hose-related leaks account for roughly 20% of dishwasher leak service calls, particularly at inlet valves and drain connections under the sink. Check both ends of supply and drain hoses for moisture, corrosion, or visible damage. Tighten connections with pliers if loose, but avoid overtightening, which can strip threads or crack plastic fittings.
Pump and motor seals develop leaks when internal components wear out, typically after years of heavy use. These leaks appear under the dishwasher and often indicate more complex mechanical failure requiring professional diagnosis. You’ll notice water pooling beneath the unit rather than around the door or sides.
Improper dish loading blocks spray arms or redirects water toward the door, causing leaks that seem mysterious. Overloading prevents the door from sealing completely, while tall items can deflect water jets upward and outward. Arrange dishes according to manufacturer recommendations, leaving space for spray arms to rotate freely. Check out common dishwasher leak sources for additional troubleshooting insights.
Common leak causes and frequency:
| Cause | Percentage of Leaks | Typical DIY Fix |
|---|---|---|
| Door gasket wear | 60% | Replace seal |
| Hose connections | 20% | Tighten or replace hose |
| Pump or motor seals | 15% | Professional repair |
| Improper loading | 5% | Adjust dish arrangement |
Pro Tip: Run your hand along the door gasket while the dishwasher is off. If the rubber feels hard, brittle, or cracked, replacement will likely solve your leak problem immediately.
Preparing to fix your dishwasher leak safely and effectively
Safety comes first when working with any appliance that combines water and electricity. Proper preparation prevents injury and ensures your repair efforts succeed.
Turn off power at the circuit breaker or unplug the dishwasher before starting any inspection or repair work. Safety first: always unplug dishwasher or turn off circuit breaker before repairs to eliminate shock hazards. Locate your electrical panel and flip the breaker labeled for the dishwasher, then test the unit by trying to start a cycle. No response confirms safe power shutoff.
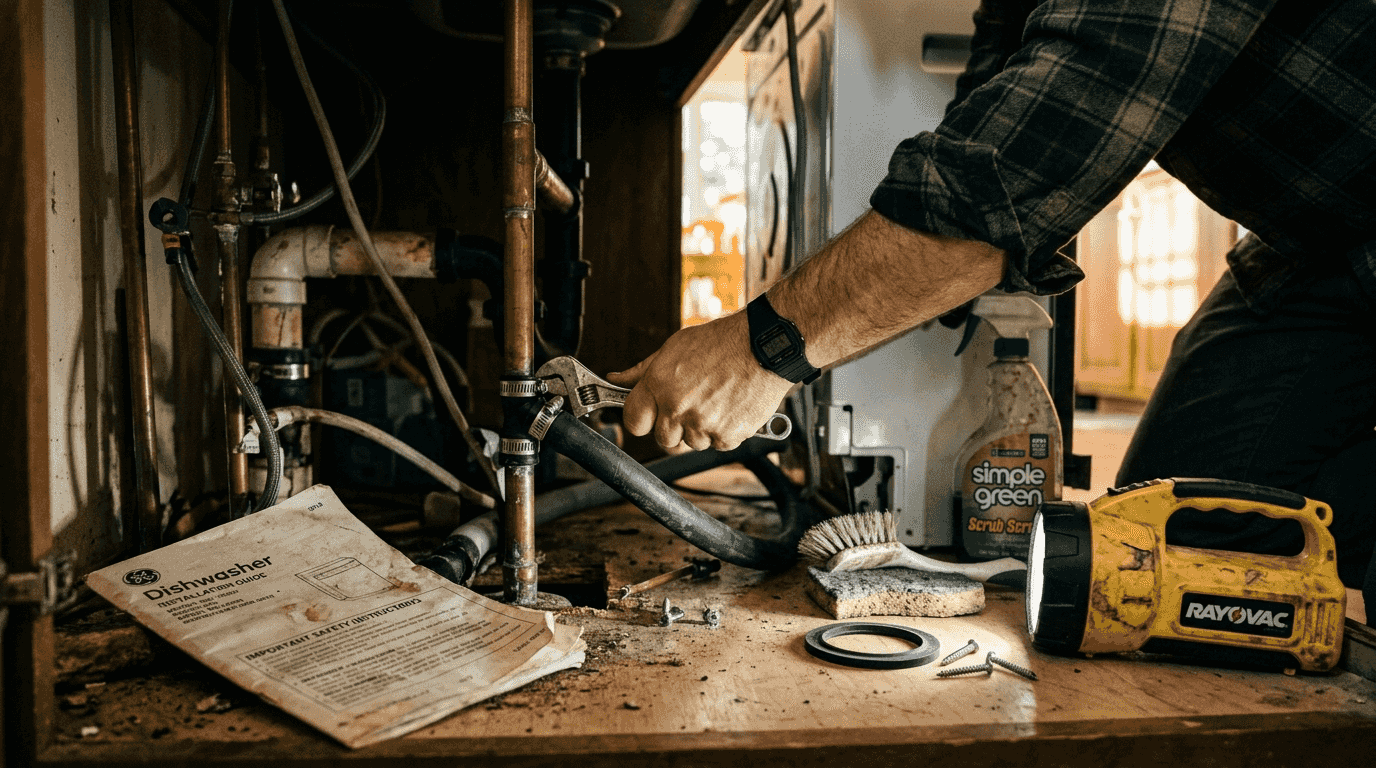
Gather essential tools and materials before beginning repairs to avoid mid-project interruptions. You’ll need a Phillips and flathead screwdriver, adjustable pliers, several absorbent towels, a bucket or shallow pan, flashlight, and mild dish soap for cleaning. If replacing parts, have the new door gasket or hoses ready and confirm they match your dishwasher model number. Check your owner’s manual or the label inside the door frame for exact model information.
Inspect visible components methodically to pinpoint the leak source. Open the dishwasher door and examine the rubber gasket for obvious damage, paying attention to corners where tears commonly start. Shine a flashlight under the unit to check for moisture around hoses, the pump area, and connection points. Pull out the bottom rack and look for water pooling in unexpected places that might indicate spray arm issues or internal seal failure.
Verify your dishwasher sits level using a carpenter’s level placed on the open door. An unlevel installation causes water to pool on one side and leak past seals that would otherwise hold. Adjust the front leveling legs by turning them clockwise to raise or counterclockwise to lower until the bubble centers in the level. Proper leveling ensures the door closes with even pressure across the entire gasket.
Have replacement parts identified and accessible before disassembly. Door gaskets cost between fifteen and forty dollars depending on the model, while hoses range from ten to thirty dollars. Order parts from appliance retailers or manufacturer websites, ensuring compatibility with your specific dishwasher. Consult the dishwasher troubleshooting guide for detailed part identification assistance.
Essential preparation checklist:
- Shut off power at breaker or unplug unit
- Assemble screwdrivers, pliers, towels, bucket, and flashlight
- Obtain replacement gasket or hoses if needed
- Verify model number for correct parts
- Clear area around dishwasher for workspace
- Review hose maintenance tips for best practices
Pro Tip: Take photos of hose connections and gasket positioning before removing anything. These reference images make reassembly faster and help you spot installation errors that could cause new leaks.
Step-by-step guide to fixing common dishwasher leaks
Follow these detailed instructions to address the most frequent leak sources and restore your dishwasher’s watertight operation.
Step 1: Inspect and replace the door gasket. Open the door fully and examine the rubber seal running around the opening. Pull gently on the gasket to check if it’s loose or separating from its channel. Clean the gasket and channel with mild soap and water, removing food debris and mineral deposits that prevent proper sealing. If the gasket shows cracks, tears, or permanent compression, remove it by pulling it out of the retaining groove. Install the new gasket by pressing it firmly into the channel, starting at the top center and working around both sides to the bottom. Ensure the gasket sits evenly without twists or gaps.
Step 2: Check and secure hose connections. Locate the water supply line under the sink where it connects to the dishwasher inlet valve. Inspect the connection for moisture, corrosion, or loose fittings. Tighten the coupling nut with pliers, turning clockwise until snug but not overtightened. Examine the drain hose where it connects to the garbage disposal or sink drain, checking for cracks or loose clamps. Replace any damaged hoses completely rather than attempting temporary patches. Ensure hoses have no kinks or sharp bends that restrict water flow or create pressure points.
Step 3: Verify proper dish loading and spray arm clearance. Remove the bottom rack and spin the lower spray arm by hand. It should rotate freely without hitting dishes or rack tines. Check the upper spray arm similarly, ensuring no tall items block its path. Reload dishes with plates angled downward in the bottom rack and cups inverted on the top rack. Leave space between items for water and detergent to circulate effectively. Avoid overloading, which prevents the door from closing with full gasket compression.
Step 4: Confirm level installation and door alignment. Place a level on the open door and check both side to side and front to back orientation. Adjust the front legs to achieve level positioning, which ensures water drains properly and doesn’t pool against seals. Close the door and observe if it latches smoothly without forcing. Misalignment indicates the unit may have shifted or the floor beneath has settled. Refer to the dishwasher installation guide for detailed leveling procedures.
Step 5: Address pump and motor leaks professionally. If water appears under the dishwasher from the center or back area, the pump seal or motor housing may have failed. Pump-related leaks constitute about 15% and often require professional repair due to the complexity of accessing internal components. These repairs involve disassembling the lower assembly and replacing sealed bearings or gaskets that demand specialized knowledge. Contact a licensed technician rather than attempting these repairs yourself. Proper installation and maintenance can reduce leaks by up to 20%, making professional service a worthwhile investment for complex issues.
Leak diagnosis and repair summary:
| Leak Location | Likely Cause | DIY or Professional |
|---|---|---|
| Around door edges | Worn gasket or improper loading | DIY gasket replacement |
| Under sink area | Loose or damaged hoses | DIY hose tightening or replacement |
| Beneath dishwasher center | Pump or motor seal failure | Professional repair required |
| Front corners of door | Unlevel installation | DIY leveling adjustment |
Pro Tip: Use only dishwasher-specific detergent in the exact amount recommended by the manufacturer. Excessive suds from wrong products or overuse stress door seals and cause leaks even with new gaskets. Review appliance seal inspection tips for ongoing maintenance strategies.
Verifying repairs and when to seek professional help
Testing your repair work confirms the leak is fixed and helps you recognize situations requiring expert intervention.
Run a complete wash cycle after making repairs, monitoring the dishwasher closely throughout. Place towels around the base and door edges to catch any remaining drips. Watch for water pooling during the fill, wash, and drain phases, checking under the unit with a flashlight. Listen for unusual sounds like grinding, squealing, or excessive vibration that might indicate problems beyond simple leaks. A successful repair produces no water outside the tub and operates quietly through all cycle phases.
Check specific areas where leaks commonly reappear if initial fixes were incomplete. Examine hose connections again after the cycle completes, feeling for moisture at coupling points. Inspect the door gasket for water beads or dampness along its outer edge, which signals incomplete sealing. Look under the dishwasher for fresh puddles that indicate pump or internal seal issues persist despite your efforts.
Recognize clear signs that professional repair services are necessary rather than continuing DIY attempts. Persistent leaks after gasket replacement and hose repairs point to internal component failure requiring diagnostic equipment and specialized parts. Pump noise combined with leaking suggests bearing or motor problems that demand complete disassembly. Electrical issues like tripped breakers or burning smells require immediate professional attention to prevent fire hazards.
Licensed repair technicians in Orange and Los Angeles counties have lower repeat service rates because they access manufacturer training, proper tools, and genuine replacement parts. Professional service ensures compliance with local building codes and appliance safety standards. Technicians diagnose complex problems accurately on the first visit, saving you time and preventing water damage from ongoing leaks.
Schedule regular maintenance inspections to catch developing problems before they cause leaks and expensive damage. Annual checkups include gasket condition assessment, hose integrity verification, and spray arm cleaning that extends dishwasher lifespan. Preventive service costs less than emergency repairs and protects your kitchen from flooding.
When to call a professional immediately:
- Leaks persist after replacing gasket and securing hoses
- Water appears from under the unit during cycles
- Unusual noises accompany leaking
- Electrical problems like sparking or burning odors occur
- You smell gas near the dishwasher area
- Multiple repair attempts fail to stop leaks
Pro Tip: Document leak patterns with photos and notes about when water appears during the cycle. This information helps technicians diagnose problems faster and can reduce service call duration and costs. Explore the dishwasher repair workflow to understand professional diagnostic processes.
Get expert dishwasher repair service in Orange and Los Angeles counties
When DIY fixes don’t solve your leak problem, local licensed professionals provide fast, reliable solutions that protect your home from water damage.
Our experienced technicians diagnose dishwasher leaks accurately and complete repairs efficiently, often during the same visit. We handle everything from simple gasket replacements to complex pump rebuilds, ensuring your appliance operates safely and efficiently. Professional service prevents the costly water damage that results from ongoing leaks, protecting your flooring, cabinets, and home value.

We offer same-day service throughout Orange and Los Angeles counties, bringing fully stocked service vehicles to your home with common replacement parts ready. Our licensed team stays current on manufacturer specifications and local code requirements, delivering repairs that last. Whether you need immediate leak repair or want to explore options, we provide clear explanations and upfront pricing.
Check out our comprehensive dishwasher troubleshooting guide for additional self-help resources. When you’re ready for professional assistance, our repair vs replacement guide helps you make informed decisions about your appliance investment. We service all major brands including Samsung appliances, providing factory-trained expertise for optimal results. Contact us today for reliable repairs that keep your kitchen running smoothly.
FAQ
How do I know if my dishwasher leak is serious?
Serious leaks cause persistent water pooling that appears during every cycle, visible damage to flooring or cabinets near the dishwasher, or water emerging from under the unit rather than around the door. If you notice increasing leak volume over several cycles or water spreading beyond the immediate dishwasher area, professional help is necessary to prevent structural damage. Small puddles or isolated drips after cycles might resolve with simple gasket cleaning or hose tightening, making them suitable for DIY attempts first.
Can using the wrong detergent cause my dishwasher to leak?
Yes, incorrect detergent creates excessive suds that overwhelm door seals and force water through small gaps in the gasket. Using incorrect detergent can increase leaks by causing over-sudsing and stressing door seals, particularly when regular dish soap substitutes for automatic dishwasher products. Always use manufacturer-recommended detergent in the exact amount specified, typically one to two tablespoons for standard loads. Excess product doesn’t improve cleaning but does compromise seal integrity and shortens gasket lifespan.
Is dishwasher leak repair covered by warranty in Orange and Los Angeles counties?
Warranty coverage varies by manufacturer and specific warranty terms, but leaks caused by defective parts typically receive coverage during the warranty period. Homeowners should review their warranty documents and contact the manufacturer or authorized service providers to verify coverage for specific leak issues. Licensed local repair services usually honor manufacturer warranties and provide compliant service that maintains your coverage. Check our appliance repair warranty guide for detailed information about warranty claims and coverage verification processes.
How often should I replace my dishwasher door gasket?
Door gaskets typically last five to seven years with normal use before requiring replacement due to hardening, cracking, or compression set. Inspect your gasket annually for signs of wear like visible cracks, stiffness, or gaps when the door closes. If you notice small leaks around the door or the gasket feels brittle when touched, replacement prevents larger problems. Homes with hard water or heavy dishwasher use may need more frequent gasket replacement, while careful maintenance extends gasket life beyond average expectations.