
Most leaking shutoff valves can be stopped by tightening or repacking the packing nut at the stem. If the valve is corroded, won’t shut off fully, or the leak is coming from the pipe connection itself, you’re looking at a replacement or a call to a licensed plumber. Shut the valve (or the main if needed), put down towels, and test with a downstream faucet before deciding your next step.
TL;DR:
- Open the downstream faucet after closing the valve: stopped flow points to an external stem leak, while continued trickling signals internal seal failure.
- Tighten the packing nut clockwise by one eighth to one quarter turn, using a second wrench to steady the body, and stop once dripping ends.
- Repack valves that still close and show light oxidation; replace deeply corroded valves, those that leak internally, or plumbing older than 15 to 20 years.
- Sink or toilet valve replacement typically costs $175 to $450; call a licensed plumber for a failed main shutoff, heavy corrosion, or brittle galvanized pipe.
Table of Contents
- How to tell where the leak is actually coming from
- Immediate stopgap fixes you can try safely
- Rebuild vs replace: which is the right long-term fix?
- Step-by-step guide to repacking or replacing a fixture shutoff valve
- When to call a licensed plumber, expected costs, and what to tell them
- Prevention: simple maintenance to keep shutoff valves reliable
- Licensed-tech tips, photo checklist, and traps to avoid
- What this whole process actually teaches homeowners
- How Appliances Repair MDTech can help you get it fixed right
- FAQ
- Sources
How to tell where the leak is actually coming from
Before you touch a wrench, figure out exactly where the water is escaping. A leak at the handle usually means a different fix than one at the pipe joint, and guessing wrong wastes time and can make things worse.
Look for these signs:
- A leak right below the handle or around the stem, sometimes with greenish oxidation on brass, usually points to a worn packing nut or packing material.
- Puddles forming at the pipe joint below the valve body, or a wet cabinet floor, usually mean the connection or supply line is failing, not the valve itself.
- A wet or corroded flexible supply hose running to the fixture is a supply line problem, separate from the shutoff valve.
- Water that keeps flowing even after you’ve closed the valve all the way means the valve isn’t sealing internally, not just leaking externally.
A quick diagnostic test confirms which category you’re dealing with. Close the valve fully, then open the faucet downstream of it. If water stops, the valve is sealing but leaking somewhere external, like the packing nut. If water keeps trickling through, the internal seal has failed. If you end up calling a plumber, take photos of the valve, the connection point, and any visible water damage so they can scope the job before arriving.
Immediate stopgap fixes you can try safely
Once you’ve spotted a stem or packing leak, you can often stop it on the spot without disassembling anything. Shut the fixture’s local valve first, or the main if the local valve isn’t holding, and lay down towels and a bucket to catch any residual drip while you work.
- Locate the packing nut, the hexagonal nut directly below the handle where the stem enters the valve body.
- Using one wrench to hold the valve body steady and a second to turn the nut, tighten it clockwise in small increments, about one-eighth to one-quarter turn at a time, checking for leaks after each turn.
- Over-tightening can crush the packing washer or crack the valve body, so stop as soon as the drip disappears rather than cranking further for good measure.
- If tightening doesn’t resolve it, the packing material itself may be worn out. Wrapping fresh Teflon packing string or plumber’s tape around the stem before retightening can buy you time until a proper repack or replacement.
- Open the downstream faucet briefly to confirm the fix holds under flow, then close it and monitor the valve over the next hour.
Pro Tip: Turn the packing nut just enough to stop the drip, then stop. A valve that’s seeping slightly after a quarter turn usually needs fresh packing, not more torque.
Some situations call for stopping immediately rather than pushing further. If the stem feels seized or won’t turn smoothly, if the nut is already stripped, or if the leak persists after a reasonable repack attempt, it’s time to shut off the main and call a plumber rather than risk cracking the valve body or snapping the stem.
Rebuild vs replace: which is the right long-term fix?
Once you know the leak is coming from the stem or packing area, you have two real options: rebuild the existing valve or replace it outright. The right call depends on the valve’s condition, not just whether it’s currently dripping.
- Rebuilding makes sense when the valve still shuts off water completely, shows only light surface oxidation, and the stem turns freely once disassembled.
- Replacement is the better call when the valve body shows deep corrosion, when it won’t shut off water even after tightening, or when the supply pipe itself feels brittle or old.
- Quarter-turn ball valves resist seizing and mineral buildup far better than older multi-turn gate or globe valves, which is why they’re the standard upgrade when replacing an aging shutoff.
- Rebuilding typically takes under an hour and costs only the price of a packing kit; full replacement takes longer and costs more but resets the clock on reliability.
If you’re unsure which category your valve falls into, lean toward replacement for anything older than 15 to 20 years, since the pipe threads and valve seat have usually degraded even when the leak looks minor.
Step-by-step guide to repacking or replacing a fixture shutoff valve
Here’s the sequence for either job, since the first several steps are identical.
Tools and materials: two adjustable or channel-lock wrenches, replacement packing material or a new valve, plumber’s grease, a bucket, and old towels.
- Shut off the local valve if it still closes, or the main water valve if it doesn’t, then open the downstream faucet to relieve remaining pressure in the line.
- Place a towel and bucket under the valve to catch drips during disassembly.
- Loosen and remove the packing nut or bonnet nut with one wrench while holding the valve body steady with the other.
- Inspect the stem and existing packing for corrosion, pitting, or crumbling material.
- If repacking, wrap new packing material around the stem and reassemble the nut. If replacing, remove the old valve from the supply pipe and thread on the new one with fresh pipe thread sealant.
- Tighten the nut or valve connection snugly, then turn the water supply back on slowly.
- Test immediately by opening the fixture faucet, then check again after a few hours for any slow seepage.
Opening the valve slowly after a repair helps avoid a pressure surge known as water hammer, which can stress the new connection before it’s fully settled. If you notice the pipe is severely corroded or brittle as you work, stop and call a plumber rather than forcing a connection onto compromised pipe. A simple sink or toilet shutoff valve replacement typically runs $175 to $450 when the valve is easy to reach, which is worth knowing before you decide whether the DIY route is worth the afternoon.
When to call a licensed plumber, expected costs, and what to tell them
Some signs mean you should stop troubleshooting and get a professional on the phone. A valve that won’t close at all, water that keeps spreading despite your best efforts, or a leak near electrical wiring or a finished ceiling are not DIY situations.
- Call immediately if the main shutoff doesn’t stop water flow when tested, since that often points to a leak between the meter and the house, which is the homeowner’s responsibility to fix.
- Call if the valve or surrounding pipe shows heavy corrosion, since forcing a repair on compromised metal can turn a small leak into a flood.
- Call if you’re dealing with an older galvanized system, since removing a seized valve can expose brittle pipe ends that need cutting back or replacing entirely.
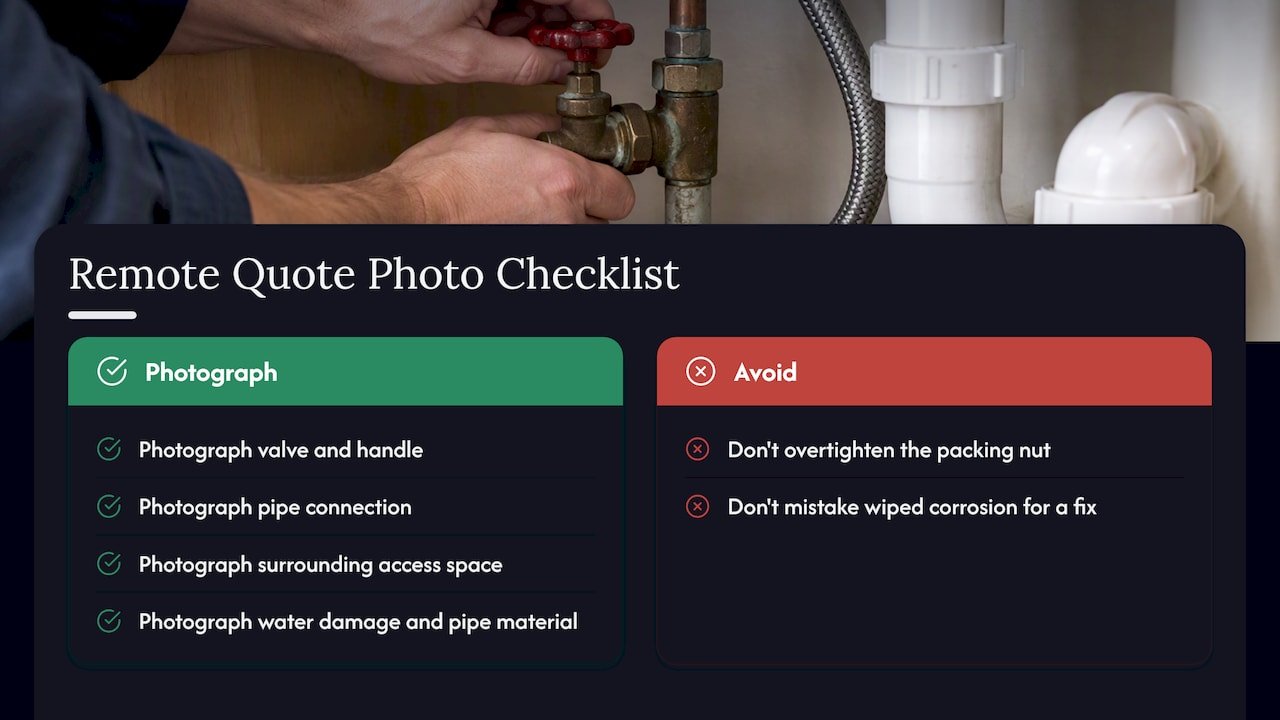
On cost, a straightforward fixture valve swap generally falls between $175 and $450, while main valve replacement runs higher due to access, potential permit requirements, and utility coordination. When you call, mention the valve’s location, how old the plumbing is, and whether you’ve already tried tightening it. Sending four photos, the valve and handle, the pipe connection, the surrounding access area, and any visible corrosion, helps a technician quote accurately before a visit. If you have more than one aging valve in the house, bundling replacements into a single visit avoids paying multiple service-call minimums.
Prevention: simple maintenance to keep shutoff valves reliable
A shutoff valve that works perfectly in an emergency is one you’ve actually tested beforehand. Most people only discover a frozen or leaking valve when they desperately need it.
- Turn every shutoff valve in the house fully closed and open every six months, checking for stiffness, resistance, or new seepage.
- Wipe down the valve area and check for oxidation or early green staining on brass fittings, which signals packing wear before it becomes a visible drip.
- Consider swapping old multi-turn angle stops for quarter-turn ball valves during routine bathroom or kitchen work, since you’re already in the access area.
- If a valve feels stiff or shows early corrosion, replace it proactively before your next fixture repair rather than waiting for it to fail mid-job.
Pro Tip: Exercise valves you rarely touch, like the one behind the water heater or under a rarely used sink, since these are the ones most likely to seize when you actually need them.
Licensed-tech tips, photo checklist, and traps to avoid
Two mistakes come up constantly: cranking the packing nut past the point where the drip stops, which risks cracking the valve body, and assuming that wiping away surface corrosion solves the underlying problem. Cleaning off oxidation is often only a temporary fix, and persistent weeping usually means the valve itself needs replacing.
For an accurate remote quote, send photos of the valve and handle, the pipe connection, the surrounding access space, and anything showing water damage, along with the pipe material if you can see it. Replacement generally makes more sense than a rebuild once a valve shows pitting on the body itself, not just surface staining on the stem, or when it sits on an older galvanized line where the threads are likely as worn as the valve.
What this whole process actually teaches homeowners
The conventional advice on leaking valves tends to jump straight to “replace it,” which oversells the difficulty of a simple packing nut fix and scares people away from a five-minute job that often solves the problem completely. The bigger risk isn’t attempting a repack, it’s over-tightening out of anxiety and cracking a valve that was otherwise fine.
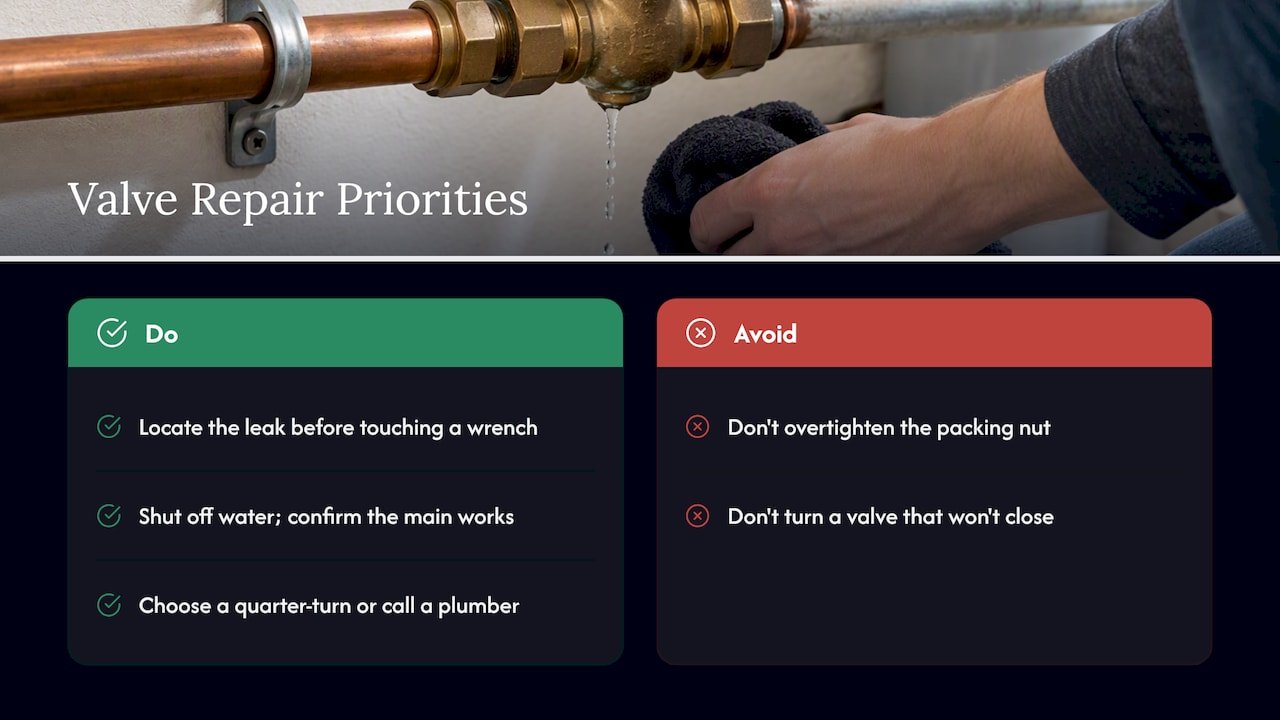
What’s underrated is the diagnostic step. Most guides skip straight to tools and torque, but knowing whether your leak is at the stem, the connection, or the supply line changes everything about which fix applies. Spend two minutes on that test before you touch a wrench.
Prioritize safety over speed: shut off water, confirm the main actually works, and only then decide between a quarter turn of the packing nut and a phone call. A valve that won’t fully close is not a tightening problem, no matter how tempting it is to keep turning.
— MDTECH
How Appliances Repair MDTech can help you get it fixed right
When a valve is corroded, won’t shut off, or the leak is at the pipe connection, a licensed hand gets it done safely in one visit instead of a weekend of trial and error.

- We handle plumbing repair and valve replacement for fixture and main shutoffs across Orange and Los Angeles counties.
- Have your valve’s location and age ready, along with photos of the leak, so we can scope the job before we arrive.
- On arrival, we diagnose the valve, give you a clear quote, and complete the repair or replacement the same visit when possible.
Book a visit through our plumbing repair services page and get your shutoff handled by a licensed technician.
FAQ
How do I get a shutoff valve to stop leaking?
Tighten the packing nut clockwise in small increments, about one-eighth to one-quarter turn at a time, checking after each adjustment. If that doesn’t work, the packing material likely needs replacing, and a valve with heavy corrosion usually needs full replacement rather than another round of tightening.
How much would a plumber charge to replace a shutoff valve?
A straightforward sink or toilet valve replacement typically costs $175 to $450 when the valve is easy to access. Main valve replacements cost more, with corrosion, limited access, and permit or utility coordination pushing the price higher.
Is it better to repair or replace a leaking shutoff valve?
Repacking is cheaper and faster when the valve still shuts off water completely and shows only light corrosion. Replacement, especially with a quarter-turn ball valve, is the better long-term choice once the valve shows real corrosion or won’t seal fully.
Why does water keep coming through after I close the shutoff valve?
If water still flows after the valve is fully closed, the internal seal has failed rather than just the external packing. This often means the valve needs a full rebuild of its internal parts or outright replacement, since a worn seat or washer won’t reseal with simple tightening.
How do I test that my main shutoff valve actually works?
Close the main valve completely, then open a faucet in the house to see if water flow stops. If water keeps running, there may be a leak or failure between the meter and the house, which is worth confirming before you ever need the main valve in an emergency.
Sources
- Fixing a water shutoff valve leak | Family Handyman
- How to fix leaking shut-off valve | Lin’s Valve
- Shutoff valve replacement cost: sink, toilet, main water valve (HomeRepairCalc)