
If you smell rotten eggs, hear a hiss near a pipe, or see a hissing appliance connector, stop everything, get everyone out of the house, and call your gas utility from outside. Do not flip light switches, light a match, or touch a phone until you’re clear of the building. If nothing smells or sounds wrong and you just want a routine safety check, you can safely run a step by step gas line inspection yourself, covering visual checks, a soap-bubble test, and a basic meter check, before deciding whether to call a licensed technician.
- Ventilate the area by opening doors and windows if you catch a whiff of gas but it’s faint.
- Shut off the supply at the appliance valve or the main meter valve only if you already know where it is and how to turn it.
- Once outside, call the gas utility’s emergency line, not 911 first, unless someone is in immediate danger.
Pro Tip: Keep the gas utility’s emergency number saved in your phone under a name you’ll actually recognize in a panic, like “GAS EMERGENCY,” not just the utility’s brand name.
Never search for a leak with an open flame, never flip a light switch or garage door opener inside a home you suspect has a leak, and never attempt to repair or tighten a fitting that’s under pressure. According to SDGE-SoCalGas inspection guidelines, the moment a technician identifies a potential leak, the protocol calls for stopping all testing immediately and evacuating occupants rather than trying to isolate or fix the problem on the spot. Homeowners should follow that same instinct.
Key Takeaways
A safe gas line inspection follows a fixed order: visual check, then detector sweep, then leak-solution confirmation, and it stops the moment a leak is found.
| Point | Details |
|---|---|
| Evacuate on confirmed leak | Stop testing, leave the house, and call the utility from a safe location outside. |
| Sweep slowly | Move a combustible gas detector at roughly one inch per second across every joint. |
| Watch brass connectors | Old flexible brass connectors behind appliances are a common, overlooked failure point. |
| Know your limits | Pressure testing and buried line repairs require a licensed technician, not DIY tools. |
| Call MDTECH for pro work | MDTECH’s licensed technicians handle pressure testing, connector swaps, and permit filing across Orange and Los Angeles counties. |
Table of Contents
- What Is a Gas Line Inspection, and Why Does It Matter?
- What Tools and Safety Prep Do You Need Before You Start?
- How Do You Perform a Step by Step Gas Line Inspection?
- What Do Licensed Technicians Test That You Shouldn’t?
- What Physical Damage and Corrosion Should You Watch For?
- When Should You Stop and Call a Professional?
- How Often Should You Inspect, and What Does It Cost?
- What Should a Gas Line Inspection Report Include?
- What’s the Fastest Way to Check Your Gas Lines Today?
- When Is It Time to Bring in a Licensed Technician?
- What Do Pros Wish Homeowners Knew About Gas Lines?
- How Can MDTECH Help With Your Gas Line Concerns?
- Where Can You Learn More About Gas Line Codes and Safety?
- Sources
What Is a Gas Line Inspection, and Why Does It Matter?
A gas line inspection is a systematic check of everything carrying natural gas from the point it enters your property to the connector feeding each appliance. That includes the meter set, exposed piping in the basement or crawl space, shutoff valves, flexible connectors behind the stove or dryer, and the fittings joining all of it together. Most homeowners never look at this system until something goes wrong, which is exactly backward. A five-minute visual sweep twice a year catches problems long before they become emergencies.
The stakes are real and specific. A leak that pools in an enclosed space can ignite from something as small as a pilot light or a spark from a light switch, causing fire or explosion. Incomplete combustion in a poorly vented appliance produces carbon monoxide, an odorless gas that causes asphyxiation without warning. Slow leaks that go undetected for months can also warp flooring, corrode nearby metal, and rot framing near the point of escape.
The procedures homeowners and technicians follow aren’t arbitrary. They trace back to specific standards:
- NFPA 54 / International Fuel Gas Code (IFGC): governs piping materials, test pressures, and approved leak-detection methods for residential gas systems.
- International Mechanical Code (IMC): covers venting, combustion air, and appliance installation requirements tied to gas equipment.
- PHMSA / 49 CFR Part 192: federal pipeline safety rules that dictate how buried gas service lines must be installed and protected.
- Utility safety guidance: companies like SoCalGas publish their own field inspection protocols that mirror and extend the code requirements above.
What Tools and Safety Prep Do You Need Before You Start?
Gather everything before you touch a single fitting. Running back inside for a tool halfway through breaks your ventilation and wastes the calm, methodical approach this job demands.
- A handheld combustible gas detector (CGI), sometimes sold as a natural gas leak detector, for sweeping accessible pipe runs.
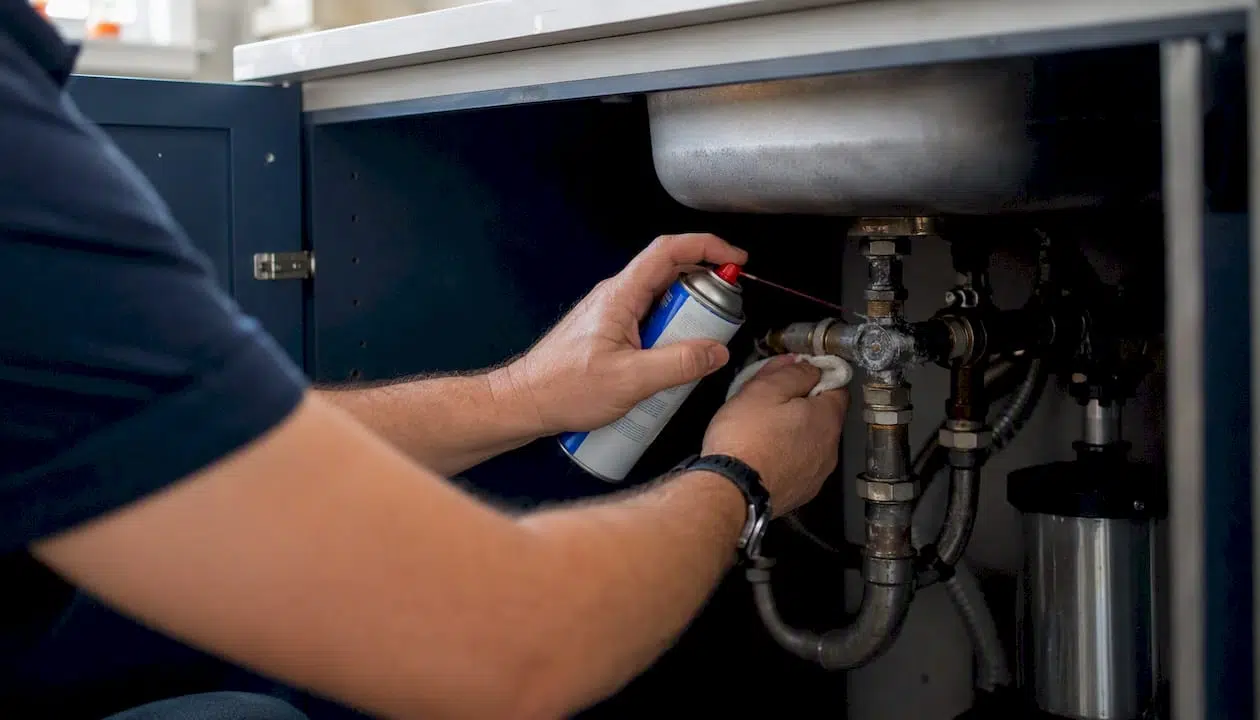
- A commercial leak-detection solution, or at minimum a soapy-water mix, in a small spray bottle.
- An adjustable wrench sized for your shutoff valves and connector fittings.
- A flashlight strong enough to check dim crawl spaces and behind appliances.
- Basic PPE: gloves and eye protection, especially if you’re working in a crawl space with sharp metal edges or rodent debris.
- A working phone kept in your pocket, not set down somewhere you’d have to go back for.
Before you start, open a window or two for airflow, and confirm you know your fastest route outside from wherever you’ll be working. Do not relight any pilot lights during the inspection itself; leave them as you find them until the check is complete. Keep candles, cigarettes, and anything with an open flame or spark risk out of the space entirely.
Pro Tip: Skip the dish soap if you can. Household detergent works in a pinch, but professional micro leak detection solutions adhere better to metal fittings and catch slow, pinhole-sized leaks that dish soap simply won’t bubble on. A strong leak can also blow a soap film away before you notice anything, which is exactly the kind of false negative you don’t want on a safety check.
How Do You Perform a Step by Step Gas Line Inspection?
Work through this in order, and don’t skip steps to save time. Each one builds on the last, and skipping the visual check before you break out the detector just means you’ll miss obvious damage that would have told you to stop early.
- Walk the perimeter first. Check the meter set outside for physical damage, rust, or anything leaning against it. Look for vegetation growth that might be hiding a buried line marker or vent pipe.
- Inspect exposed indoor piping. Follow the visible line from where it enters the house through the basement, crawl space, or utility closet. Look at every joint and fitting along the way.
- Check appliance connectors individually. Look behind the stove, dryer, water heater, and furnace. Pull each appliance out gently if it’s on wheels or has slack in the line.
- Run the odor check. In open, unconfined areas like outdoor meter sets, a simple smell test is a valid first pass. Indoors, or if you’re not confident in your sense of smell, switch to the electronic detector instead, since people with a diminished sense of smell can miss a real leak entirely.
- Sweep with the combustible gas detector. Move the sensor slowly along every joint, valve, and connector, holding it close to the surface. Professionals sweep at roughly one inch per second, which is far slower than it sounds; rushing this step is the single most common reason homeowners miss a real leak.
- Confirm suspect spots with soapy water or leak solution. Spray any joint that triggered the detector, or any joint you’re simply unsure about. Watch for bubbles forming and growing over 30 to 60 seconds.
- Check the meter dial. With all appliances off and pilot lights left alone, watch the meter’s smallest dial for movement. Any slow, steady creep with everything off suggests a leak somewhere in the system.
- Stop immediately if you find a confirmed leak. Don’t try to tighten the fitting or investigate further. Shut off the gas at the valve nearest the leak or at the main, get everyone outside, and call the utility.
A note on timing: a full walkthrough of an average single-family home takes most homeowners 30 to 45 minutes when done carefully. Rushing it defeats the purpose.
What Do Licensed Technicians Test That You Shouldn’t?
Everything above stops at confirmation, not repair, and definitely not pressure testing. Once a homeowner finds a suspect joint or a moving meter dial, the job shifts to a licensed technician, and for good reason: the next steps involve pressurizing a fuel system, which carries real risk if done without training and the right gauges.
Professional technicians follow a documented sequence that starts where the homeowner check leaves off: a full visual sweep, then an electronic detector pass across every fitting, then confirmation with a micro-leak solution at any suspect joint, and finally a pressure test or diagnostic if the situation calls for it. NFPA and IFGC code language specifies that test pressure must run at least 1½ times the system’s proposed maximum working pressure, and never less than 3 psi, held for a set observation window to confirm there’s no pressure drop. That number matters because it’s precise enough that a homeowner’s shop gauge simply isn’t built to read it reliably.
“When a system fails a pressure test or an electronic sweep flags a leak, the correct response is to stop, evacuate the affected area, and avoid operating any combustion appliance until the leak is isolated or repaired.” This is the standard utility guidance behind professional inspection protocols, and it applies just as much to a homeowner’s own check as it does to a technician’s.
For leaks that are hard to pin down through sweeping alone, pros also reach for infrared imaging, tracer gas methods, and high-sensitivity electronic sniffers, tools that cost more than most homeowners will ever justify buying for occasional use.
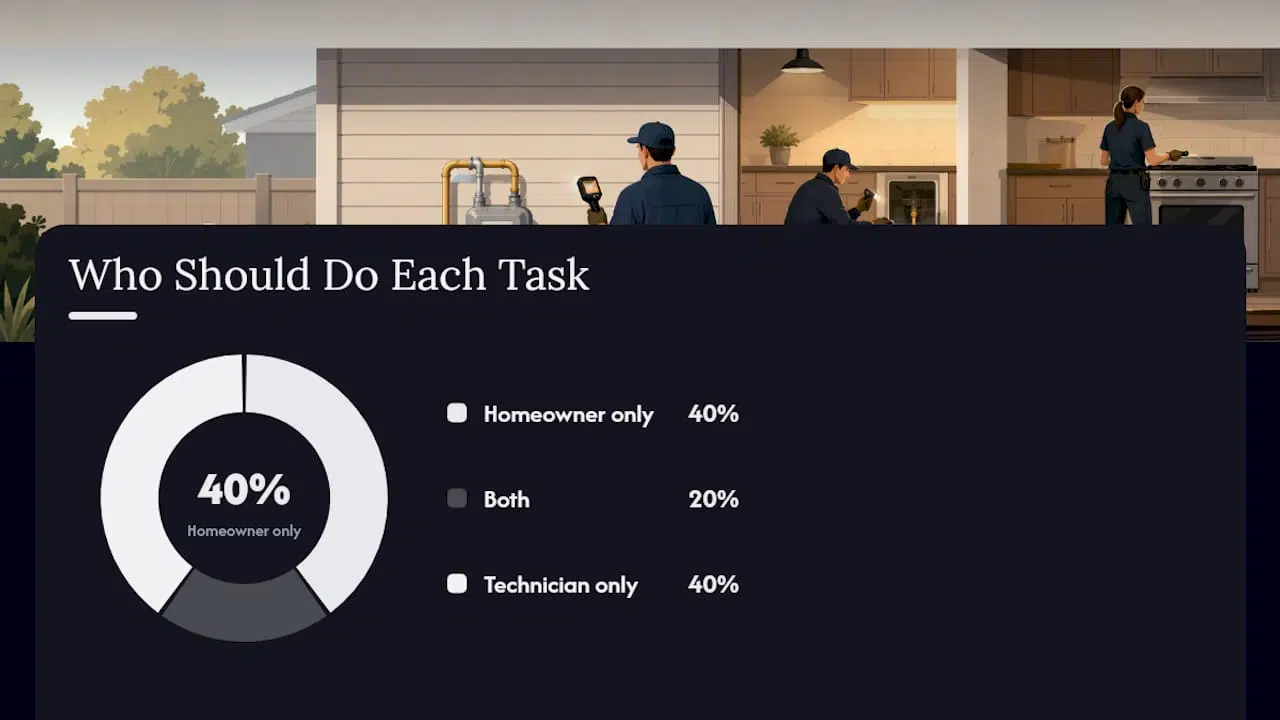
| Task | Who Should Do It | Tools/Certification Required | Risk If Misapplied |
|---|---|---|---|
| Visual inspection of exposed pipe | Homeowner | Flashlight, basic knowledge | Low, mainly missed damage |
| Soap-bubble or leak-solution test | Homeowner | Leak solution, spray bottle | Low, may miss slow leaks |
| Combustible gas detector sweep | Homeowner or technician | Handheld CGI unit | Low if used correctly |
| Pressure testing the system | Licensed technician only | Calibrated gauges, permit in some cases | High, risk of overpressurization or missed leak |
| Purging and reconnecting lines | Licensed technician only | Trade license, specialized fittings | High, fire/explosion risk |
What Physical Damage and Corrosion Should You Watch For?
Leaks aren’t the only thing to look for. Physical damage and slow corrosion often show up long before a joint actually starts leaking, and catching them early is cheaper than waiting for a failure.
- Rusted joints and fittings: surface rust on black iron pipe usually means moisture exposure over years; medium risk, since it can eventually weaken the joint enough to loosen or crack.
- Dented or gouged pipe: often caused by nearby construction, storage boxes leaned against a line, or a lawnmower strike near an outdoor meter run; medium to high risk depending on depth, since a deep gouge thins the pipe wall.
- Old flexible brass connectors: these older connectors are one of the most overlooked hazards in a home, since brass fatigues and cracks with age far more readily than modern stainless steel connectors; high risk once they show any pitting or cracking.
- Loose fittings at unions or valves: often the result of vibration from an appliance or ground settling; medium risk, worth tightening only if you’re confident and the line isn’t under active pressure testing.
- Missing tracer wire on buried lines: federal pipeline rules require a means of locating nonmetallic buried service lines, and a line without tracer wire is a real problem if you ever need to find it for excavation or repair; low immediate risk but high cost risk later.
If you’re photographing defects for your own records, get a close, well-lit shot of the fitting itself along with a wider shot showing its location relative to the appliance or wall, so a technician can identify it quickly from your phone before ever stepping inside.
Corrosion rarely announces itself with a smell. A rusted joint can sit quietly for years before it finally lets go, which is exactly why a twice-yearly visual check matters more than most homeowners assume.
Pro Tip: If you find an old brass flexible connector behind an appliance, don’t wait for it to show visible damage before replacing it. Swap it out proactively; they’re inexpensive compared to the alternative. You can read more about why timely gas line checks protect your home before your next appliance swap.
When Should You Stop and Call a Professional?
Some signs mean the inspection is over and it’s time to act, not investigate further. A strong sulfur smell anywhere in the house, a hissing sound near any fitting, bubbling that grows rapidly under a leak solution, or a meter dial that keeps creeping with everything off, all of these mean stop testing immediately.
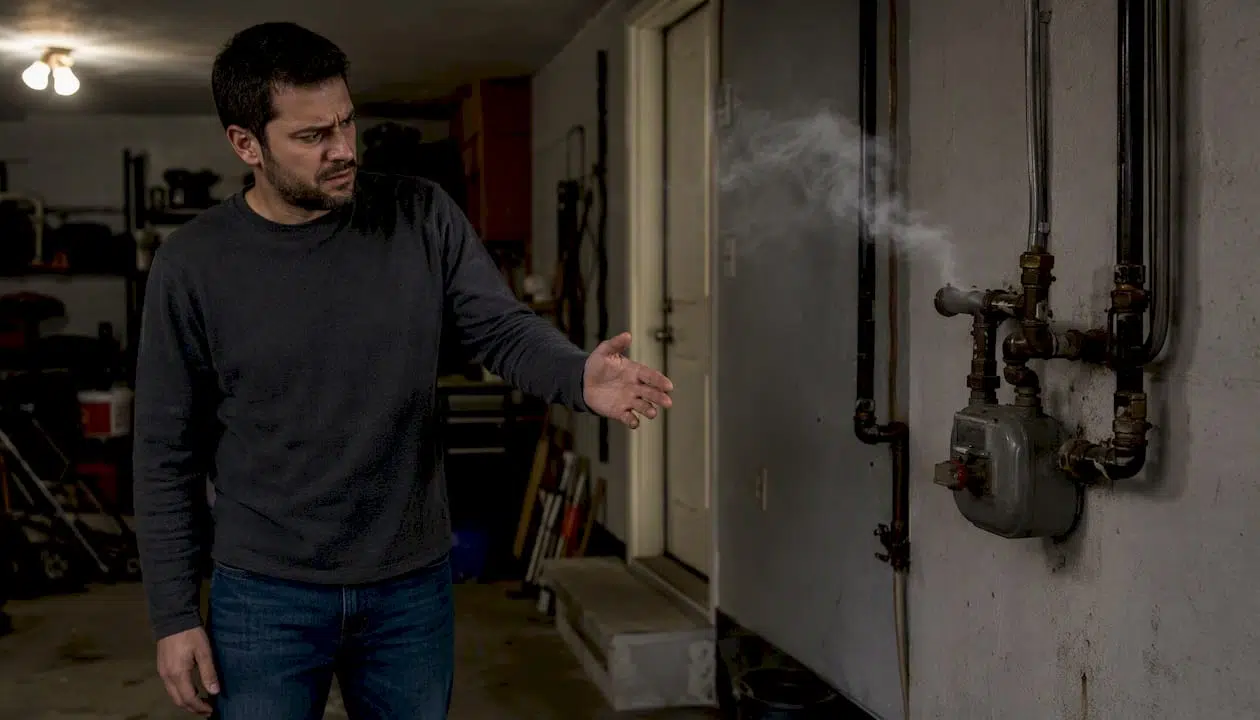
Evacuate everyone, including pets, and don’t flip any switches or unplug anything on your way out. Call the gas utility’s emergency line from a safe distance, not from inside the garage or driveway. If you know where the main shutoff valve is and can reach it safely without going back through a gas-filled space, turn it a quarter turn until it’s perpendicular to the pipe. If reaching it means walking back through the affected area, skip it and let the utility or fire department handle it.
Have this information ready when you call: your meter number (usually printed on the meter itself), what you observed and where, whether any appliances were running at the time, and how long ago you noticed the smell or sound. That context helps the responding technician move faster once they arrive.
For anything beyond a confirmed leak, whether it’s a cracked fitting, a failed pressure test, or a buried line that needs excavation, you’ll want a technician licensed for gas work, typically carrying a C-4, C-20, or C-36 classification depending on your state’s licensing structure. Routine appliance connector swaps and pressure certification both fall under that same licensing requirement in most jurisdictions.
How Often Should You Inspect, and What Does It Cost?
A visual walkthrough once a year is a reasonable baseline for most homes, done any time you’re already checking smoke detectors or doing seasonal maintenance, as explained in this homeowner’s guide to servicing gas boilers safely. Bump that up to right after any excavation, landscaping work, or foundation repair near your gas line, and again anytime you install a new gas appliance or move an existing one.
Flexible connectors deserve their own attention: swap them out every 10 to 15 years regardless of appearance, sooner if you spot any pitting or stiffness when you flex them by hand. Buried service lines running from the meter to the house are worth a professional look every few years, especially in older neighborhoods where original installations may predate current tracer-wire requirements.
Costs vary by region and by how much access work is involved, so treat these as planning ranges rather than quotes. A detailed gas appliance safety checklist can help you decide which of these services you actually need before you call anyone.
What Should a Gas Line Inspection Report Include?
A proper professional report isn’t just a checkbox form. It documents exactly what was tested, how, and what was found, which matters if you ever need it for insurance, resale, or a warranty claim down the line.
- Test pressures used and the observation window for any pressure test performed.
- Detector readings at each point swept, including any flagged locations.
- Exact locations of any defects found, ideally with photos.
- Corrective actions taken or recommended, and whether they were completed on-site or scheduled.
- The inspecting technician’s name and license number.
Permits typically come into play for new gas service installations or significant repairs involving buried line work, and the licensed contractor doing the work usually files that paperwork, not the homeowner. Keep a folder, physical or digital, with every inspection report and photo you’ve collected. Future buyers, insurance adjusters, and warranty companies will all ask for exactly this kind of documentation, and having it ready saves weeks of back-and-forth later.
What’s the Fastest Way to Check Your Gas Lines Today?
Print this and keep it near your gas meter or in a kitchen drawer for quick reference:
- Walk the meter and visible piping for rust, dents, or damage.
- Check every appliance connector, especially old brass ones behind the stove and dryer.
- Smell test outdoors; use the detector indoors or if your sense of smell is unreliable.
- Sweep suspect joints with a detector, then confirm with soap solution or leak fluid.
- Watch the meter’s smallest dial with everything off.
- Stop and evacuate immediately if you find a confirmed leak.
Laminate the sheet if you can, or slide it into a plastic sleeve. A checklist that survives a spilled coffee is a checklist you’ll actually reach for during a real scare.
When Is It Time to Bring in a Licensed Technician?
Some jobs simply require a license, not because homeowners can’t learn the steps, but because the tools and the liability both call for it. Pressure testing a system, replacing a buried section of line, pulling permits for new service, and diagnosing a complex appliance that won’t hold a steady flame all fall into that category.
MDTECH’s licensed technicians handle exactly this kind of work across Orange County and Los Angeles County, covering gas conversions, appliance connections, and the diagnostic work that goes beyond a homeowner’s soap-bottle test. A typical visit includes a full inspection checklist, a written estimate before any repair begins, and permit handling when the job requires it, so there’s no guessing about scope or cost partway through.
- Pressure testing and certification for insurance or resale purposes.
- Valve replacement and buried line repair work.
- Complex appliance diagnostics when a unit won’t hold a consistent flame or shows inconsistent gas flow.
Pro Tip: Ask for a written estimate before work starts, and confirm upfront whether permit filing is included in that quote. Some smaller repairs don’t need one, but larger jobs almost always do, and it’s better to know that before the technician arrives with tools in hand.
What Do Pros Wish Homeowners Knew About Gas Lines?
The most common mistake isn’t a lack of caution. It’s the opposite: homeowners who find a slightly loose fitting or a small patch of rust and decide to tighten it themselves without ever confirming whether the line is even pressurized at that moment. A wrench in the wrong hands on a live line turns a minor issue into a real one fast.
The second most common mistake is simpler and cheaper to fix. People replace a flexible connector, then forget which one they swapped and when. Tag the new connector with a piece of tape and a date written in permanent marker. It sounds almost too simple to matter, but it saves real time on the next inspection, and it tells whoever checks the line after you exactly what’s new and what still needs watching. Keep a clear foot of space around every gas valve too. A valve buried behind storage boxes is a valve nobody can reach fast in an emergency.
How Can MDTECH Help With Your Gas Line Concerns?
If your inspection turns up a suspect joint, an aging brass connector, or a meter dial that won’t sit still, that’s the point where a professional visit pays for itself. MDTECH’s licensed technicians serve homeowners across Orange County and Los Angeles County with gas appliance safety checks, pressure testing, connector replacement, and full gas conversion work, all backed by a written estimate before any repair starts.
A typical visit starts with the technician running through the same checklist categories covered here, visual, detector sweep, and connector review, then confirming findings with proper pressure-testing equipment where needed. If your issue turns out to be a permit-triggering repair, MDTECH handles that paperwork as part of the job rather than leaving you to sort it out separately. For homeowners weighing whether a fix is worth it or whether it’s time to replace an aging appliance altogether, our guide on repair versus replacement breaks down that decision plainly. When you’re ready, book a professional gas line repair visit and get a technician out to confirm what your own inspection found.
Where Can You Learn More About Gas Line Codes and Safety?
- SDGE-SoCalGas Inspection Guidelines V7.3: the utility protocol behind the visual sweep, detector sweep, and micro-leak confirmation sequence referenced throughout this guide.
- First Revision Draft BSR Z223.1 / NFPA 54-2024: the code language setting minimum test pressures and approved leak-detection methods.
- 49 CFR § 192.361: federal rules on burial depth, protection, and locating requirements for buried service lines.
- Inspectapedia’s gas leak detection guide: a practical breakdown of soap-bubble testing and its limitations compared to pressure testing.
- Liberty Utilities’ guide to maintaining natural gas pipes: clear explanation of where homeowner responsibility for piping begins and ends.
These sources cover the professional procedures and code requirements mentioned throughout this guide, and they’re worth a direct read if you want the full regulatory language behind any single step.
This article provides general safety information and does not replace guidance from your local gas utility or a licensed gas technician. Confirm current code requirements and permit rules with your utility or a qualified professional before performing any repair work.
This article is general information, not a substitute for advice from a qualified lawyer. Consult a qualified legal professional about your own circumstances before acting on anything here.
Sources
- SDGE-SoCalGas Inspection Guidelines V7.3
- Inspectapedia — How to Test or Look for LP Gas System Leaks
- 49 CFR § 192.361 — Service lines: Installation
- Liberty Utilities — Maintaining natural gas pipes