
TL;DR:
- A plumbing leak guide helps homeowners detect, repair, and prevent water leaks before damage occurs. It emphasizes checking water meters, inspecting fixtures, and monitoring water pressure to identify hidden leaks early. Proper tools and routine maintenance can save significant repair costs and conserve water.
A plumbing leak guide is a practical system for detecting, repairing, and preventing water leaks in your home before they cause serious damage. The average U.S. household wastes over 10,000 gallons annually from easy-to-fix leaks. That is enough water to fill a backyard swimming pool. Fixing those leaks saves roughly 10% on your water bill. This guide walks you through every step, from reading your water meter to replacing worn parts, so you can stop leaks early and protect your home.
What does a plumbing leak guide actually help you find?
Leak detection is the first skill every homeowner needs. Many leaks are silent. They hide inside walls, under slabs, or inside toilet tanks, and they cost you money every single day without a single visible drip.
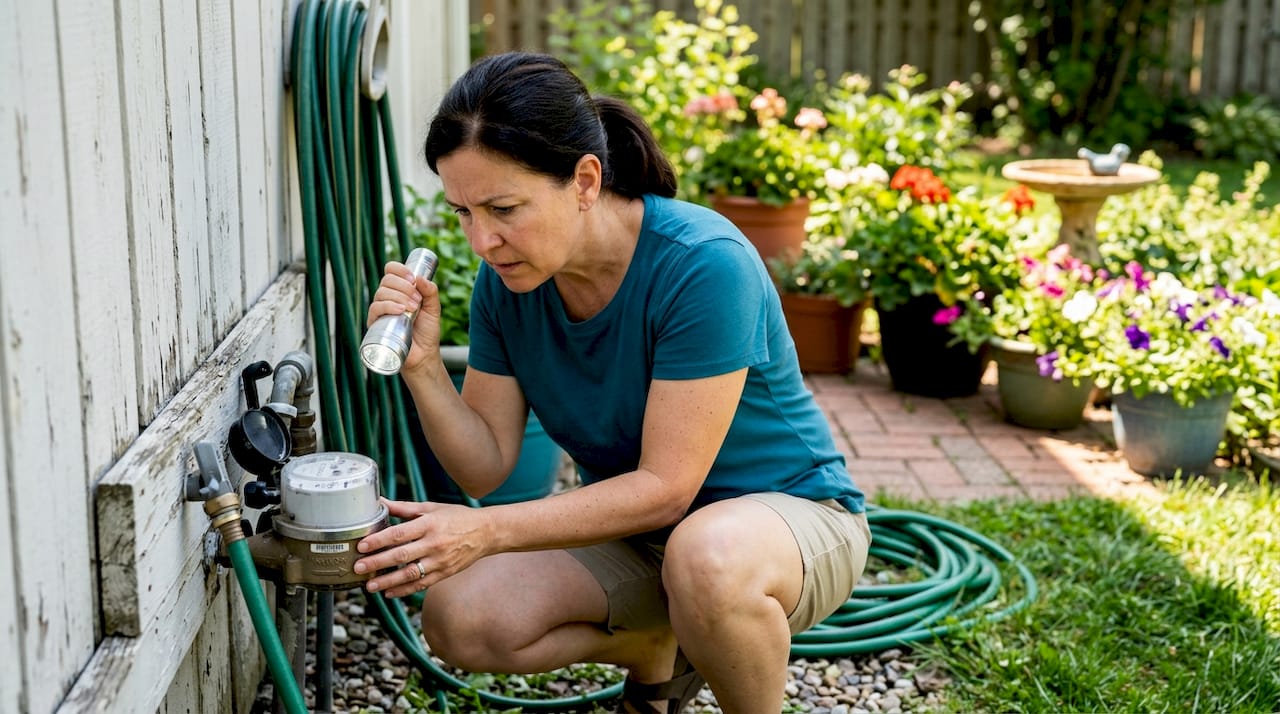
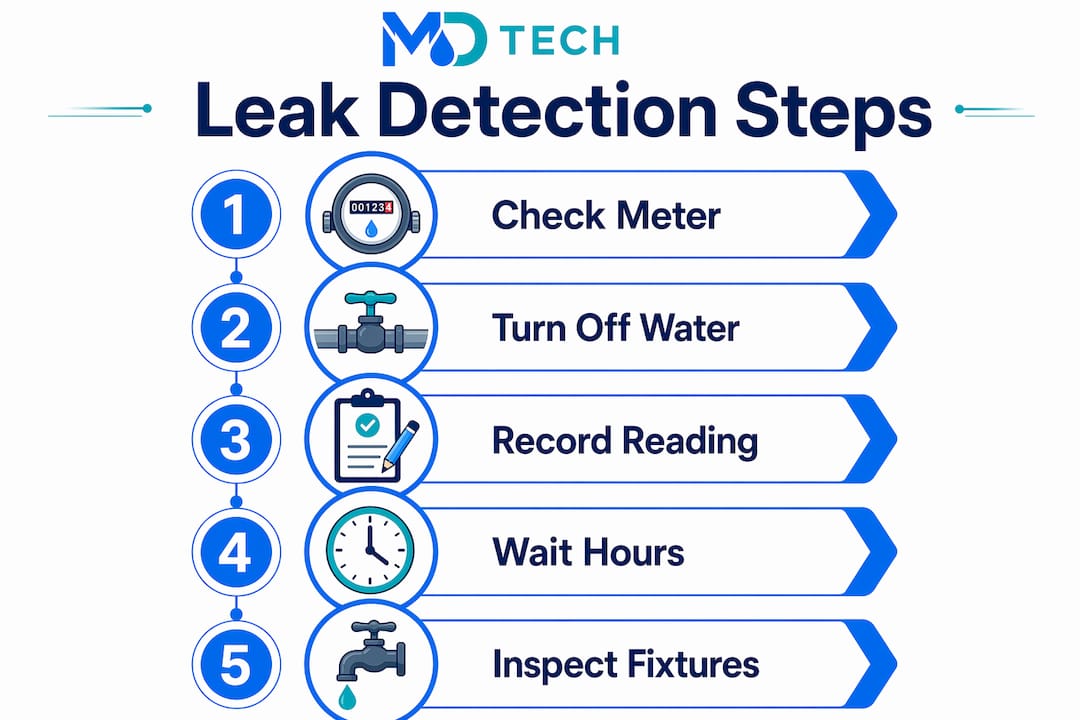
The fastest starting point is your water meter. Turn off all water use, record the meter reading, wait one to two hours, then check again. If the numbers moved, you have a leak somewhere in the system. This no-use meter check costs nothing and confirms a pressurized leak without calling anyone.
The two-stage meter test goes one step further. After confirming movement, close your main shutoff valve and watch the meter again. If it stops, the leak is inside the house. If it keeps moving, the leak is in the underground service line and needs professional attention.
Toilets are the most common silent offenders. Drop a few drops of food coloring into the tank and wait 10 minutes without flushing. Color appearing in the bowl confirms a flapper leak. That one worn rubber part can waste thousands of gallons per year.
Here are the key signs of a plumbing leak to check throughout your home:
- Unexplained spikes in your monthly water bill
- Wet spots, staining, or soft drywall on ceilings and walls
- Musty odors in cabinets under sinks or near appliances
- Sound of running water when all fixtures are off
- Unusually green or soggy patches in your lawn near the water line
Pro Tip: Use a pinless moisture meter to scan walls before cutting into drywall. Readings above 17% moisture in drywall confirm an active leak behind the surface.
Hidden leaks are tricky because water travels along structural members before it appears as a wet spot. The visible stain is rarely directly above the actual pipe. Always inspect vertically around the stain, not just the area directly beneath it.
What tools do you need for leak detection and repair?
The right toolkit makes the difference between a 20-minute fix and a ruined weekend. Most homeowners already own several of these items.
| Tool | Purpose | Estimated Cost |
|---|---|---|
| Teflon pipe tape | Seals threaded fixture joints | Under $5 |
| Replacement toilet flapper | Stops silent tank-to-bowl leaks | $5–$15 |
| Pinless moisture meter | Detects moisture behind walls without damage | $30–$80 |
| Adjustable wrench | Tightens supply line connections | $15–$30 |
| Food coloring | Tests for toilet flapper leaks | Under $2 |
| Faucet washer kit | Replaces worn compression washers | $10–$20 |
For most DIY plumbing leak repair jobs, Teflon tape, a flapper, and a wrench cover the majority of common fixes. Leaks at faucets, showerheads, and toilets account for the bulk of residential water loss, and all three respond well to basic hand tools.
Pro Tip: Buy a leak detector guide before purchasing electronic sensors. Passive acoustic sensors and smart water monitors serve different needs, and choosing the wrong type wastes money.
Avoid buying professional-grade pipe cameras or acoustic correlators for standard home use. Those tools require training to interpret correctly. A pinless moisture meter and a good flashlight handle 90% of what a homeowner needs for detecting hidden plumbing leaks.
How do you fix the most common plumbing leaks yourself?
Most residential leaks fall into four categories: dripping faucets, running toilets, leaking showerheads, and small pipe joint leaks. Each has a clear repair path.
-
Shut off the water supply first. Turn the shutoff valve under the sink or behind the toilet clockwise until it stops. For showerheads, use the main shutoff or the shower valve. Never skip this step.
-
Replace a worn toilet flapper. Drain the tank by flushing after shutoff. Unhook the old flapper from the overflow tube ears and disconnect the chain from the flush handle arm. Snap the new flapper into place and reconnect the chain with about half an inch of slack. Worn toilet flappers are the primary cause of silent leaks and should be replaced every five years as standard maintenance.
-
Fix a dripping faucet. Remove the handle by unscrewing the decorative cap and the screw beneath it. Pull out the cartridge or stem and inspect the rubber washer at the base. Replace the washer, reassemble the faucet, and restore water flow. Compression faucets use washers; cartridge faucets use O-rings. Match the replacement part to your faucet type.
-
Stop a leaking showerhead. Unscrew the showerhead by hand or with a wrench wrapped in a cloth to protect the finish. Remove old tape from the threaded pipe stub. Wrap three to four layers of Teflon pipe tape clockwise around the threads, then reattach the showerhead and hand-tighten plus a quarter turn with the wrench.
-
Seal a leaking pipe joint. For threaded joints, drain the pipe, dry the threads completely, and wrap with Teflon tape before reassembling. For compression fittings, check that the ferrule is seated correctly before retightening the nut.
Pro Tip: Overtightening is one of the most common DIY mistakes. Hand-tight plus a quarter turn is the correct torque for most fixture connections. Forcing a fitting strips threads and creates a worse leak than the one you started with.
If a leak persists after these steps, the problem is likely a cracked fitting, a corroded valve seat, or a pipe section that needs replacement. At that point, a step-by-step repair guide or a licensed plumber is the right next move. Repeated attempts on a damaged fitting cause more harm than good.
How do you prevent future plumbing leaks?
Preventing plumbing leaks costs far less than repairing water damage. A few consistent habits protect your pipes for years.
- Monitor water pressure. Residential systems are designed for 40–60 PSI. Pressure above 60 PSI stresses pipe walls and causes pinhole leaks over time. Install a pressure-reducing valve if your readings run high. A basic pressure gauge costs under $15 at any hardware store.
- Address water hammer immediately. That banging sound when you shut off a faucet fast is water hammer. Water hammer at pressures above 80 PSI loosens fittings and cracks joints over time. Installing water hammer arrestors on washing machine supply lines and other high-velocity shutoff points stops the damage before it starts.
- Replace aging components on schedule. Toilet flappers last roughly five years. Supply line hoses on washing machines and dishwashers should be replaced every five to seven years, or sooner if you see cracking or bulging. Rubber degrades faster in hot water environments.
- Choose WaterSense labeled fixtures. The EPA’s WaterSense program certifies fixtures that use at least 20% less water without sacrificing performance. Efficient fixtures reduce pressure cycling, which extends the life of seals and washers.
- Track your water bill monthly. Corrosive water causes pinhole leaks that are invisible until they soak a wall. A sudden unexplained increase in your bill is the earliest warning sign you will get. Catching a 5% bill increase early is far cheaper than replacing drywall and subfloor.
- Schedule annual plumbing inspections. A licensed plumber can spot early corrosion, failing valves, and pressure irregularities that a homeowner cannot see. Regular checks for Orange County homeowners are especially useful given the region’s hard water, which accelerates mineral buildup in pipes and fixtures. Learn more about why regular plumbing checks matter for local residents.
Key Takeaways
Catching a plumbing leak early through meter checks, fixture inspection, and pressure monitoring prevents the majority of costly residential water damage.
| Point | Details |
|---|---|
| Meter check first | A 1–2 hour no-use meter test confirms any silent pressurized leak at zero cost. |
| Toilet flappers are the top culprit | Replace flappers every five years to stop silent leaks wasting thousands of gallons. |
| Pressure control protects pipes | Keep residential water pressure at 40–60 PSI to prevent pinhole leaks and joint stress. |
| Teflon tape fixes most fixture leaks | Wrap threaded joints with three to four layers of Teflon tape before reassembly. |
| Prevention beats repair every time | Monthly bill tracking and annual inspections catch leaks before they cause structural damage. |
What I have learned after years of watching homeowners deal with leaks
Most homeowners wait too long. They hear a drip, they notice a stain, and they tell themselves they will deal with it next weekend. By the time they act, the drywall is soft, the subfloor has started to buckle, and a $12 flapper has turned into a $1,500 repair job.
The water meter is the most underused tool in any home. Every homeowner should know where their meter is and how to read it. That single skill catches leaks that no visual inspection ever would. I have seen homeowners spend months assuming a high water bill was a rate increase, when a simple meter test would have revealed a running toilet in under two hours.
Water hammer is the warning sign that almost nobody takes seriously. That banging in the pipes is not just annoying. It is your plumbing system telling you that pressure spikes are hammering your fittings loose. Ignoring it is like ignoring a knocking engine. The damage accumulates quietly until something fails completely.
The homeowners who come out ahead are the ones who treat plumbing maintenance the same way they treat smoke detector checks. They do it on a schedule, they know what normal looks like, and they act fast when something changes. That mindset costs almost nothing and saves thousands.
— MDTECH
Professional plumbing support from Appliancesrepairmdtech
When a leak goes beyond a flapper or a strip of Teflon tape, you need a licensed technician who knows residential plumbing inside and out. Appliancesrepairmdtech serves homeowners across Orange County and Los Angeles County with fast, reliable plumbing repair and appliance service.
The team at Appliancesrepairmdtech handles everything from pipe repairs in Orange County to complex leak troubleshooting that DIY methods cannot resolve. If you are facing a leak that keeps coming back, a pressure issue you cannot diagnose, or damage that needs professional assessment, booking is straightforward through the website. You can also review the plumbing repair guide for detailed step-by-step solutions before deciding whether to call. Fast response and local expertise make Appliancesrepairmdtech the practical first call for serious plumbing problems in Southern California.
FAQ
How do I know if I have a hidden plumbing leak?
Turn off all water in the house, record your meter reading, and check again after one to two hours. If the meter moved, a hidden leak is present somewhere in your system.
What causes most residential plumbing leaks?
Worn toilet flappers, corroded faucet washers, and high water pressure above 60 PSI are the leading causes of residential plumbing leaks.
Can I fix a plumbing leak myself?
Most common leaks at faucets, showerheads, and toilets are DIY repairs using Teflon tape, a replacement flapper, or a new faucet washer. Leaks at main lines or underground pipes require a licensed plumber.
How often should I replace my toilet flapper?
Replace your toilet flapper every five years as standard maintenance. A worn flapper is the most common source of silent leaks that waste thousands of gallons annually.
What water pressure is safe for home pipes?
Residential plumbing is designed for 40–60 PSI. Pressure above 80 PSI damages pipe joints and seals, and a pressure-reducing valve is the recommended fix.