
TL;DR:
- A diverter valve redirects water flow between a tub spout and showerhead to ensure proper fixture function. Most failures result from mineral buildup, worn seals, or incorrect installation, which homeowners can often fix with simple maintenance. Regular cycling and vinegar cleaning prevent damage, while proper part matching ensures reliable repairs.
A diverter valve is a water flow control device that redirects water from one outlet to another, most commonly switching flow between a bathtub spout and a showerhead. Every tub-shower combo in your home relies on this small component to function correctly. When it fails, you either get a weak shower, water spraying from both outlets at once, or a faucet that refuses to switch at all. Understanding what is a diverter valve, how it works, and how to maintain it puts you in control of one of the most frequently used fixtures in your home.
How does a diverter valve work in home plumbing?
A diverter valve works by blocking or redirecting the primary water path inside a pipe, forcing water to exit through a different outlet. When you pull up the knob on a tub spout or turn a separate handle, an internal gate or cartridge shifts position. That shift seals off the original flow path and opens a new one toward the showerhead.
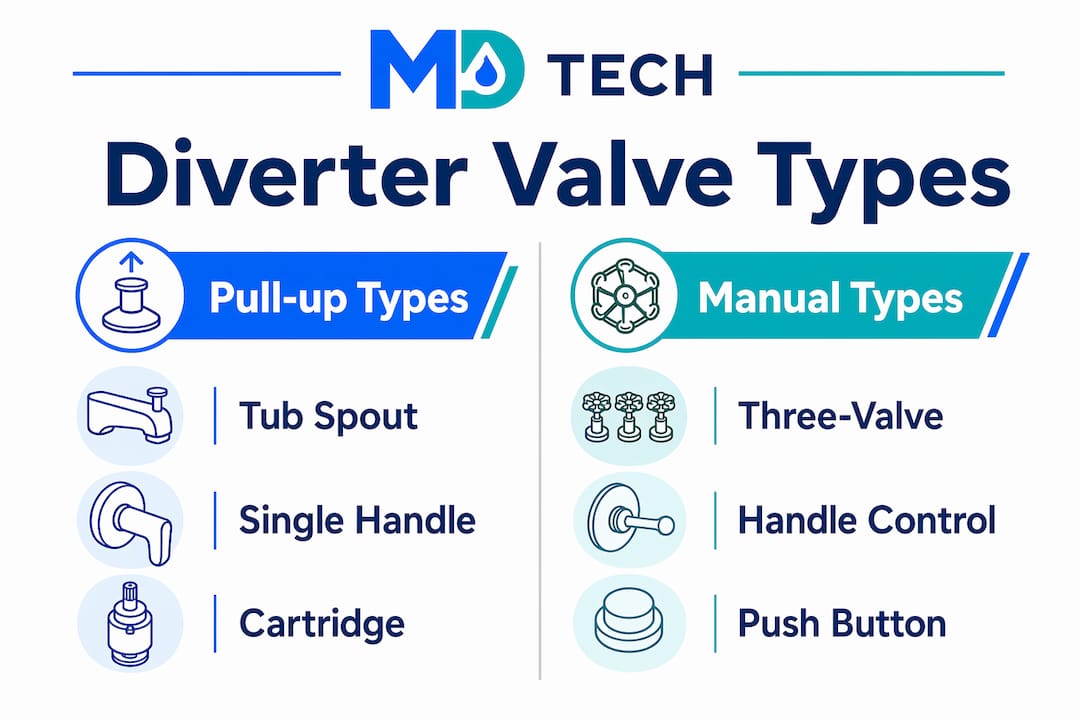
The mechanics vary by design, but three actuation methods cover most residential setups:
- Pull-up knob: A pin inside the tub spout rises when you pull the collar upward, blocking the spout outlet and sending water up the riser pipe to the showerhead.
- Three-valve handle: A dedicated center handle between the hot and cold controls rotates to redirect flow. This design gives precise control and is common in older or higher-end fixtures.
- Cartridge-style diverter: A single-handle unit where rotating or pulling the handle past a certain point shifts an internal cartridge, changing the water path. This is the most common design in modern shower systems.
Water pressure plays a direct role in how well the valve seals. A pull-up knob diverter, for example, relies on water pressure to hold the gate closed against the spout. When you turn off the shower, the gate drops back down automatically because pressure drops. Internal rubber seals and O-rings create the watertight contact that makes this pressure-dependent sealing work.
Pro Tip: If your showerhead still drips water while the tub spout runs, the internal seal on your diverter is worn. That small leak wastes water and signals a repair is overdue.
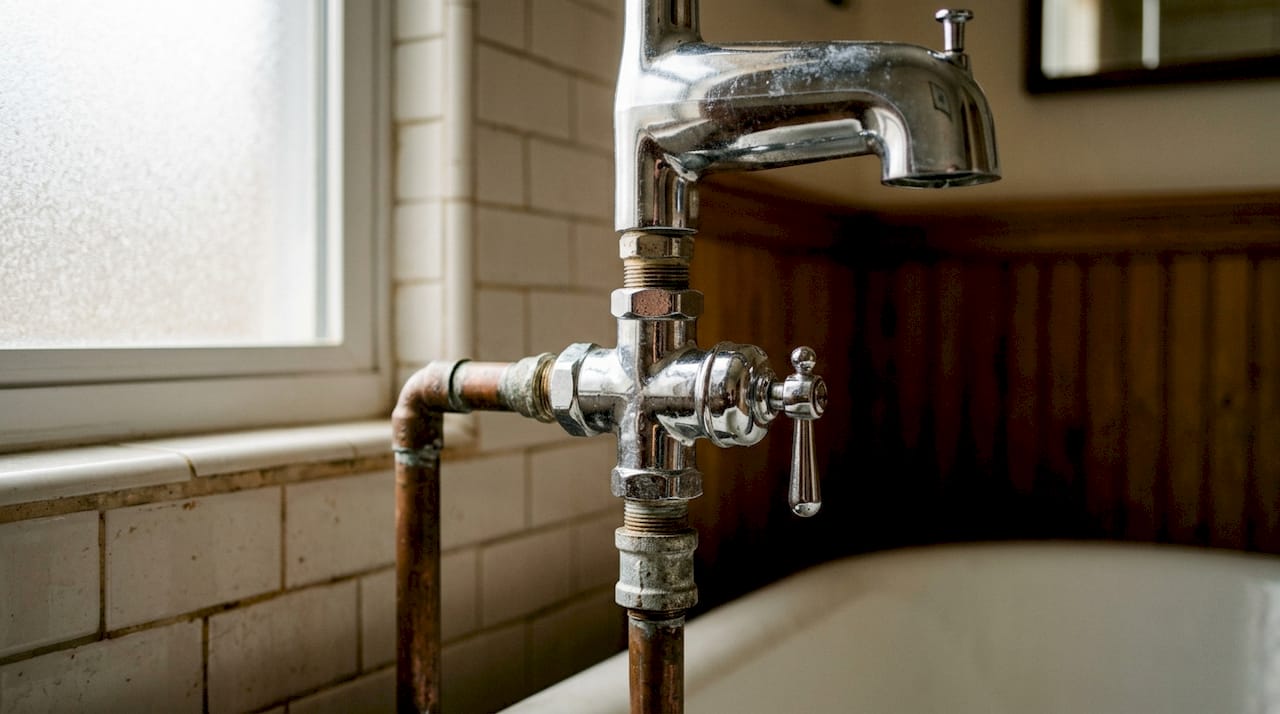
What are the main types of diverter valves?
Diverter valve types vary significantly across fixtures, and replacement parts are seldom universal between them. Identifying your type before buying any parts saves you a wasted trip to the hardware store.
| Diverter type | How it activates | Best suited for | Key limitation |
|---|---|---|---|
| Tub spout pull-up | Pull collar on spout | Basic tub-shower combos | Wears out faster; pressure-dependent |
| Three-valve diverter | Separate center handle | Older or premium fixtures | Requires more wall space |
| Cartridge-style | Single rotating handle | Modern single-handle setups | Cartridge must match exact model |
| Inline diverter | Lever on supply line | Multi-outlet shower systems | Requires professional installation |
Tub spout diverters
The tub spout pull-up diverter is the most common type in American homes. It integrates directly into the spout body, so the entire spout must be replaced if the internal mechanism fails. These are inexpensive and easy to swap, but they wear out faster than other types because the gate seal takes constant pressure cycling.
Three-valve diverters
Three-valve systems use a dedicated handle that sits between the hot and cold controls. Turning this handle routes water to the showerhead. This design is more durable because the diverter mechanism is separate from the temperature controls, reducing wear on any single component.
Cartridge-style diverters
Cartridge diverters are built into single-handle faucet assemblies. The cartridge itself contains all the seals and flow channels. When it fails, you replace the cartridge rather than the entire valve body. The catch is that cartridges are brand-specific and model-specific. Bringing the old cartridge to the store is the only reliable way to get the right match.
Pro Tip: Take a photo of your existing spout or handle before shopping for parts. Fixture manufacturers change cartridge designs across product generations, and visual confirmation prevents a second trip.
What causes diverter valve malfunctions?
Mineral buildup causes 20% of diverter valve malfunctions, with broken or corroded stems contributing another 12%. That means nearly a third of all diverter failures trace back to two preventable problems. Homeowners in areas with hard water face this risk most acutely, because calcium and magnesium deposits accumulate inside the valve body over months of use.
Common failure symptoms and their likely causes:
- Water flows from both spout and showerhead simultaneously: The gate or cartridge is not sealing completely, usually from mineral buildup or a worn O-ring.
- Diverter knob sticks or won’t pull up: Mineral deposits have locked the internal pin in place.
- Showerhead has weak pressure after diverting: A partially blocked riser pipe or a gate that isn’t fully closing is restricting flow.
- Dripping from the showerhead when the tub runs: The diverter seal is failing to hold under pressure.
- Diverter won’t return to tub position: The spring or return mechanism inside the valve is broken or corroded.
Incorrect pipe length during installation is a frequently overlooked cause of diverter failure. The recommended pipe length for most tub spout diverter installations is 2.5 to 3.5 inches. A pipe outside that range puts mechanical stress on the valve body, causing leaks or misalignment even when the valve itself is brand new. This is one of the most common reasons a newly installed diverter fails immediately.
Diagnosing the problem correctly before ordering parts matters. Understanding your valve type is the first step, because the repair approach for a pull-up spout diverter is completely different from the approach for a cartridge-style unit. Misidentifying the type leads to wrong parts, wasted money, and a second repair call.
How can homeowners maintain and repair diverter valves?
Most diverter valve repairs are within reach for a prepared homeowner. The key is working methodically and gathering the right parts before you start. Rushing this repair without the correct replacement components is the most common DIY mistake.
Step-by-step repair process
- Shut off the water supply. Turn off the shutoff valves under the sink or at the main supply. Open the faucet to release pressure and drain remaining water from the line.
- Protect the drain. Place a rag or stopper in the drain opening. Small screws, O-rings, and washers fall easily into open drains and are nearly impossible to retrieve.
- Remove the spout or trim. For pull-up spout diverters, unscrew the spout counterclockwise or remove the set screw underneath. For cartridge-style units, remove the handle cap, unscrew the handle, and pull the cartridge straight out.
- Soak in white vinegar. Place the removed valve or spout in a bowl of white vinegar for at least 30 minutes. Vinegar soaking dissolves mineral scale that causes sticking and incomplete sealing, often restoring function without any part replacement.
- Inspect and replace seals. After soaking, examine the O-rings and washers. Any cracked, flattened, or brittle seal needs replacement. Match the new seal to the old one by size and profile.
- Lubricate moving parts. Apply a thin coat of plumber’s grease to all O-rings and the valve stem before reassembly. Valve lubrication reduces friction and extends the life of the repaired component significantly.
- Reassemble and test. Reinstall the spout or cartridge, restore water pressure, and test both positions. Check for leaks at the spout base and around the showerhead connection.
Ongoing maintenance to prevent failures
Industry professionals recommend cycling diverter valves through their full range of motion monthly. This simple habit prevents mineral deposits from locking the mechanism in one position. In homes with hard water, a vinegar cleaning every one to three months keeps scale from building to the point of failure.
Replacing a diverter valve entirely is the right call when the valve body itself is cracked, when the cartridge is discontinued, or when repeated cleaning and seal replacement fail to restore proper function. When selecting a replacement, matching parts to your valve type is non-negotiable. A generic replacement that “almost fits” will leak or fail prematurely.
Pro Tip: Before reassembling, run water briefly with the valve body removed to flush any debris from the supply pipe. Sediment flushed into a freshly repaired valve can damage new seals within days.
For broader plumbing repairs around the home, the plumbing repair guide from Appliancesrepairmdtech covers step-by-step solutions across common household systems.
Key Takeaways
A diverter valve is a small but critical plumbing component, and most failures trace back to mineral buildup, worn seals, or incorrect installation specs that homeowners can prevent with regular maintenance.
| Point | Details |
|---|---|
| Core function | A diverter valve redirects water between outlets, typically from tub spout to showerhead. |
| Most common failure cause | Mineral buildup causes 20% of malfunctions; monthly cycling and vinegar cleaning prevent it. |
| Pipe length matters | Installation requires a pipe length of 2.5 to 3.5 inches; outside this range causes failure even with a new valve. |
| Part matching is critical | Diverter components are seldom universal; always match replacement parts to your specific valve type. |
| DIY repair is viable | Soaking in white vinegar for 30 minutes, replacing O-rings, and lubricating parts resolves most failures without full replacement. |
What I’ve learned from years of diverter valve calls
The repair that surprises homeowners most is the vinegar soak. People call expecting to replace the entire valve, and half the time a 30-minute soak in white vinegar is all it takes. Mineral scale is invisible until it locks a mechanism solid, and most homeowners never think to look for it until the shower stops working.
The mistake I see most often is skipping the monthly cycling habit. Diverter valves that sit in one position for months accumulate deposits at the contact points. By the time the valve sticks, the damage is already done. Moving the valve through its full range once a month takes ten seconds and prevents the majority of service calls I receive.
Finding the right replacement cartridge is genuinely the hardest part of this repair for most homeowners. Manufacturers change cartridge designs without notice, and the model number on the faucet body does not always correspond to the current cartridge catalog. My advice: pull the old cartridge out first, take it to a plumbing supply house rather than a big-box store, and let the counter staff match it by hand. That approach succeeds far more reliably than ordering by model number online.
If you are unsure whether your valve needs cleaning, a new cartridge, or full replacement, a professional diagnosis saves you from buying the wrong parts twice. The repair vs. replacement decision is worth getting right the first time.
— MDTECH
Professional plumbing repair support in Orange County and Los Angeles
Diverter valve problems range from a quick vinegar cleaning to a full cartridge replacement, and knowing which repair your fixture needs makes the difference between a 20-minute fix and a flooded bathroom.

Appliancesrepairmdtech serves homeowners across Orange County and Los Angeles County with licensed technicians who diagnose plumbing issues correctly the first time. Whether your diverter is sticking, leaking, or failing to redirect flow entirely, the team handles the full repair process from diagnosis through testing. For homeowners who want to understand the full scope of replacing appliance parts before calling a professional, that resource covers what to expect at every step. Book a service appointment online or call to get a same-day assessment for your plumbing issue.
FAQ
What is a diverter valve in simple terms?
A diverter valve is a plumbing device that redirects water from one outlet to another, such as switching flow from a bathtub spout to a showerhead. It uses an internal gate, cartridge, or handle mechanism to change the water path.
How do I know if my diverter valve is broken?
The clearest sign is water flowing from both the tub spout and showerhead at the same time, or a showerhead that drips when the tub runs. A sticking pull-up knob or weak shower pressure after diverting also indicates a failing valve.
Can I fix a diverter valve myself?
Most diverter valve repairs are DIY-friendly. Soaking the valve in white vinegar for 30 minutes removes mineral deposits, and replacing O-rings and washers restores sealing in most cases.
How long does a diverter valve last?
Diverter valve lifespan depends on water hardness and maintenance habits. Valves in hard-water areas that receive monthly cycling and periodic vinegar cleaning last significantly longer than neglected ones.
Why does my new diverter valve leak right after installation?
Incorrect pipe length is the most common cause. The supply pipe should measure 2.5 to 3.5 inches; a pipe outside that range stresses the valve body and causes leaks regardless of valve quality.