Most American households are surprised to learn that dryers cause nearly 3,000 home fires each year according to the National Fire Protection Association. For homeowners in Orange and Los Angeles Counties, routine dryer maintenance goes far beyond just clean laundry. With careful cleaning and vigilant checks, you can prevent costly repair calls, avoid hidden fire risks, and keep your appliance running safely for years to come.
Table of Contents
- Step 1: Unplug and Prepare Your Dryer Area
- Step 2: Clean the Lint Trap and Filter
- Step 3: Vacuum the Dryer Drum and Exterior
- Step 4: Inspect and Clear the Venting System
- Step 5: Test Dryer Performance and Safety Features
Quick Summary
| Key Point | Explanation |
|---|---|
| 1. Unplug Your Dryer First | Always disconnect the power before cleaning to prevent electrical hazards during maintenance tasks. |
| 2. Clean Lint Trap Regularly | Remove lint after every load to reduce fire risks and maintain dryer efficiency. |
| 3. Vacuum Drum and Exterior | Thoroughly vacuum internal and external surfaces to eliminate hidden lint and dust for safer operation. |
| 4. Inspect Venting System | Check for blockages and ensure the vent system is clear to prevent overheating and maintain airflow. |
| 5. Test Performance and Safety Features | Regularly assess drying efficiency and confirm safety features function correctly to identify potential issues early. |
Step 1: Unplug and Prepare Your Dryer Area
Safety begins with disconnecting your dryer from electrical power before performing any maintenance or cleaning tasks. You will completely isolate the appliance and create a secure workspace that minimizes potential electrical risks.
Start by locating the power cord and unplugging the dryer from its electrical outlet. If the outlet is hard to reach, consider pulling the dryer slightly away from the wall to provide better access. When unplugging, grasp the plug directly rather than yanking the cord, which could damage the electrical connection. National Fire Protection Association safety recommendations emphasize this critical first step in preventing potential electrical hazards during maintenance.
Next, clear the area surrounding your dryer. Remove any combustible materials like cardboard boxes, cleaning supplies, or stray clothing that might obstruct airflow or create potential fire risks. Inspect the area for lint accumulation on the floor, behind the dryer, or around the electrical outlet. Consumer Reports advises that maintaining a clean workspace is crucial for preventing potential fire incidents.
Pro tip: Keep a small fire extinguisher nearby and ensure your smoke detectors are functional before starting any appliance maintenance work.
Step 2: Clean the Lint Trap and Filter
Maintaining a clean lint trap is crucial for your dryer’s performance and safety. You will learn how to properly remove and clean the lint filter to prevent potential fire hazards and keep your appliance running efficiently.
Locate the lint trap typically found inside the dryer door or on top of the machine. Housing experts recommend gently removing the filter with clean hands. Pull the lint screen out completely and inspect it for any accumulated lint buildup. Use your fingers or a soft paper towel to carefully remove the lint layer. Be gentle to avoid tearing or damaging the mesh screen. Roll the lint between your fingers or tap it into a trash can for easy disposal.
Consumer Reports emphasizes that cleaning the lint filter after every single load is essential. If you notice the lint screen looks damaged or has any tears or bent edges replace it immediately. For a deeper clean occasionally wash the lint screen with warm water and mild soap to remove any residual fabric softener or dryer sheet buildup that might clog the mesh.
Pro tip: Hold the lint trap up to a light source occasionally to check for any blockages or damage that might not be visible during routine cleaning.
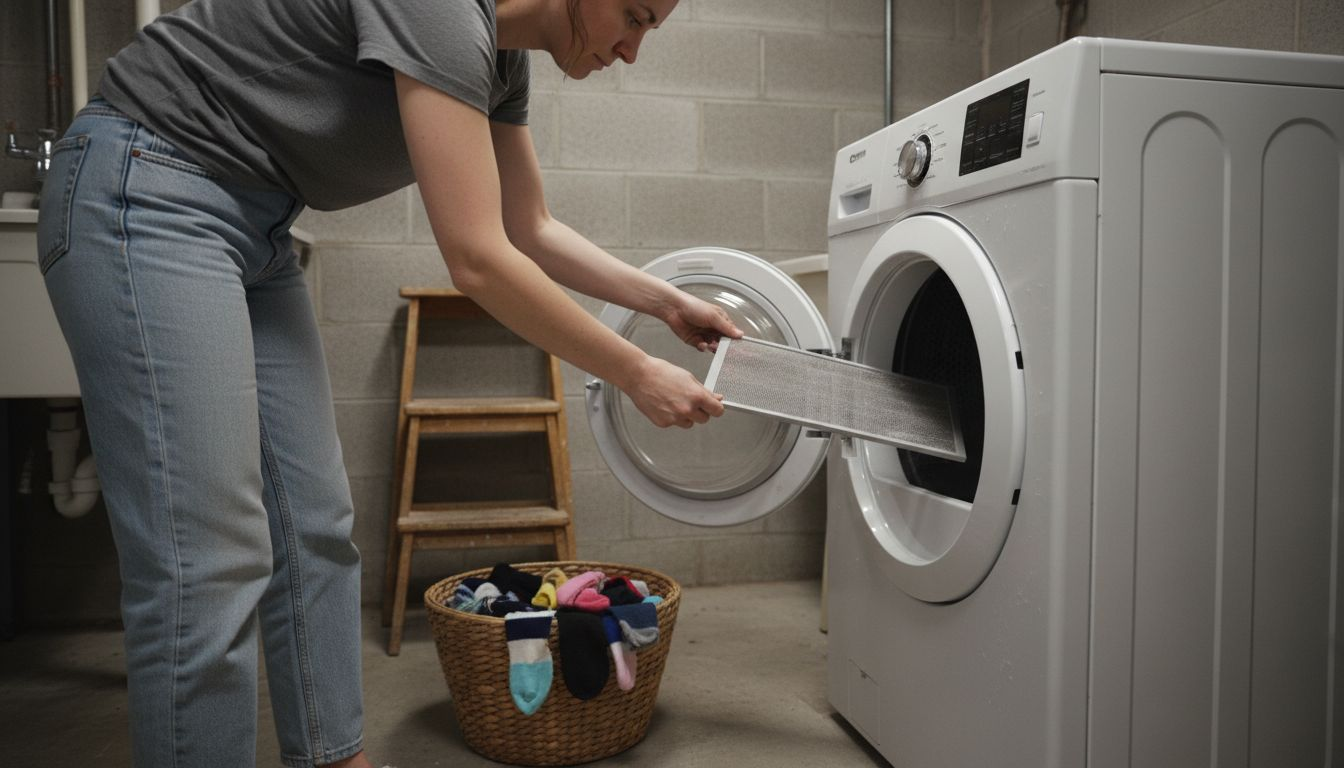
Step 3: Vacuum the Dryer Drum and Exterior
Deep cleaning your dryer involves more than just clearing the lint trap. You will thoroughly vacuum the dryer drum and exterior surfaces to remove hidden lint and dust that can compromise your appliance’s performance and safety.
Mobile Home Living experts recommend carefully opening the dryer door and using a vacuum with a narrow attachment to clean the interior drum. Start by removing any visible lint or debris from the drum’s surface. Gently run the vacuum attachment along the drum’s walls, paying special attention to seams and corners where lint tends to accumulate. If possible remove the top panel to access hard to reach areas behind the drum.
Nachi safety experts emphasize the importance of vacuuming the dryer’s exterior surfaces as well. Use the vacuum attachment to clean around the door seal, control panel, and exterior sides of the machine. Focus on removing dust and lint that might have settled in crevices or around mechanical components. Be careful not to disconnect any electrical connections or damage sensitive parts during the cleaning process.
Pro tip: Use a soft microfiber cloth after vacuuming to wipe down surfaces and catch any remaining dust particles that the vacuum might have missed.
Step 4: Inspect and Clear the Venting System
Proper dryer vent maintenance is critical for preventing fire hazards and ensuring your appliance operates efficiently. You will learn how to thoroughly inspect and clear the entire venting system to maintain optimal airflow and reduce potential safety risks.
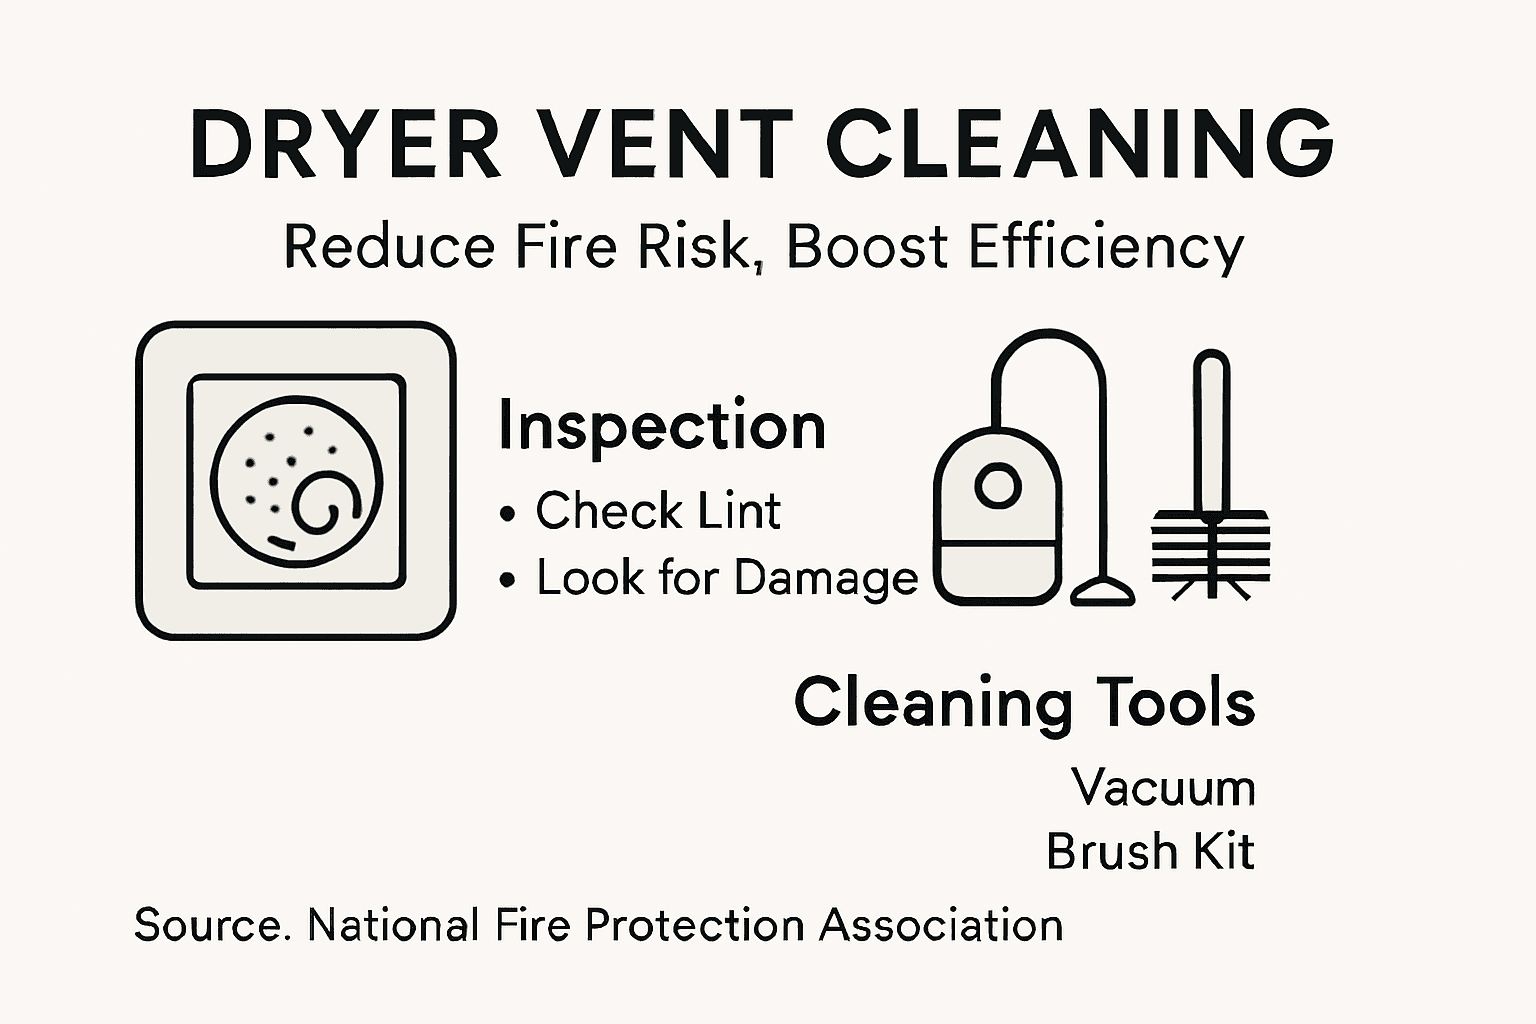
InterNACHI safety guidelines recommend carefully disconnecting the vent pipe from the dryer and examining its entire length. Look for any signs of lint buildup, damage, or restrictions. Ensure the ductwork is made of rigid metal with smooth interior walls to minimize lint accumulation. Use a specialized dryer vent cleaning brush or vacuum attachment to remove lint and debris from inside the vent pipe. Work methodically from both the interior and exterior ends of the vent to ensure complete cleaning.
International Residential Code standards emphasize checking the exterior vent termination point. Verify that the vent exits at least three feet away from any building openings and is not blocked by screens or debris. Inspect the exterior vent cover to ensure it opens and closes properly, allowing lint and moisture to escape while preventing outside elements from entering. If you notice any significant blockages or damage, consider professional cleaning or replacement of the vent system.
Pro tip: Purchase a flexible inspection mirror and flashlight to help you thoroughly examine hard to reach areas of the venting system.
This table compares key cleaning tools recommended for dryer maintenance:
| Tool | Purpose | Benefits |
|---|---|---|
| Vacuum with attachments | Remove lint and dust | Deep cleans drum and exterior |
| Dryer vent brush | Clear vent piping | Reaches inside ductwork, removes blockages |
| Soft microfiber cloth | Wipe surfaces | Picks up fine dust, protects finish |
| Inspection mirror and flashlight | Examine hard-to-see areas | Identifies hidden lint and damage |
| Fire extinguisher | Emergency safety | Mitigates risk during cleaning tasks |
Step 5: Test Dryer Performance and Safety Features
Final verification of your dryer’s functionality is crucial to ensure safe and efficient operation. You will systematically check critical performance and safety mechanisms to confirm your appliance is working correctly and minimize potential risks.
Consumer Reports recommends starting with moisture sensor testing. Run a small load and observe how quickly the dryer detects moisture levels and adjusts drying time. Listen for consistent drum rotation and even heat distribution. Check that the machine automatically stops when clothes are dry, preventing unnecessary energy consumption and potential overheating. Pay attention to unusual noises or uneven heating that might indicate underlying mechanical issues.
National Fire Protection Association guidelines emphasize testing automatic safety shutoff features. Verify that the dryer stops immediately if the lint trap is removed during operation. Check that the exterior vent flap opens properly when the dryer is running, allowing hot air and moisture to escape. Monitor the temperature and ensure the machine does not overheat during a complete drying cycle. If you notice any inconsistencies or malfunctions, consider consulting a professional technician.
Pro tip: Keep a small notebook to log performance observations during each test, which can help track potential issues over time.
Here’s a summary of common dryer safety risks and how each cleaning step addresses them:
| Step | Safety Risk Addressed | How Step Reduces Risk |
|---|---|---|
| Unplug and Prepare Area | Electrical shock, fire | Removes power, clears flammable materials |
| Clean Lint Trap and Filter | Lint fire hazard | Removes ignition sources, prevents buildup |
| Vacuum Drum and Exterior | Dust accumulation | Reduces hidden fire sources, improves airflow |
| Inspect Venting System | Blocked airflow, overheating | Ensures vent is clear, maintains exhaust flow |
| Test Performance and Safety | Malfunction, overheating | Confirms features work, detects issues early |
Keep Your Dryer Safe and Efficient with Expert Help
The detailed steps in “Essential Dryer Maintenance Steps for Lasting Performance” highlight how critical it is to prevent lint buildup, clear vents, and test safety features to avoid fire hazards and appliance malfunctions. If you value lasting performance and peace of mind, you understand how tricky it can be to stay on top of all these maintenance tasks while ensuring your dryer is fully safe and efficient.

Don’t let dryer issues turn into costly emergencies. Our licensed technicians at Appliances Repair MD Tech specialize in professional dryer repair, vent clearing, and safety inspections across Orange County and Los Angeles County. With fast, reliable local service, we tackle hidden problems that threaten your home safety and improve your dryer’s lifespan. Take control of your dryer’s performance today by visiting Appliance Repair Services to schedule your appointment. Protect your home and keep your dryer running safely and efficiently now.
Frequently Asked Questions
How do I safely unplug my dryer for maintenance?
To safely unplug your dryer, always grasp the plug directly and avoid yanking on the cord. If the outlet is hard to reach, gently pull the dryer away from the wall for better access and minimize electrical hazards before starting any cleaning.
Why is it important to clean the lint trap after every load?
Cleaning the lint trap after every load is crucial to prevent fire hazards and ensure efficient drying. Remove the accumulated lint from the trap to improve airflow and enhance your dryer’s performance with each use.
How can I clean the dryer drum and its exterior surfaces?
You can clean the dryer drum and exterior surfaces by using a vacuum with a narrow attachment to remove hidden lint and dust. Run the vacuum along the drum walls and around the door seal and control panel regularly to maintain optimal appliance performance.
What should I check when inspecting the dryer venting system?
When inspecting the dryer venting system, check for lint buildup, damage, and blockages. Ensure the vent pipe is made of rigid metal and the exterior vent opens properly to allow moisture and hot air to escape, reducing the risk of overheating.
What performance tests should I conduct after maintaining my dryer?
After maintenance, conduct moisture sensor tests by running a small load and checking the drying efficiency. Listen for consistent rotation and ensure automatic shutoff features activate when the lint trap is removed or if the dryer overheats.
How can I track the performance of my dryer over time?
You can track your dryer’s performance by keeping a small notebook to log observations during each test run. Note any unusual noises, drying times, or issues so you can address potential problems promptly and maintain lasting performance.