Over half of American homeowners, especially in Orange and Los Angeles counties, attempt at least one major appliance install themselves to save money—but many miss hidden requirements set by local plumbing codes. Doing your own dishwasher installation not only cuts service costs but also gives you peace of mind if everything is done safely and lawfully. This step-by-step guide makes it easy to get the job done right, from gathering tools to that critical final leak check.
Table of Contents
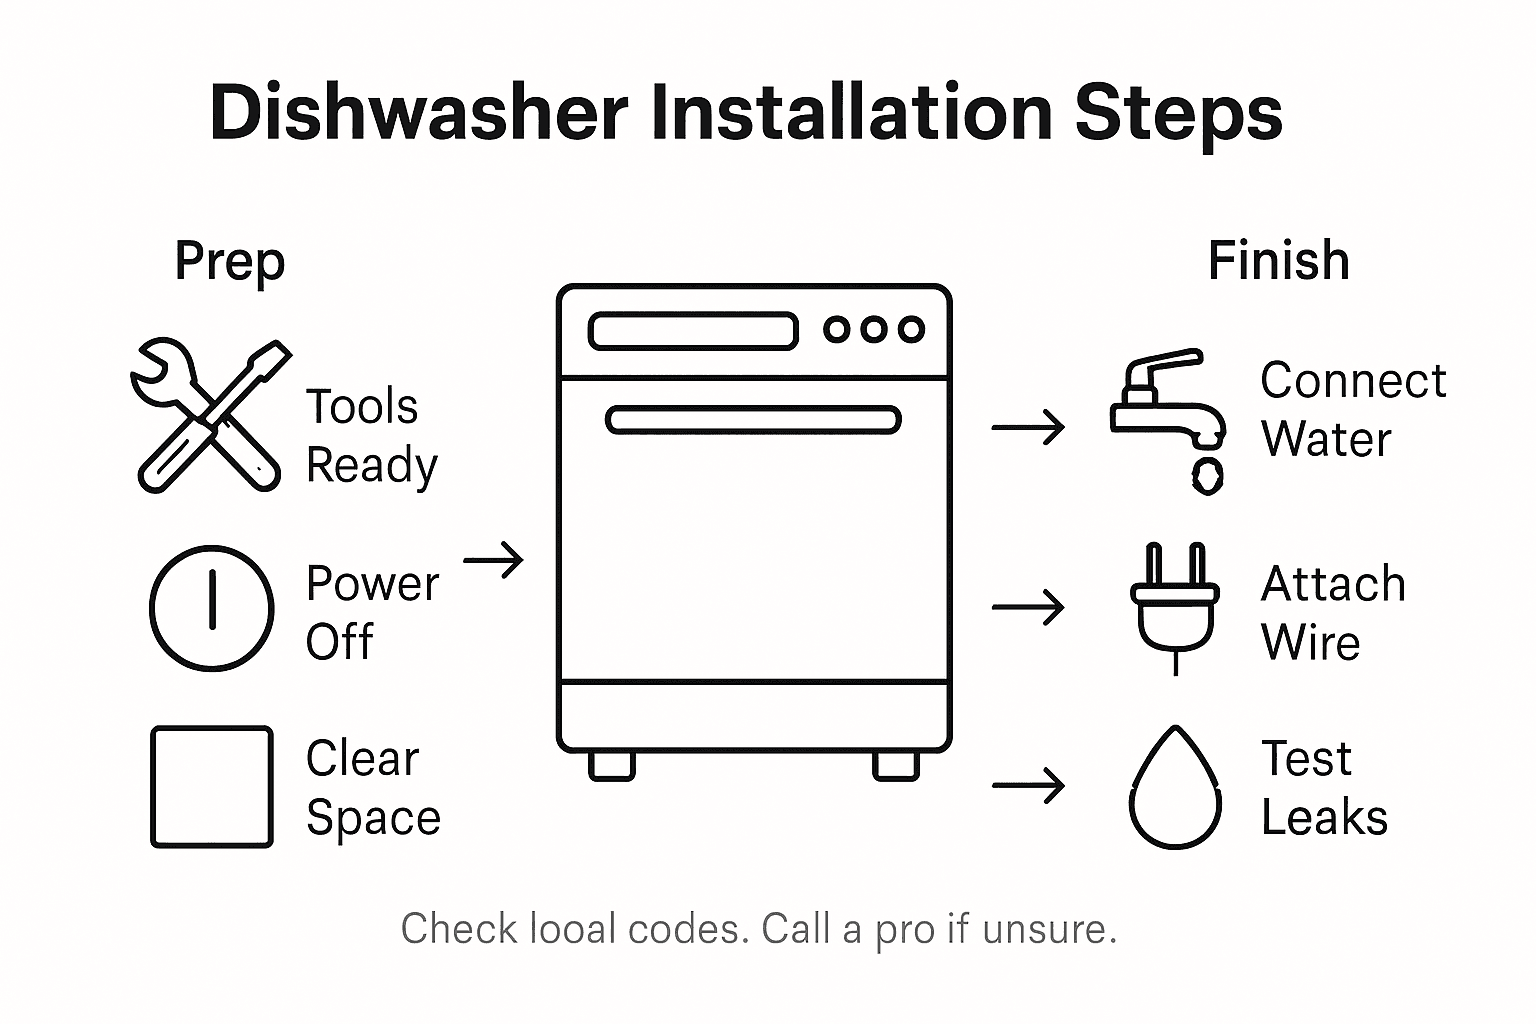
- Step 1: Gather Required Tools And Disconnect Utilities
- Step 2: Position Dishwasher And Secure Mounting Brackets
- Step 3: Connect Water Supply And Drain Line
- Step 4: Wire Electrical Connections Following Local Codes
- Step 5: Test For Leaks And Verify Proper Operation
Quick Summary
| Key Insight | Explanation |
|---|---|
| 1. Gather Necessary Tools First | Collect tools like adjustable wrenches and screwdrivers to ensure a smooth installation process. |
| 2. Disconnect Utilities Safely | Always turn off electrical power and water supply to eliminate hazards before starting work. |
| 3. Secure Dishwasher Properly | Properly anchor mounting brackets and ensure stability to prevent movement during operation. |
| 4. Follow Proper Connection Protocols | Use Teflon tape for water connections to avoid leaks, and ensure electrical work meets local codes. |
| 5. Conduct Comprehensive Testing | Run a full wash cycle to check for leaks and ensure all components function correctly before regular use. |
Step 1: Gather required tools and disconnect utilities
Before starting your dishwasher installation, you will need to carefully prepare your workspace and safely disconnect existing utilities. This crucial first step ensures a smooth and safe appliance replacement process.
Start by collecting all necessary tools. According to the Building America Solution Center, you will want to gather the following essential items: an adjustable wrench, screwdriver, pliers, level, tape measure, power drill, wire stripper, and Teflon tape. Having these tools ready before beginning will save you time and prevent unnecessary interruptions.
Next, safety becomes your top priority. Disconnect all utilities by first locating your home’s electrical panel and turning off the circuit breaker connected to the dishwasher. This prevents any potential electrical hazards during removal. Similarly, shut off the water supply valve typically located under your kitchen sink or near the dishwasher. By completely disconnecting power and water, you create a secure environment for installation.
Pro Tip: Before removing the old dishwasher, take a quick smartphone photo of the existing utility connections to use as a reference guide when installing your new unit.
Step 2: Position dishwasher and secure mounting brackets
With the utilities disconnected and tools prepared, you are now ready to position and secure your new dishwasher. This step requires careful measurement, precise alignment, and strategic mounting to ensure a stable and professional installation.
According to Plumbing Resource, the first task is carefully sliding the dishwasher into the designated cutout space. Measure your cabinet opening meticulously and verify the appliance fits with minimal gaps. Use a level to check horizontal alignment, adjusting the unit’s feet if needed to create a completely even surface. Most dishwashers have adjustable legs that allow you to compensate for slightly uneven flooring.
Next, focus on securing the mounting brackets. These are critical for preventing movement and ensuring stability during operation. Typically, you will attach brackets to the sides of the dishwasher and then anchor them into the adjacent cabinetry or countertop. Some installations might require brackets at the top of the unit. Make certain these connections are tight and secure to prevent any potential wobbling or shifting during use.
Pro Tip: Always test the dishwasher’s stability by gently pushing and pulling before completing the final connections to catch any potential mounting issues early.
Here’s a summary of common dishwasher installation mistakes and how to prevent them:
| Mistake | Possible Consequence | Prevention Strategy |
|---|---|---|
| Skipping utility checks | Electrical shock, leaks | Confirm utilities are disconnected |
| Poor bracket attachment | Dishwasher movement | Tighten and test brackets |
| Loose water connections | Leaks and water damage | Use Teflon tape, inspect seals |
| Incorrect drain setup | Wastewater backflow | Install air gap or high loop |
| Incomplete electrical work | Dishwasher won’t work | Match circuit, check codes |
Step 3: Connect water supply and drain line
With your dishwasher positioned and secured, you are now ready to tackle the critical task of connecting the water supply and drain line. These connections are crucial for ensuring proper functionality and preventing potential water damage to your kitchen.
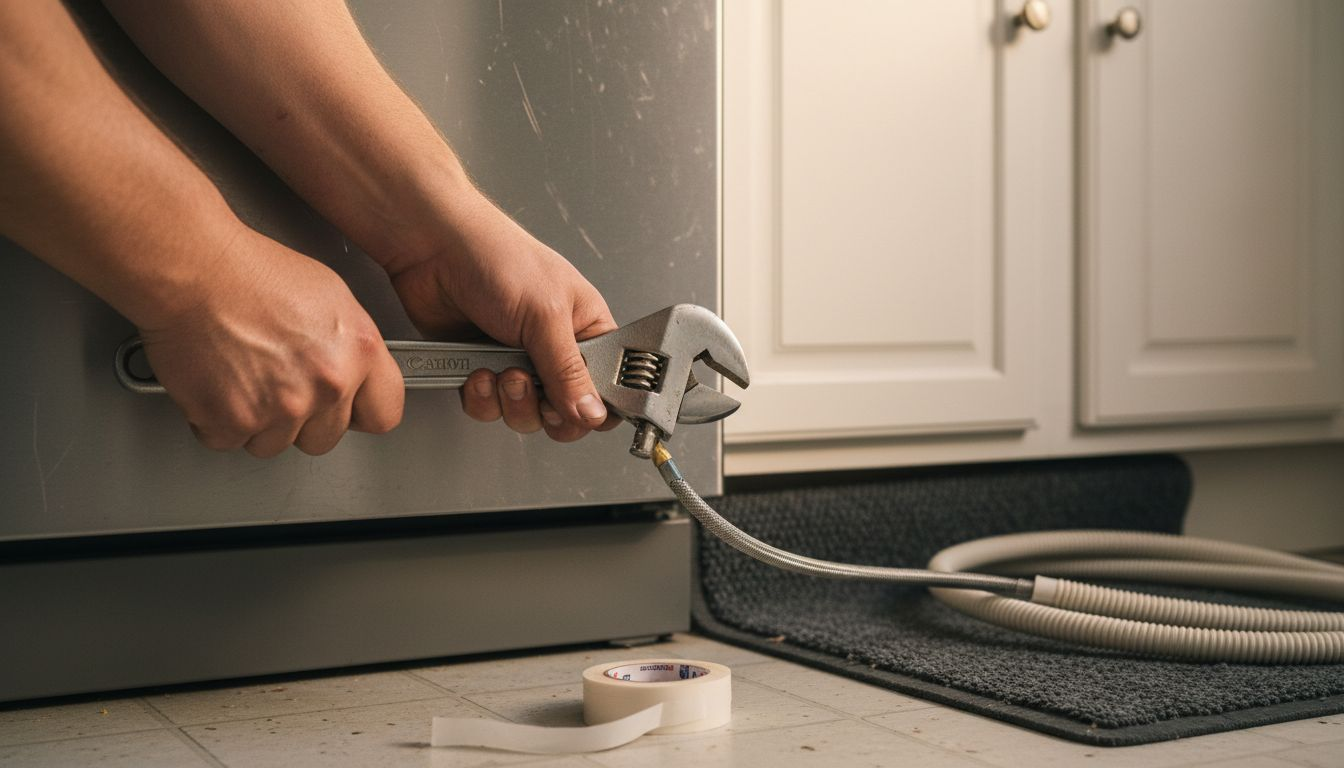
According to the Building America Solution Center, start by connecting the water supply line to a hot water source. Wrap the connection threads with Teflon tape to create a watertight seal, then attach using a 90-degree elbow fitting. The water supply line should connect securely to the dishwasher’s inlet valve, ensuring a tight and leak-free connection. Take care to avoid over-tightening, which could damage the threads or create potential weak points.
Next, focus on the drain line connection. King County plumbing guidelines emphasize the importance of preventing backflow contamination. Install an air gap fitting or create a high loop in the drain hose to prevent wastewater from flowing back into the dishwasher. Secure the drain hose to the sink drain or garbage disposal using appropriate clamps, ensuring a snug fit that prevents potential leaks or disconnection during operation.
Pro Tip: Before fully tightening any connections, run a quick visual inspection and feel for any potential weak spots or areas that might require additional sealing.
Step 4: Wire electrical connections following local codes
Electrical connections represent one of the most critical stages of dishwasher installation, requiring precision and strict adherence to safety standards. Your goal is to establish a secure, code-compliant electrical connection that ensures both functionality and personal safety.
According to the National Renewable Energy Laboratory’s Standard Work Specifications, all electrical work must begin with the circuit completely de-energized. You will need to carefully match your dishwasher’s electrical requirements with an appropriate dedicated circuit. Depending on your specific model, you might be working with a plug-in unit or a hardwired installation. For plug-in models, verify that the outlet matches the appliance’s voltage and amperage specifications. For hardwired connections, you will need to connect the appliance’s wiring directly to the home’s electrical system using appropriate wire nuts and following the National Electrical Code (NFPA 70) guidelines.
Washington State labor and industries guidelines emphasize the importance of understanding local permitting requirements. Some jurisdictions may require professional inspection or specific permits for electrical modifications. Double-check your local municipal codes and consider consulting a licensed electrician if you are uncertain about any aspect of the electrical connection process.
Pro Tip: Use a non-contact voltage tester to double-check that the circuit is completely dead before beginning any electrical work, and always wear insulated gloves during the connection process.
Step 5: Test for leaks and verify proper operation
With all connections made, you are now ready to conduct a comprehensive test to ensure your dishwasher installation was successful. This final verification step is crucial for identifying any potential issues before regular use and preventing future water damage or operational problems.
According to Inspectapedia’s detailed inspection resource, your testing process should begin with a visual inspection of all water connections. Start by running a complete fill and wash cycle, carefully monitoring water supply and drain lines for any signs of dripping or leakage. Pay close attention to the base of the dishwasher and surrounding cabinetry for moisture or water accumulation. Listen carefully for any unusual sounds that might indicate improper installation or potential mechanical issues.
Home Gear Geek recommends checking multiple operational aspects during your test cycle. Verify that the door seals properly, the racks slide smoothly, and spray arms rotate without obstruction. Confirm that the detergent dispenser opens correctly and that the dishwasher fills completely and drains thoroughly. If you notice any irregularities in performance or detect even a small leak, stop the cycle and recheck your connections before proceeding with full use.
Pro Tip: Keep a few dry white towels under and around the dishwasher during the first few test cycles to quickly detect any potential leaks that might not be immediately visible.
Use this table to quickly verify key performance checks during post-installation testing:
| Test Step | What to Look For | Action if Issue Found |
|---|---|---|
| Run wash cycle | No leaks, smooth operation | Inspect connections, retighten |
| Door seal integrity | No moisture at edges | Adjust door, clean gasket |
| Rack movement | Racks slide fully | Reposition racks or guides |
| Drainage | Water drains completely | Check hose, clear drain path |
| Spray arm rotation | Unobstructed spinning | Remove debris, adjust alignment |
Ensure a Safe and Expert Dishwasher Installation with Professional Help
Dishwasher installation requires careful attention to utility disconnection, precise bracket mounting, secure water and drain connections, and strict adherence to electrical codes to avoid leaks, electrical hazards, and operational issues. If tackling these detailed steps like positioning the dishwasher, connecting water lines with Teflon tape, or wiring electrical connections feels overwhelming or if you want to guarantee your new appliance runs flawlessly from day one, expert assistance can make all the difference.

Trust the licensed technicians at Appliances Repair MD Tech for safe, reliable dishwasher installation and appliance repair services across Orange County and Los Angeles County. Our team understands the importance of following local codes and best practices to protect your home and ensure lasting performance. Schedule your service now to avoid common mistakes like leaks or improper electrical wiring that could cause costly damage. Visit our landing page to book an appointment and enjoy professional support for all your dishwasher and household appliance needs.
Frequently Asked Questions
What tools do I need for dishwasher installation?
You will need several tools for a safe dishwasher installation, including an adjustable wrench, screwdriver, pliers, level, tape measure, power drill, wire stripper, and Teflon tape. Gather all these tools beforehand to streamline the installation process and prevent interruptions.
How do I disconnect utilities before installing a dishwasher?
Start by turning off the circuit breaker for the dishwasher at your home’s electrical panel to prevent electrical hazards. Next, shut off the water supply valve, usually located under the kitchen sink, to ensure a safe environment for installation.
How do I properly secure the dishwasher after positioning it?
To secure your dishwasher, first, use a level to ensure it is horizontally aligned, making adjustments as needed. Then, attach the mounting brackets to the sides of the dishwasher and anchor them to the cabinetry to prevent any movement during operation.
What precautions should I take when connecting water supply and drain lines?
When connecting the water supply line, wrap the threads with Teflon tape to create a watertight seal and avoid leaks. For the drain line, install an air gap fitting or create a high loop to prevent backflow and ensure proper drainage.
How can I ensure my electrical connections are safe and code-compliant?
Verify that the circuit is completely de-energized before beginning any electrical work. Follow the manufacturer’s instructions closely and ensure that all connections comply with local electrical codes to maintain safety and functionality.
What should I do if I detect a leak after installation?
If you notice a leak during the first test cycle, immediately stop the cycle and inspect all connections for tightness and proper sealing. Retighten any loose connections and ensure the drain and water supply lines are securely attached before running another test.