
To adjust a water pressure regulator, measure your pressure with a gauge, loosen the locknut on top of the regulator, and turn the adjustment screw in small steps: clockwise raises pressure, counterclockwise lowers it. Recheck the gauge after every turn. For most homes, the target is roughly 50 to 60 psi, and if the screw does nothing, the regulator has probably worn out and needs a rebuild or replacement.
This guide walks through the whole job the way a technician approaches it: measure first, adjust in tiny increments, verify, and know when to stop. If your house water pressure is too high and you would rather not touch a valve on your main line, we cover that decision too.
TL;DR
- Aim for about 50 to 60 psi at a hose bib. The EPA’s WaterSense program recommends incoming residential pressure between 45 and 60 psi.
- Always measure with a $10 to $20 gauge before and after you touch the screw. Never adjust by feel.
- Turn the screw clockwise to raise pressure and counterclockwise to lower it, in very small turns (about 1/8 of a turn at a time).
- If the gauge does not move, or pressure creeps up when no water is running, the regulator is likely failing and adjustment will not fix it.
- If you are unsure, the main line is not accessible, or you see leaks, call a licensed plumber rather than experimenting.
Table of Contents
- What a water pressure regulator actually does
- Signs your pressure is too high
- What pressure should your regulator be set to?
- Before you touch the screw: measure your pressure
- How to adjust a water pressure regulator, step by step
- Why the pressure will not change
- Can you adjust it yourself, or should you call a pro?
- What high pressure does to your appliances
- Perspective: what we see in the field
- Need help with a regulator or a pressure-damaged appliance?
- Aftercare: keep the setting stable
- FAQ
- Sources
What a water pressure regulator actually does
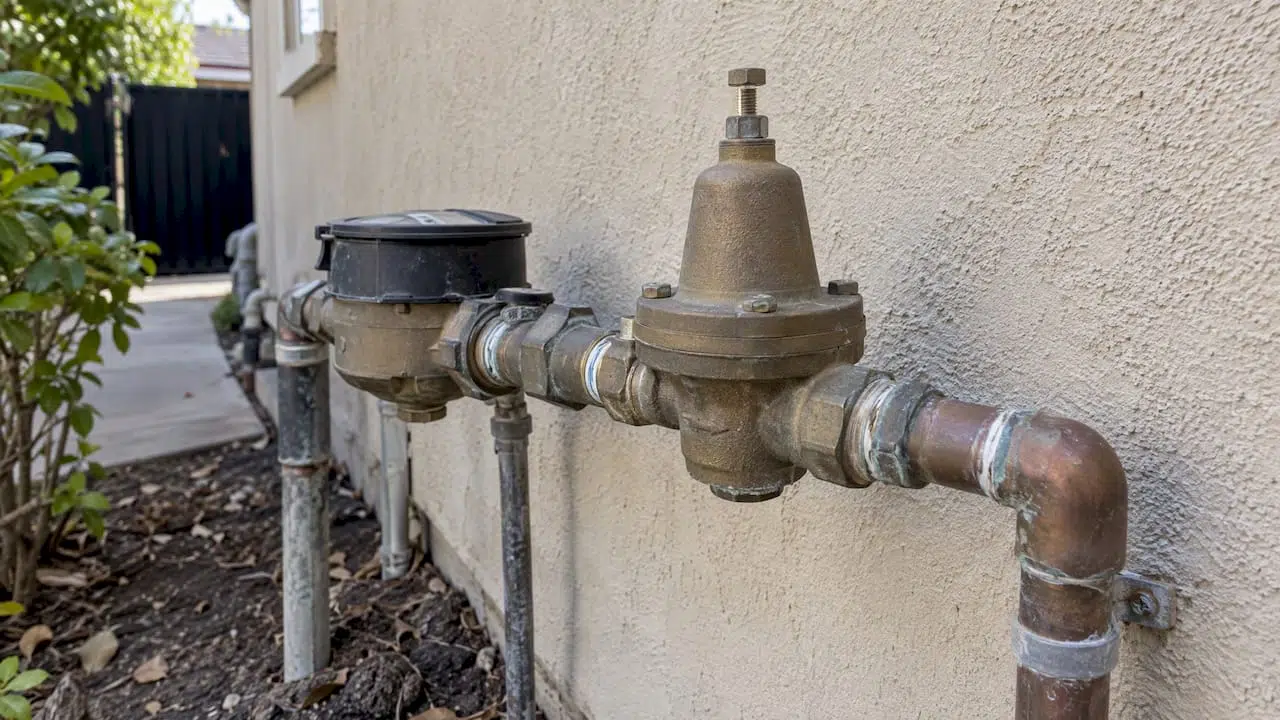
City water arrives at your property at whatever pressure the utility delivers, which depends on your neighborhood’s elevation, the distance from the reservoir or pump station, and demand on the system. A pressure regulator (also called a pressure reducing valve, or PRV) sits on the main supply line, usually near where the water enters the house, and steps that pressure down to a level your pipes, fixtures and appliances can live with.
Inside the bell-shaped housing is a spring-loaded diaphragm and a seat. The adjustment screw on top changes the spring tension. More tension holds the valve open further and lets more pressure through. Less tension closes it down and lowers the pressure on the house side. That is why one small screw can change the pressure in every faucet in the house.
You can usually find the regulator by tracing the pipe from your main shutoff valve. In Southern California homes it is often near the water meter, on the side of the house, in a garage, or in a utility closet next to the water heater.
Signs your pressure is too high
High pressure rarely announces itself with a dramatic failure. It wears things out quietly. According to the EPA’s WaterSense technical guidance, high residential water pressure can damage piping, fixtures and appliances, and it can lead to higher water consumption, early equipment failure and a greater risk of leaks.
Watch for these signs:
- Banging or rattling pipes. A local water district lists rattling or clanging pipes when fixtures are in use among the symptoms of a malfunctioning regulator.
- Faucets that spray or splash harder than they should.
- Toilets that refill noisily or run on their own, and supply lines that weep at the fittings.
- Dishwashers, washing machines and ice makers that fail early or leak at the inlet valve.
- A water heater relief valve that drips regularly.
One caution: if you recently moved, your pressure may simply feel strong compared with your old home. A gauge settles the question in about two minutes.
If you have the opposite problem, weak flow at the shower or sink, our guide to low water pressure in your house covers the likely causes. And if the pressure swings up and down during the day, start with tracing the causes of fluctuating water pressure, because a regulator is only one possible culprit.
What pressure should your regulator be set to?
The EPA’s WaterSense program recommends keeping incoming residential service pressure between 45 and 60 psi for efficient water use and proper system function. One water district notes that most homeowners set their pressure at about 50 psi.
The EPA also advises that if your service pressure is well above that range, you may want a professional to adjust or install a pressure-regulating valve to keep it near 60 psi.
Here is a practical way to think about the numbers:
| Reading at the hose bib | What it means | What to do |
|---|---|---|
| Under 40 psi | Weak showers, slow appliance fill | Check for a partly closed valve or a regulator set too low before looking elsewhere |
| 45 to 60 psi | In the EPA’s recommended range | Leave it alone |
| 60 to 80 psi | Workable but tougher on fixtures | Lowering toward 50 to 60 psi is reasonable |
| Above 80 psi | Likely a failed or missing regulator | Have a plumber inspect it; adjustment alone may not hold |
The bands in the table are our working guide as technicians, not a code citation. Local plumbing codes and your water utility set the rules that apply to your address, so ask the utility or a licensed plumber what applies where you live.
Before you touch the screw: measure your pressure
Never adjust a regulator blind. A simple gauge tells you where you are starting and whether each change worked. A water pressure gauge costs about $10 to $20 and screws onto a standard hose bib.
- Shut off every water use. Turn off the dishwasher, washing machine, ice maker and irrigation, and make sure no one is running a faucet or flushing a toilet.
- Attach the gauge to an outdoor hose bib or the washing machine supply faucet, as close to the regulator as practical.
- Open the faucet fully and read the needle. This is your static pressure.
- Write the number down. You will compare against it after every adjustment.
- Check again at a different time of day. Municipal pressure often rises overnight when demand is low, so a morning or late-evening reading can look different from an afternoon one.
If your gauge has a drag needle, leave it in place overnight. The maximum reading it records shows the highest pressure your plumbing sees, which is the number that stresses your pipes.
How to adjust a water pressure regulator, step by step
Most residential regulators from the major manufacturers follow the same basic design. Check the manufacturer’s instructions or the model number stamped on the bell housing, since a water district notes that a homeowner or plumber can adjust the regulator by following the manufacturer’s instructions.
What you need: a pressure gauge, an adjustable wrench or the wrench size that fits your locknut, a flathead screwdriver or hex key (depending on the model), a rag, and a pen and paper.
Step 1: Locate the regulator and read the baseline
Find the bell-shaped valve on the main line and take your gauge reading as described above. Note it.
Step 2: Loosen the locknut
The adjustment screw usually has a locknut above or around it. Loosen it just enough to let the screw turn. Do not remove it. Some models have no locknut and use a plain bolt or a cap you remove first.
Step 3: Turn the screw in small increments
Adjustment is typically done with a screw on top of the regulator. As a general rule, clockwise increases pressure and counterclockwise reduces it.
Keep the turns small. One water district’s best-practice guide says that only very small turns, such as 1/8 of a turn, are typically necessary. A full turn can swing you from comfortable pressure to a number that stresses your pipes.
Step 4: Release a little water and recheck
After each turn, open a faucet briefly to let the downstream side settle, close it, and read the gauge again. Pressure on the house side of a regulator often will not drop until some water has been drawn off, because the closed system holds the old pressure. This is the single most common reason people think the screw is not working.
Step 5: Repeat until you reach your target
Repeat the small turn, brief flow, and recheck cycle until the gauge sits around 50 to 60 psi. Resist the urge to chase an exact number. Anywhere in that band is fine.
Step 6: Tighten the locknut and run a final test
Hold the screw still while you snug the locknut so the setting does not drift. Then run a hot and cold tap, flush a toilet, and look at the regulator and the nearby fittings for drips. Take a last gauge reading and record it.
A note on the “which way” confusion
Homeowners often report that a screw turned the “wrong” way. Some of that is the delay in Step 4. Some is that certain models use a different adjustment mechanism, such as a bolt or a cap, or have stops that limit travel. If the pressure moves opposite to what you expected, stop, return the screw to its starting position, and look up the exact model’s instructions. Incorrect adjustment can leave household pressure either too low or too high, so guessing is not worth it.
Why the pressure will not change
If you have made several careful turns and the gauge has not budged, or it climbs back up after you adjust it, the cause is usually one of these:
- Worn diaphragm or seat. Regulators are wear items. When the internals fail, the valve can no longer hold pressure down, and the screw has nothing left to control. One plumbing resource puts the lifespan at roughly 4 to 7 years before regulators go bad, though how long yours lasts depends on water quality and the model.
- Debris in the seat. Sediment or scale can keep the valve from closing fully. A rebuild often cures this. Repair kits are typically available from the valve manufacturer.
- Pressure creep. If the gauge reads normal while water is flowing but rises when everything is off, the regulator is failing to seal. This also happens when thermal expansion in a closed system pushes pressure up after the water heater cycles.
- No regulator at all. Some homes have an old valve that was bypassed, or never had one. In that case, there is nothing to adjust.
- The setting is at the end of its range. Every model has a limited adjustment range. If the screw is fully backed out and the pressure is still high, the valve is the wrong size or range for your supply pressure.
Thermal expansion: the hidden catch
Installing or replacing a pressure-regulating valve can turn your plumbing into a closed system. The EPA’s technical sheet notes that this may require addressing thermal expansion under local plumbing codes. In practice, that often means an expansion tank on the water heater. If your relief valve drips after a regulator is installed, this is the first thing a plumber will check. Our overview of common water heater problems explains how to recognize it.
Can you adjust it yourself, or should you call a pro?
A handy homeowner can usually handle a simple adjustment on an accessible regulator. The same water district that describes adjustment recommends a licensed plumber for installation and maintenance, which is a sensible line to draw.
Adjust it yourself when:
- You have a gauge and know your starting pressure.
- The regulator is accessible, dry and not visibly corroded.
- The model has a clear adjustment screw and you have the instructions.
- You are making small changes within the 45 to 60 psi range.
Call a licensed plumber when:
- The gauge shows pressure above 80 psi, or it creeps up when no water is running.
- The regulator is leaking, corroded, or stuck.
- Your relief valve discharges or pipes bang loudly.
- You need to replace the valve, add an expansion tank, or you are unsure where the regulator is.
- Your home has older galvanized or brittle pipes. A pressure change can expose weak spots.
A plumber also knows how to separate a regulator problem from a utility-side one. If your pressure is high but you have no regulator, or the readings change dramatically through the day, that points to supply conditions rather than your valve. For more on professional help with home plumbing, see these licensed plumbing services in the New York and New Jersey area, and in Southern California call a local licensed contractor.
What high pressure does to your appliances
We repair appliances every day, so this is where we see the cost of ignored pressure. Dishwasher and washing machine inlet valves are rated for a limited pressure range. When the supply sits too high, solenoids wear out faster, hoses bulge and fittings seep. Ice maker lines and refrigerator water filters are also easy casualties. The EPA’s guidance links high pressure to premature equipment failure and leak risk, and that matches what we find on service calls.
If an appliance has already failed, fix the pressure first. Replacing a washer inlet valve without correcting 90 psi at the main means the new part is on a clock. Our kitchen appliance repair team can diagnose the appliance, and a pressure reading at the hose bib takes the guesswork out of whether supply conditions caused the failure.
Perspective: what we see in the field
We are an appliance, HVAC and plumbing repair company serving Orange County and Los Angeles County, and pressure problems come up on many of our calls even when the customer phoned about something else. A dishwasher that leaks at the inlet, a water heater relief valve that drips, a toilet that keeps refilling: often the appliance is the symptom and the supply pressure is the cause.
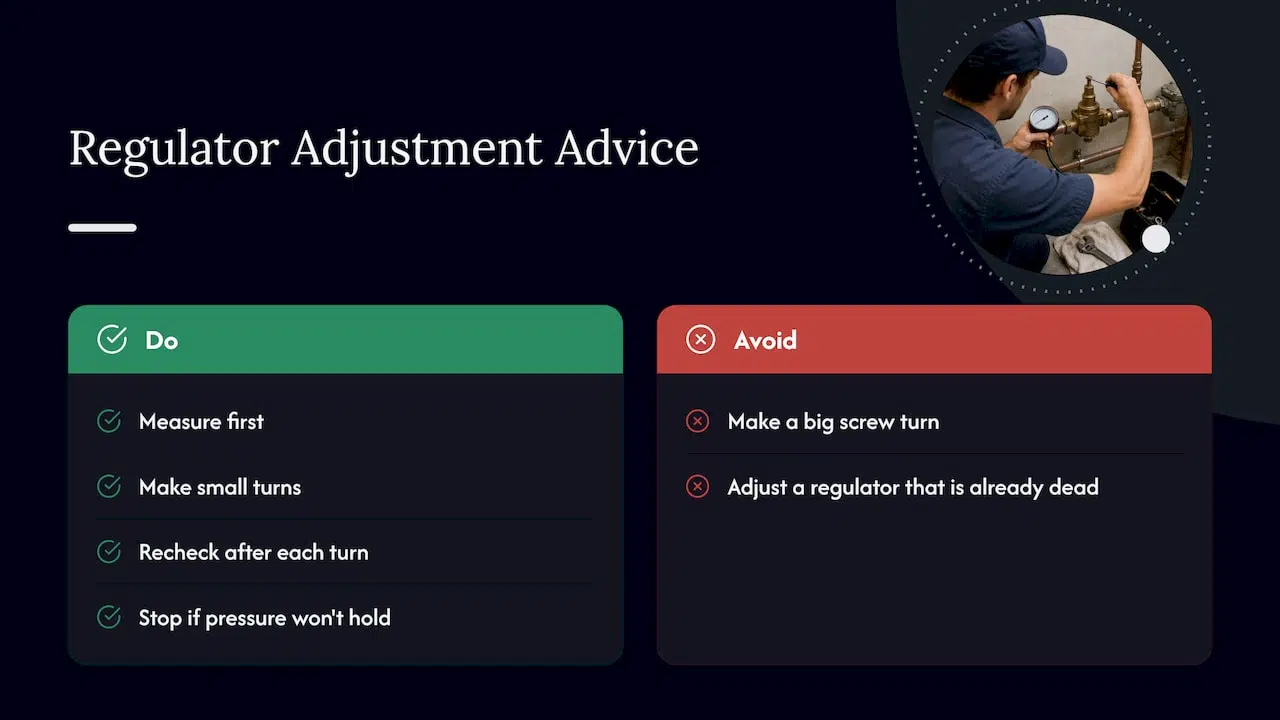
Our advice is simple. Measure first, move slowly, and trust the gauge over your hands. The mistake we see most is a big turn of the screw followed by a shower that has no flow, then another big turn the other way. Small steps and a recheck each time avoid that. The second most common mistake is adjusting a regulator that is already dead. If the number will not hold, stop turning and have the valve rebuilt or replaced.
We also treat the eighth-turn mindset as a general rule for valves. If you are dealing with a weeping shutoff, our article on starting with an eighth turn on a leaking shutoff valve applies the same patient approach.
— MDTECH
Need help with a regulator or a pressure-damaged appliance?
If your gauge shows high pressure, the screw will not respond, or you would simply rather have it done right, we can help. MDTECH handles plumbing repair, plumbing installation and appliance repair across Orange County and Los Angeles County, with online booking. Our licensed technicians can check your pressure, adjust or replace the regulator, and inspect the appliances that high pressure tends to damage. We do not publish flat prices for these jobs because they depend on the valve, access and what we find, so request a quote when you book.
For a broader look at what else can go wrong in a house, see our rundown of types of plumbing issues at home.
Aftercare: keep the setting stable
Once your pressure is in range, a few habits keep it there:
- Recheck twice a year. A quick gauge reading each spring and fall catches drift early.
- Note the setting. Write the target psi and the date on a tag near the regulator.
- Watch for creeping signs. Noisy pipes, dripping relief valves and fixtures that start to leak are all early warnings.
- Plan for replacement. Regulators wear out. If yours is old and the pressure no longer holds, replacing it is cheaper than repairing the damage it allows.
- Check the whole system after any change. Look at the water heater’s relief valve and the expansion tank if you have one.
FAQ
What psi should a water pressure regulator be set at?
For most homes, between 50 and 60 psi. The EPA’s WaterSense program recommends incoming residential pressure of 45 to 60 psi, and many homeowners settle near 50. Pick a number in that band that gives you comfortable showers without straining fixtures.
Which way do you turn a pressure regulator to lower the pressure?
Turn the adjustment screw counterclockwise to lower pressure and clockwise to raise it. Make the change in small steps, around 1/8 of a turn, and recheck with a gauge each time. If the result is the opposite, check the manufacturer’s instructions for your model.
Why is my water pressure still high after adjusting the regulator?
The regulator may be worn out, clogged with debris, or already at the end of its adjustment range. It may also need a little water drawn off before the gauge falls. If pressure still will not hold, a rebuild kit or replacement is the usual fix, and a plumber can confirm which.
Can I adjust my water pressure regulator myself?
Often yes, if the regulator is accessible and you follow the manufacturer’s instructions with a gauge in hand. For installation, replacement, leaks or readings that keep climbing, use a licensed plumber.
How do I know if my house water pressure is too high?
Screw a gauge onto an outdoor hose bib with all water off and read it. Anything well above 60 psi is worth attention. Noisy pipes, running toilets, dripping fixtures and short-lived appliances are the usual clues.
Sources
- WaterSense Labeled Homes Technical Sheet: Service Water Pressure (EPA)
- Home Maintenance (US EPA WaterSense)
- Pressure Regulator Information (Vallecitos Water District)
- Water Pressure, Pressure Regulators and Best Practices (Jurupa Community Services District)
- Pressure & Elevation (Frazier Park Public Utility District)