Burnt cookies or unevenly cooked roasts can frustrate even the most enthusiastic home chef. When your oven stops performing as it should, simple repairs often bring it back to life without the high cost of replacement. In fact, over 60 percent of oven issues are fixable at home with the right approach. By following practical steps and prioritizing safety, you can efficiently diagnose, repair, and restore your oven for reliable cooking results.
Table of Contents
- Step 1: Prepare Your Oven And Workspace
- Step 2: Diagnose Common Oven Problems
- Step 3: Replace Or Repair Faulty Components
- Step 4: Reassemble And Clean The Oven
- Step 5: Test And Verify Proper Oven Operation
Quick Summary
| Key Point | Explanation |
|---|---|
| 1. Power off and unplug the oven | Ensure the oven is off and unplugged before starting repairs to avoid electrical hazards. |
| 2. Diagnose specific oven issues | Check components like heating elements and door seals to identify problems affecting performance. |
| 3. Replace faulty components carefully | Identify and replace damaged parts, following the manufacturer’s specifications for proper installation. |
| 4. Clean and reassemble the oven | Thoroughly clean the interior and securely reassemble all parts to enhance performance and longevity. |
| 5. Test oven functionality post-repair | Verify proper operation by checking temperature accuracy and baking a simple dish to ensure consistent heating. |
Step 1: Prepare Your Oven and Workspace
Before diving into oven repair, you need to create a safe and organized workspace that minimizes potential risks and sets you up for success. This critical first step involves preparing both your oven and the surrounding area to ensure a smooth repair process.
Start by completely powering down your appliance. According to Consumer Reports, it is crucial to ensure the oven is turned off and completely cool before beginning any repair work. Remove all racks, pans, and items from inside the oven to provide clear access. Clear the surrounding countertop and floor area to create an organized workspace where you can lay out your tools and have room to maneuver.
As a safety precaution recommended by manuals.heartlandowners.org, unplug the oven from its electrical outlet to eliminate any potential electrical hazards. Keep children and pets away from your work area, and have a fire extinguisher nearby as a standard safety measure. Pro tip: Lay down an old towel or drop cloth to protect your floor and catch any small parts that might fall during the repair process.
With your workspace prepped and safety measures in place, you are now ready to move forward with diagnosing and addressing your specific oven issue.
Step 2: Diagnose Common Oven Problems
Now that your workspace is prepared, it is time to diagnose the specific issues plaguing your oven. Understanding what is wrong will help you determine whether you can handle the repair yourself or need professional assistance.
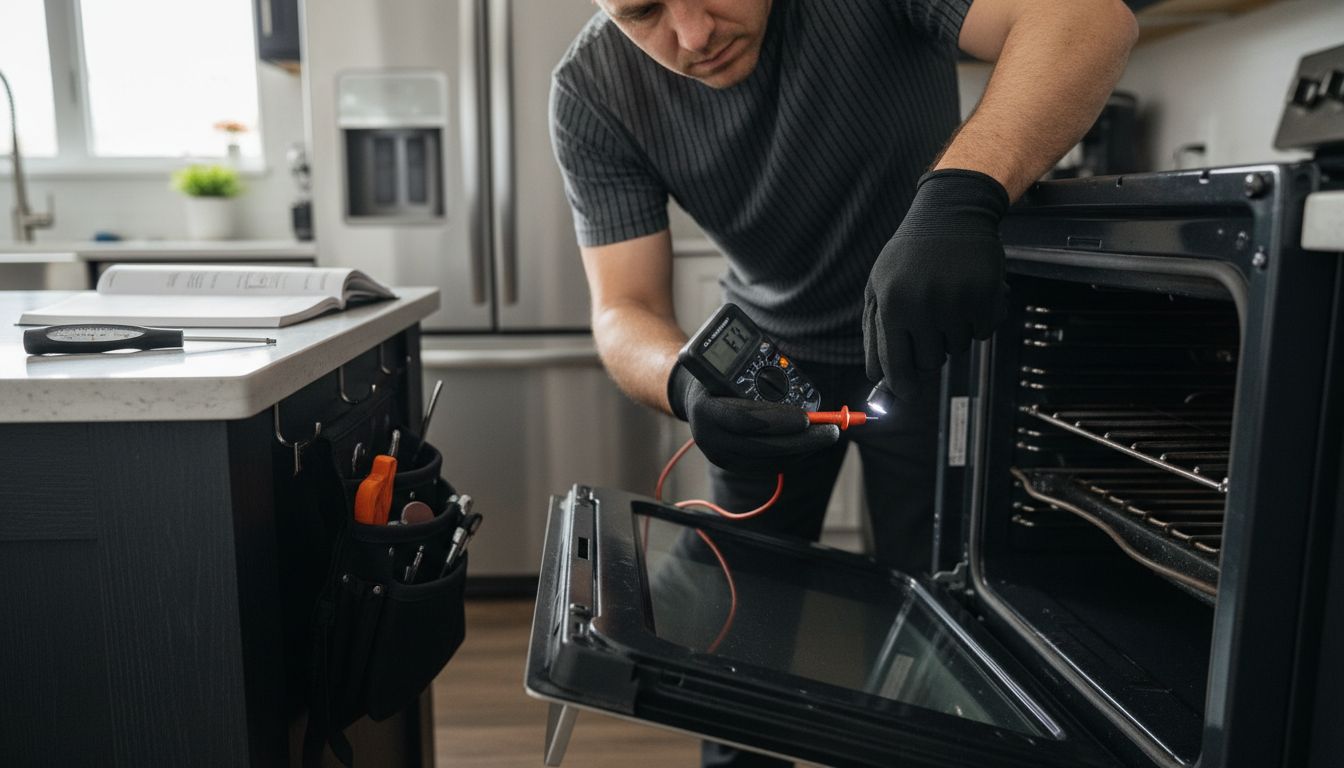
According to Consumer Reports, common oven problems typically involve temperature inaccuracies and burner performance issues. Start by checking the heating elements for signs of damage or wear. Place an external thermometer inside the oven and compare its reading with the oven’s built-in temperature display to verify accuracy. Watch for uneven heating patterns, which could indicate a faulty temperature sensor or heating element.
As recommended by The Tech Advocate, carefully inspect the oven door seal for any visible wear or gaps that might cause heat loss. A compromised seal can significantly impact your oven’s efficiency and performance. Gently run your hand around the door seal to feel for any irregularities or places where heat might escape. Pay special attention to the corners and edges where seals are most likely to deteriorate.
By systematically examining these key components, you will gain valuable insights into your oven’s condition and be better prepared to address specific repair needs.
Step 3: Replace or Repair Faulty Components
With your oven diagnosis complete, you are now ready to tackle the specific repairs needed to restore your appliance to full functionality. This step involves carefully identifying and replacing or repairing the components causing performance issues.
According to Consumer Reports, temperature sensor and burner problems are common issues that can often be resolved through targeted replacements. If you have identified a faulty temperature sensor causing uneven heating, you will need to locate the sensor typically found near the oven wall. Carefully disconnect the electrical connection and remove the old sensor before installing the new one. For gas ovens experiencing burner problems, cleaning or replacing clogged burners can significantly improve flame control and overall cooking performance.
As recommended by The Tech Advocate, if your oven thermostat is proving inaccurate, you may need to recalibrate or completely replace it to ensure precise temperature control. When replacing components, always consult your oven’s specific manual and use manufacturer approved replacement parts. Be sure to match the exact model and specifications to guarantee proper fit and function. Pro tip: Take a photo of the current component configuration before removal to help guide you during reinstallation and prevent potential mistakes.
Careful component replacement can breathe new life into your oven and save you the expense of a complete appliance replacement.
Step 4: Reassemble and Clean the Oven
With repairs completed, the final critical stage involves carefully reassembling your oven and thoroughly cleaning the interior to ensure optimal performance and longevity. This step will help restore your appliance to its best working condition.
According to manuals.heartlandowners.org, begin by meticulously reinstalling all components you previously removed. Double-check that each part is securely fastened and positioned correctly. Use your earlier photographs as a reference to ensure everything returns to its original location. When cleaning the oven interior, choose a mild detergent and soft cloth to prevent scratching or damaging sensitive surfaces. Avoid harsh abrasive cleaners that could compromise the oven’s finish or internal components.
As noted by Consumer Reports, resist the temptation to line your oven bottom with aluminum foil. This common mistake can interfere with heat circulation and potentially damage your newly repaired appliance. Instead, consider placing a washable baking tray on the lowest rack to catch any future drips. Ensure all surfaces are completely dry before reconnecting power to prevent electrical issues. Pro tip: Wipe down all surfaces with a clean microfiber cloth to remove any cleaning residue and leave your oven sparkling clean.
With careful reassembly and cleaning complete, your oven should now be ready to return to full cooking service.
Step 5: Test and Verify Proper Oven Operation
Your oven repair journey culminates in this critical testing phase where you will confirm that all your hard work has successfully restored the appliance to optimal performance. This step involves methodical verification to ensure your repairs have resolved the initial problems.
According to The Tech Advocate, the most effective way to test your oven is by setting it to a specific temperature and using an external thermometer to verify accuracy. Start by preheating the oven to 350 degrees Fahrenheit and carefully place your external thermometer inside. Compare the reading with the oven’s built-in display to check for precise temperature alignment. Watch how quickly the oven reaches the set temperature and how consistently it maintains that heat throughout the cooking chamber.
As recommended by Consumer Reports, extend your testing by baking something simple like cookies or a sheet cake to observe heating performance. This practical test will reveal any remaining issues with uneven heating or temperature fluctuations. Pro tip: If you notice any persistent problems such as hot or cold spots during cooking, you may need to consult a professional technician for further diagnostics. Regular maintenance and careful monitoring can help prevent future oven performance issues and extend the life of your appliance.
With thorough testing complete, you can confidently return your oven to regular cooking duties.
![]()
Restore Your Oven with Confidence and Expert Help
Repairing your oven can be overwhelming when facing issues like inaccurate temperature readings, faulty sensors, or worn seals that affect your cooking experience. You want a solution that saves time, ensures safety, and brings your appliance back to reliable performance. This guide shows you how to diagnose and fix common oven problems but when challenges become too complex or urgent, professional support is the best way forward.

Get peace of mind by connecting with licensed technicians who specialize in oven repair and other appliance services. At Appliances Repair MD Tech, we offer fast, dependable service across Orange County and Los Angeles County. Whether you need help diagnosing burner issues or replacing temperature sensors, our experts are ready to restore your oven efficiently so you can cook with confidence again. Don’t wait until minor faults turn into costly damages. Schedule your trusted oven repair today through our easy online booking on the main site and regain your kitchen’s full potential.
Frequently Asked Questions
How do I safely prepare my oven for repair?
To safely prepare your oven for repair, turn off the appliance and unplug it from its electrical outlet. Remove all items from the oven and clear the surrounding workspace to create a safe area for repair tools and movements.
What are the common problems I should look for when diagnosing my oven issues?
Common oven problems include temperature inaccuracies and burner performance issues. Check the heating elements for damage and use an external thermometer to verify your oven’s temperature accuracy compared to its display.
How can I replace a faulty temperature sensor in my oven?
To replace a faulty temperature sensor, first locate it near the oven wall. Disconnect the electrical connection, remove the old sensor, and then install the new one following your oven’s specific manual for guidance.
What should I do if my oven still isn’t heating evenly after repairs?
If your oven isn’t heating evenly after repairs, double-check the installation of your temperature sensor and ensure that the oven door seal is intact. Consider running a test bake with simple items like cookies to monitor for any remaining temperature fluctuations.
How can I effectively clean my oven after completing repairs?
After completing repairs, clean your oven by using a mild detergent and soft cloth, avoiding harsh chemicals. Make sure all interior surfaces are dry before reconnecting power, and consider using a washable baking tray in the future to catch spills while baking.
What steps should I take to test my oven after repairs?
To test your oven after repairs, preheat it to 350 degrees Fahrenheit and use an external thermometer to compare readings with the built-in display. Also, bake a simple item to check for consistent heating and to ensure that all repairs have been effective.
Recommended
- Broan repair In Irvine Orange CA
- Appliance Repair Whittier – MDTECH APPLIANCE REPAIR
- Tujunga Appliance Repair: Expert Fixes for Home Essentials
- Hood Installation & Repair: Expert Fixes for Home Essentials
- Step by Step iPhone Repair Guide for Local Users | Dash Cellular Repair | Cell Phone, iPhone, Laptop Repair in Oklahoma
- How to Re-Season a Carbon Steel Pan for Perfect Cooking – Brass & Steel