
TL;DR:
- Regular HVAC maintenance extends system lifespan and improves efficiency through simple tasks like filter changes. Homeowners should perform basic checks every 30 to 60 days and schedule professional tune-ups twice a year for optimal performance. Complex repairs, such as refrigerant recharges and electrical work, require licensed technicians to ensure safety and compliance.
HVAC maintenance is the process of performing regular, practical care tasks on your heating and cooling system to improve efficiency and extend its lifespan. Knowing how to maintain HVAC equipment properly separates homeowners who face surprise breakdowns from those who run their systems for 20 years without major failures. The U.S. Department of Energy and the EPA both set clear guidance on what homeowners can safely handle themselves and what requires a licensed technician. This guide covers both, in the order you need them.
What tools and materials do you need for HVAC maintenance?
Preparing the right supplies before you start saves time and keeps you safe. Most DIY HVAC maintenance tasks require only basic household tools, a few inexpensive supplies, and proper safety gear.
Basic tools and supplies:
- Flathead and Phillips screwdrivers
- A flashlight or headlamp
- A garden hose with a spray nozzle
- Replacement air filters (1-inch pleated filters typically cost $8–$20)
- White distilled vinegar (for drain line flushing)
- A wet/dry vacuum
- Coil cleaner spray (optional, for heavy outdoor coil buildup)
Safety equipment:
- Work gloves
- Safety goggles
- A dust mask or N95 respirator
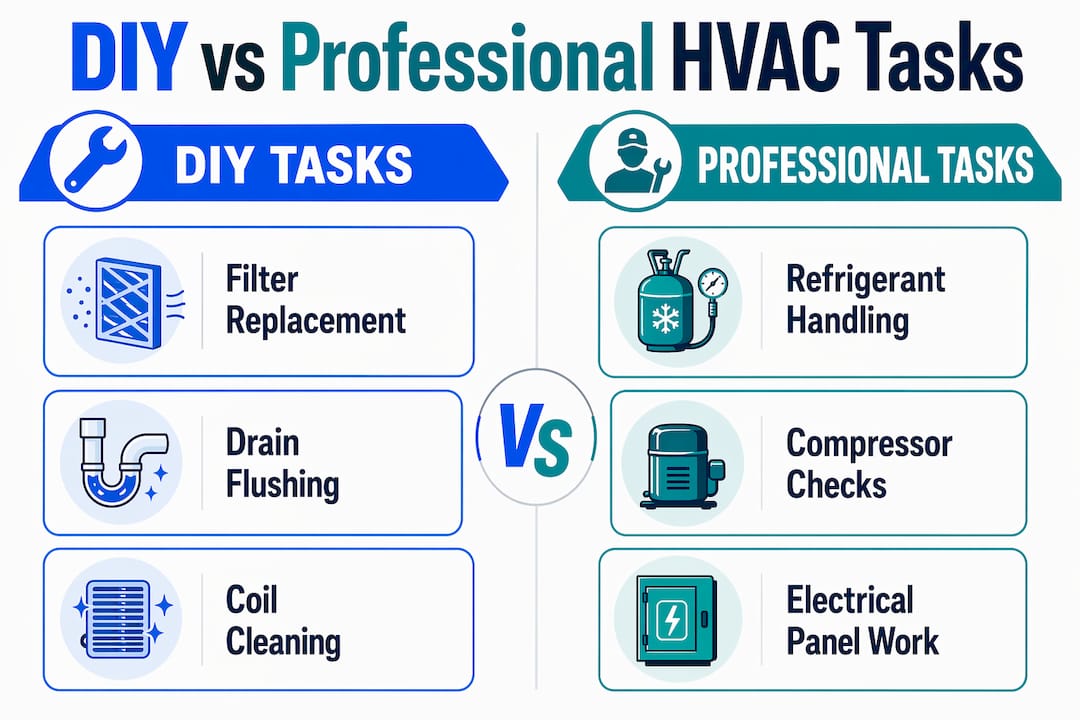
Some tasks belong strictly to licensed professionals. Refrigerant handling, electrical panel work, compressor diagnostics, and capacitor replacement all require certification and training. Attempting these without proper credentials is both dangerous and illegal under EPA Section 608 regulations. Keep your DIY scope to filters, coils, drain lines, and clearance work.
| Task | DIY or Pro? |
|---|---|
| Air filter replacement | DIY |
| Condensate drain flush | DIY |
| Outdoor unit clearance | DIY |
| Refrigerant recharge | Licensed pro only |
| Electrical component repair | Licensed pro only |
| Compressor diagnostics | Licensed pro only |
How often should you maintain your HVAC system?
Maintenance frequency depends on the component and your home’s conditions. A clear schedule prevents the most common cause of system failure: neglect.
-
Every 30–60 days: Replace or clean your air filter. Homes with pets, heavy dust, or allergy sufferers need the shorter interval. Dirty filters cause a 5–15% spike in energy use by restricting airflow. That energy penalty adds up fast on a monthly utility bill.
-
Every 3 months: Flush the condensate drain line with white vinegar during the cooling season. Check the condensate pan for standing water or slime buildup.
-
Every 3 months: Walk around the outdoor condenser unit and clear any vegetation, leaves, or debris within 2 feet of the cabinet. This single task prevents measurable efficiency loss.
-
Twice per year: Schedule a professional tune-up. Spring visits prepare the cooling system before summer demand peaks. Fall visits prepare the heating system before cold weather arrives.
-
Annually: Inspect ductwork for visible gaps, disconnected joints, or pest intrusion. Check insulation on refrigerant lines running to the outdoor unit.
Professional HVAC maintenance twice yearly extends system lifespan by 5–10 years and reduces energy use by 15–30%. That means a system that might last 12 years with no care can realistically reach 20 years with consistent upkeep. Heat pump owners should follow the same twice-yearly schedule, since heat pumps run year-round and accumulate wear faster than standard split systems.
Pro Tip: Set a recurring phone reminder on the first day of march and the first day of september. Those two reminders cover both professional visits and prompt you to check filters and drain lines at the same time.
Step-by-step DIY HVAC maintenance tasks
These are the tasks the DOE recommends homeowners handle themselves. Work through them in order each season.
Replacing or cleaning the air filter
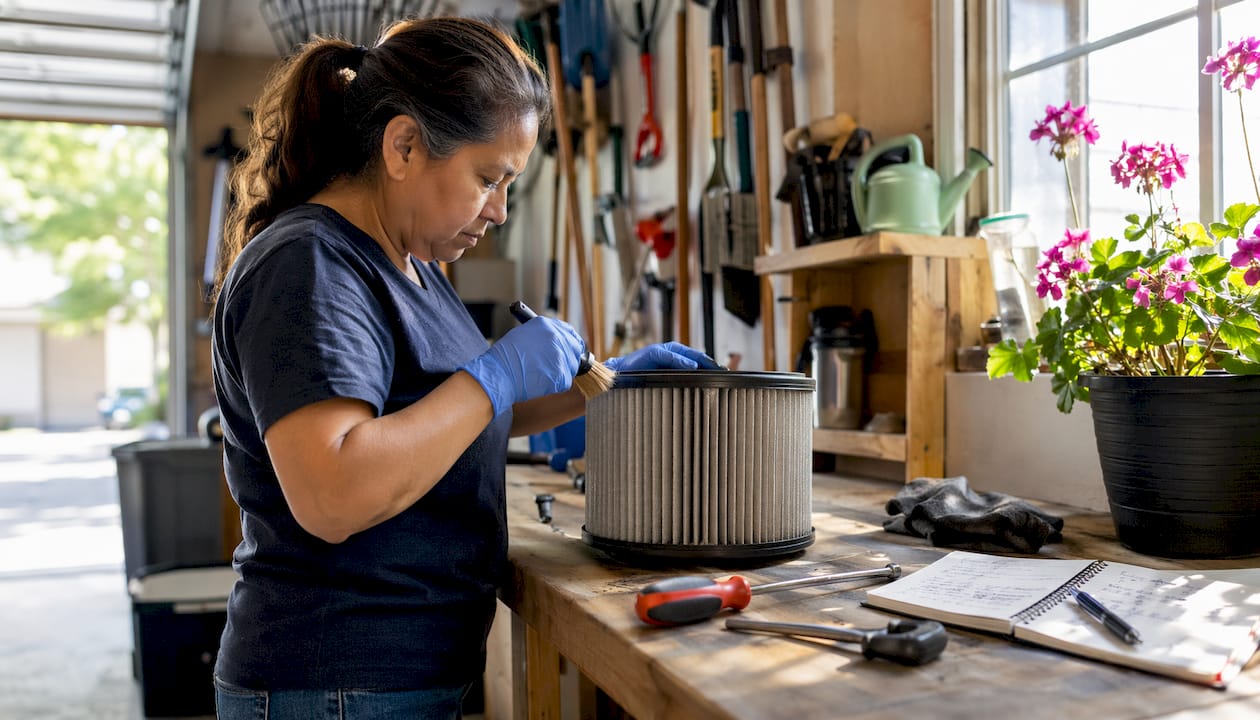
Turn off the system at the thermostat before touching the filter. Locate the filter slot, usually at the return air grille or inside the air handler cabinet. Pull the old filter out and hold it up to a light source. If you cannot see light through the filter media, replace it immediately. Slide the new filter in with the airflow arrow pointing toward the blower. Write the replacement date on the filter frame with a marker so you always know when it was last changed.
Clearing the outdoor condenser unit
Switch off power to the outdoor unit at the disconnect box mounted on the wall near the unit. Remove any leaves, grass clippings, or debris from the top and sides of the cabinet. Trim back any shrubs or plants to maintain at least 2 feet of clear space on all sides. Vegetation within that clearance zone forces the unit to work harder to dissipate heat, which raises energy consumption by up to 20%.
Pro Tip: Rinse outdoor condenser coils with a garden hose from the inside out, not outside in. Spraying from the outside pushes debris deeper into the coil fins. Spraying from the inside forces debris out the way it entered.
For heavy buildup, apply a commercial coil cleaner according to the product label, let it foam and loosen debris, then rinse thoroughly. This restores heat transfer efficiency and prolongs coil life.
Flushing the condensate drain line
Find the PVC drain line running from your indoor air handler to a floor drain or outside. Locate the access port (a T-shaped cap near the air handler). Pour one cup of white distilled vinegar into the port. Wait 30 minutes, then flush with water. This kills algae and mold that cause clogs. A clogged drain line causes water to back up into the condensate pan and eventually overflow onto your floor or ceiling.
Cleaning vents and the blower area
Remove supply and return vent covers and wash them with warm soapy water. Vacuum dust from inside the duct opening as far as your hose reaches. Wipe down the blower compartment with a damp cloth if accessible. Dust buildup on blower blades reduces airflow and forces the motor to draw more power.
Checking the thermostat
Set the thermostat 5 degrees below the current room temperature and listen for the system to start within a few minutes. If it does not respond, check the batteries first. A thermostat that reads inaccurately by even 2–3 degrees causes the system to run longer cycles than needed, wasting energy and adding wear.
When should you hire a professional HVAC technician?
DIY maintenance covers the basics. A licensed technician handles everything that involves electricity, refrigerant, or precision measurement.
Tasks that require a licensed pro:
- Refrigerant level check and recharge (EPA Section 608 certification required)
- Capacitor and contactor testing and replacement
- Electrical wiring inspection and torque verification
- Compressor health assessment
- Duct leakage testing and sealing
A thorough professional tune-up covers far more than a filter swap. Honest tune-ups last 60–90 minutes and include refrigerant superheat and subcooling measurements, capacitor microfarad testing, temperature split verification, and a full safety inspection. Be cautious of service packages that promise 20-point inspections in 20 minutes. That pace does not allow for accurate diagnostics.
A professional tune-up is not just a cleaning visit. It is a diagnostic session that catches failing capacitors, low refrigerant, and worn contactors before they cause a full system shutdown on the hottest day of the year. Skipping it is the single most expensive decision most homeowners make.
Professional care also protects your warranty. Most HVAC manufacturers require documented annual service to keep the equipment warranty valid. Skipping professional visits can void coverage on a compressor replacement that costs $1,500–$4,500. The math strongly favors paying for the tune-up. When weighing repair vs. replacement decisions, documented maintenance history also gives you a clearer picture of remaining system life.
What are common HVAC maintenance mistakes to avoid?
Recognizing trouble early and avoiding common errors keeps repair bills low and system life long.
Warning signs that need attention:
- Musty or burning odors from vents
- Rattling, squealing, or banging sounds during operation
- Water pooling near the indoor air handler
- Rooms that stay warm or cool regardless of thermostat settings
- Utility bills that spike without a change in usage habits
Ignoring early HVAC symptoms like these typically leads to repairs costing $1,500–$4,500 for major component replacements. Catching the same problems early often costs a fraction of that.
Mistakes homeowners make most often:
- Skipping filter changes for months at a time
- Closing supply vents in unused rooms to “save energy”
- Planting shrubs directly against the outdoor unit
- Ignoring condensate drain maintenance until water damage appears
Closing supply vents is a particularly damaging habit. Closed vents increase duct static pressure, strain the blower motor, risk frozen evaporator coils, and shorten system lifespan. Keep every vent open, even in rooms you rarely use.
Pro Tip: Before calling a technician for a “broken” system, check three things: the thermostat batteries, the circuit breaker for the air handler and outdoor unit, and the condensate float switch (a safety device that shuts the system off when the drain pan fills). These three checks resolve a surprising number of service calls.
Key Takeaways
Consistent HVAC maintenance, combining monthly filter checks with twice-yearly professional tune-ups, is the most reliable way to extend system life, cut energy costs, and avoid emergency repairs.
| Point | Details |
|---|---|
| Filter replacement cadence | Replace or clean filters every 30–60 days to prevent energy spikes and airflow loss. |
| Outdoor unit clearance | Keep 2 feet of clear space around the condenser to maintain heat dissipation efficiency. |
| Professional visits | Schedule two professional tune-ups per year to extend system lifespan by 5–10 years. |
| Drain line flushing | Flush the condensate drain with vinegar quarterly to prevent water damage and mold. |
| Know your limits | Leave refrigerant, electrical, and compressor work to licensed technicians only. |
What I’ve learned from years of HVAC maintenance calls
The homeowners who call us in a panic in july almost always share one thing in common: they skipped the spring tune-up. Not because they forgot the system existed, but because it was running fine and they saw no reason to spend money on something that was not broken. That logic is understandable. It is also the reason we replace compressors that could have run another five years.
The tasks that make the biggest difference are the boring ones. Changing a filter. Pouring vinegar down a drain line. Pulling weeds away from the outdoor unit. None of these feel significant. Together, they determine whether your system lasts 12 years or 20.
One thing most homeowners do not realize: installation quality is the single biggest factor in long-term system durability. A well-maintained system that was improperly sized or installed will still fail early. Maintenance preserves what good installation creates. If you bought a home and do not know the installation history, a professional diagnostic visit gives you a baseline to work from.
My honest advice: treat your HVAC the way you treat your car. You would not skip oil changes for three years and then wonder why the engine failed. The same logic applies here. The benefits of regular HVAC service show up in lower bills, fewer breakdowns, and a system that performs when you need it most.
— MDTECH
Professional HVAC care from Appliancesrepairmdtech
When your DIY checklist is complete and it is time for a professional tune-up, Appliancesrepairmdtech serves homeowners across Orange County and Los Angeles County with licensed HVAC technicians who perform thorough diagnostics, not rushed walk-throughs.
Every service visit includes refrigerant measurement, electrical safety checks, coil inspection, and a full system report. Appliancesrepairmdtech technicians are trained to catch the problems that filter changes cannot fix: failing capacitors, low refrigerant, and worn contactors. Schedule your HVAC maintenance visit before the next season hits, or use the complete HVAC maintenance checklist to track every task between professional visits. Protecting your system now costs far less than replacing it later.
FAQ
How often should I replace my HVAC air filter?
Replace or clean your air filter every 30–60 days. Homes with pets or heavy dust need the shorter interval to avoid energy spikes from restricted airflow.
What does a professional HVAC tune-up include?
A thorough tune-up covers refrigerant superheat and subcooling measurements, capacitor testing, temperature split checks, and a safety inspection. It typically takes 60–90 minutes to complete properly.
Can closing vents in unused rooms save energy?
No. Closing supply vents increases duct static pressure, strains the blower motor, and risks frozen coils. Keep all vents open regardless of room use.
How long does an HVAC system last with proper maintenance?
A well-maintained system lasts 15–20 years. Without consistent care, the same system may fail in 12 years or fewer.
When should I call a professional instead of fixing it myself?
Call a licensed technician for any work involving refrigerant, electrical components, or the compressor. These tasks require EPA certification and specialized equipment that homeowners cannot safely use without training.