
Converting an electric range to gas is possible in most homes, but it hinges on one gating factor: whether natural gas already reaches your house or you’re willing to install a propane tank. Beyond that, licensed electricians and plumbers, a city permit, and a pressure test are non-negotiable, not optional extras. Start with three moves: check whether gas service already exists at your meter, snap a photo of your breaker panel, and book a site assessment with a licensed installer before you buy a single fitting.
TL;DR:
- Gas service availability significantly impacts costs, with nearby existing lines making conversions much more affordable than long pipe runs exceeding 20 feet.
- The conversion process requires multiple licensed professionals, including electricians and plumbers, and typically takes 2 to 3 days with proper inspections and permits.
- Permits involve pressure tests, rough-in inspections, and final approvals, and skipping these steps can lead to insurance issues and resale complications.
- Costs vary widely depending on pipe length, venting upgrades, and the range model, with a detailed itemized bid necessary for accurate budgeting.
- Converting to gas is advantageous mainly for those who need precise flame control and already have gas service close to the kitchen.
Table of Contents
- What Does It Take To Convert an Electric Range to Gas?
- How Does the Conversion Process Actually Work?
- What Does a Gas Range Conversion Actually Cost?
- What Permits, Codes, and Ventilation Rules Apply?
- Is Converting to Gas Actually Worth It?
- How Do You Compare Quotes and Avoid Bad Contractors?
- How a Licensed Team Runs a Safe Conversion
- Why Most Conversion Guides Get the Priorities Backward
- Ready for a Safe, Permitted Gas Conversion?
- Where This Guide’s Numbers Come From
- Sources
What Does It Take To Convert an Electric Range to Gas?
Most kitchens can handle the switch, but a few details decide whether the job takes an afternoon or a week. Run through this before you call anyone for a quote.
- Check for existing gas service. Look at your utility bill or walk out to the meter. If your furnace, water heater, or dryer already runs on gas, you likely have a line somewhere nearby.
- No gas line? Look at propane. Propane (LPG) works as a substitute when natural gas isn’t available, but it needs an external tank, a dedicated regulator, and yard space that many urban lots simply don’t have.
- Measure the run from meter to stove. Distance drives cost more than almost anything else in this project. A line that has to snake under a slab or through a finished wall costs far more than one running along an accessible crawl space.
- Plan the electrical swap. Your current 240V outlet has to be disconnected or capped, and most gas ranges need a nearby 120V outlet just to power the electronic igniter and clock.
- Look up at the hood. Gas combustion produces different byproducts than an electric coil, and your existing range hood may not move enough air or vent to the right place.
- Watch for red flags early. Galvanized supply pipes, an undersized meter, or a shut-off valve buried behind drywall are the kinds of problems that turn a simple quote into a change order.
None of these are dealbreakers on their own. But if you’re missing gas service, have zero yard space for propane, and your hood is a recirculating unit with no outside vent, you’re looking at a bigger renovation than a straightforward hookup.
How Does the Conversion Process Actually Work?
A real conversion isn’t a weekend DIY project. It’s a coordinated sequence between an electrician, a gas fitter, and your local permit office, and it typically runs 2 to 3 days from first cut to final sign-off, based on the typical timeline for stove conversions.
- Site assessment and permit filing. A licensed installer inspects the space, confirms pipe routing, and files the permit application, which most cities require before any cutting begins.
- Electrical disconnect. The electrician isolates the 240V circuit, caps it safely or repurposes it, and adds a 120V outlet for the igniter and controls.
- Gas line run. The plumber or gas fitter routes a properly sized branch line from the existing service, installs a shut-off valve and a sediment trap to catch debris, and bonds any corrugated stainless steel tubing (CSST) if that’s the material used.
- Pressure test. Before anything gets connected, the line goes through a rough-in pressure test, often held at 1.5 times working pressure with air or nitrogen, to catch any leak before it becomes a problem inside your kitchen.
- Rough-in inspection. A city inspector verifies pipe sizing, bonding, and the pressure test results before anyone is allowed to close up walls or connect the appliance.
- Appliance hookup and calibration. The installer connects the range, adjusts the burners, and checks for a clean blue flame. A yellow-tipped flame or a burner that won’t hold ignition signals a sizing or calibration issue that needs fixing before sign-off.
- Final inspection. The inspector confirms everything matches the permit, and you get your certificate of compliance.
Pro Tip: Ask your installer to schedule the rough-in inspection for the same week as the pressure test. Cities often have multi-day inspector backlogs, and stacking these steps back to back is the easiest way to shave a full day off your timeline.
A few things reliably add delays. If your meter needs an upgrade to handle the added load, that’s a utility company request that can take longer than the installation itself. Long pipe runs mean more labor hours and more places for something to go wrong during the pressure test. Vent upgrades, if your hood can’t handle combustion byproducts, mean ordering and installing new ductwork. And permit turnaround varies wildly by city, from same-day counter permits to a two-week wait in busier jurisdictions.
What Does a Gas Range Conversion Actually Cost?
Budget for a wide range, because your specific setup determines almost everything. Simple jobs where gas service already sits a few feet from the stove location run cheap. Complex jobs with long pipe runs, meter upgrades, or vent work climb fast.
Line distance to the meter matters more than the appliance you’re installing. A nearby gas line keeps a project affordable, while a long run through finished space can triple your labor and material costs compared to a straightforward hookup.
These figures come from detailed cost data on gas stove hookups and reflect installation labor and materials, not the appliance itself.
A few things push a quote toward the high end:
- A range hood that needs replacement or new ducting to handle a gas cooktop.
- A pipe run longer than 20 feet, especially through finished walls or flooring.
- Buying the gas range itself, which adds several hundred to well over a thousand dollars depending on the model.
- A contingency line for unexpected issues like galvanized pipe replacement or meter capacity upgrades.
When you’re comparing bids, ask for an itemized breakdown rather than a flat number. A detailed look at gas line installation costs can help you sanity check what you’re being quoted before you sign anything. And always confirm the permit fee is baked into the estimate. It’s a small line item, but it’s the one contractors sometimes leave out to make a bid look lower than a competitor’s.
What Permits, Codes, and Ventilation Rules Apply?
Permits aren’t paperwork theater. Most jurisdictions require at least two inspections: a rough-in pressure test after the piping goes in, and a final inspection once the range is connected and running. Skipping either one can void your homeowner’s insurance and create real problems if you ever try to sell the house with unpermitted gas work on record.
There’s no federal rule banning gas stoves or forcing you to remove one. Recent policy attention has focused on efficiency standards for new construction, not on existing appliances in homes like yours. Local permitting rules are the real thing to watch, not headlines about federal bans.
A short list of what inspectors actually flag on site:
- Missing or improper CSST bonding, which is required in many jurisdictions to protect against electrical surges.
- Undersized range hoods or missing make-up air, which can cause backdrafting and carbon monoxide buildup in a tight kitchen.
- Inaccessible or missing shut-off valves.
- No sediment trap on the branch line.
- Pipe runs that weren’t pressure tested before being covered by drywall or flooring.
Roughly two full inspections stand between a rough-in and a signed-off kitchen, based on standard permitting requirements for appliance installations. A CO detector near the kitchen is a smart add regardless of local code, since gas combustion introduces a risk that wasn’t there with electric coils. When the project wraps, you should walk away with a signed permit card, pressure test documentation, and a final inspection certificate. Keep all three. They matter at resale and for insurance claims.
Is Converting to Gas Actually Worth It?
Gas gives you faster visual feedback and finer control over flame size, which matters if you sear, wok cook, or work with carbon steel pans. That responsiveness is the main reason people go through the hassle at all.
But it’s not free, and it’s not always the right move.
- Performance gain: instant heat adjustment and visible flame control that many cooks prefer over electric coils.
- Cost tradeoff: installation costs money upfront that an equivalent electric range swap doesn’t require.
- Fuel and policy trends: some cities are steering new construction toward all-electric, though existing gas appliances aren’t affected by those rules.
- Alternatives worth weighing: a propane conversion if natural gas isn’t available, a dual-fuel range if you want gas burners with an electric oven, or a modern induction range if you’d rather skip combustion entirely.
Conversion tends to pay off when gas service already sits close to your kitchen and you cook enough to notice the difference. It makes less sense if you’re in a newer all-electric build or facing a long, expensive pipe run for a range you’ll use occasionally. Full details on the tradeoffs of gas conversion are worth a look before you commit either way.
How Do You Compare Quotes and Avoid Bad Contractors?
Getting three accurate bids starts with giving every contractor the same information.
- Supply photos up front: your meter location, breaker panel, and the stove area, so quotes reflect your actual setup instead of a guess.
- Ask direct questions: confirm the contractor’s license and insurance, who pulls the permit, what pressure test method they use, whether they bond CSST, and what warranty covers the finished work.
- Compare itemized bids, not just bottom-line numbers, checking that materials, labor, and permit handling are broken out separately.
- Walk away from any quote that skips permits, asks for cash only, or suggests bypassing inspection. That’s the fastest way to end up with an unsafe line and no paper trail if something goes wrong later.
How a Licensed Team Runs a Safe Conversion
A conversion done right isn’t one person’s job. It’s an electrician, a gas fitter, and a permit office all working from the same plan, and coordinating that sequence is what separates a smooth two-day job from a project that drags into a second week.
MDTECH’s gas conversion workflow documents every step for the homeowner: the permit application, pressure test records, and the inspector’s rough-in and final sign-off. That paperwork isn’t busywork. It’s what protects you if you sell the house or file an insurance claim down the line.
Scheduling typically starts with a site visit to confirm meter location, pipe routing, and hood capacity before any quote is finalized. From there, a licensed team sequences the electrical disconnect and gas line run to minimize the days your kitchen is out of commission. Reputable services often back the finished work with a warranty on labor and materials, so a burner calibration issue discovered later may be covered.
Why Most Conversion Guides Get the Priorities Backward
A lot of advice online treats this like a weekend project with a shopping list: buy a conversion kit, swap the burner orifices, done. That framing undersells the actual risk. The hard part isn’t the appliance. It’s the line run, the pressure test, and the inspection sign-off that most DIY guides skip entirely, because those steps require a license to perform legally in nearly every jurisdiction.
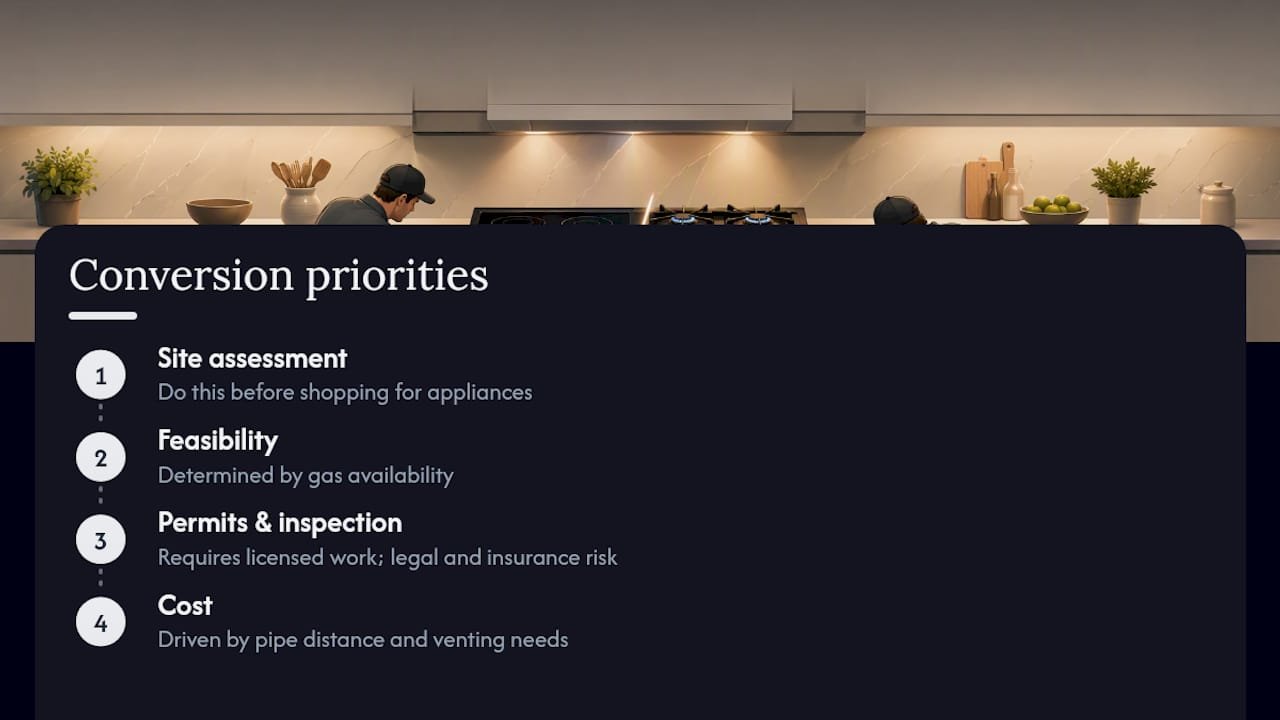
The research backs a different priority order than most articles give you. Feasibility comes first, and it’s determined by gas availability, not by how badly you want a gas range. Permits and inspections come second, because skipping them creates real insurance and resale exposure, not just a hypothetical risk. Cost comes third, and it’s driven almost entirely by pipe distance and venting needs, not by the range you end up buying.
If you take one thing from this guide, take this: get the site assessment before you shop for appliances. Everything else, budget, timeline, whether propane makes more sense than natural gas, flows from what that assessment tells you.
— MDTECH
Ready for a Safe, Permitted Gas Conversion?
Skip the guesswork of coordinating an electrician, a gas fitter, and a permit office on your own. Some service providers handle all three tasks as one job: a licensed team runs the site assessment, manages the permit paperwork, performs the pressure test, and coordinates the final inspection so homeowners get a signed-off kitchen instead of a half-finished project with mismatched contractors.
To get an accurate estimate, MDTECH needs a few photos of your meter, breaker panel, and stove location, plus a quick site visit to confirm pipe routing and hood capacity. If propane makes more sense for your property, the team also handles natural gas to propane conversions. Book a site assessment through MDTECH’s appliance installation services and get a real, itemized quote before you commit to a range.
Where This Guide’s Numbers Come From
Cost figures in this guide come from gas stove hookup cost data covering materials, labor, and permit ranges. Permit and inspection details reflect San Jose’s permit center guidance on appliance installations, and policy context on gas stoves draws from the Department of Energy’s clarification on appliance standards. Ventilation guidance comes from range hood venting requirements for gas cooktops. Local permit rules and fees vary by city, so confirm specifics with your own permit office before budgeting a project.
Sources
- DOE: Addressing misinformation on appliance standards
- Gas stove hookup cost — CurrentCost
- Do I need a permit to convert electric stove to gas? — LegalClarity
- City of San Jose: appliance installations and permit process