
TL;DR:
- Performing simple checks like thermostat settings and filter replacement often resolves air conditioning issues.
- Homeowners should follow a safety power-down sequence and document symptoms before calling a technician.
Try these six safe, ordered checks before calling anyone: thermostat settings, power at the breakers, air filter, outdoor condenser, condensate drain, and a controlled reset. Most homeowners who work through this sequence fix the problem themselves. The ones who don’t come away with exactly the right information to hand to a technician.
- Confirm thermostat settings and batteries. Mode to COOL, setpoint at least 5°F below room temp, fan to AUTO.
- Check power at indoor and outdoor breakers and the outdoor disconnect. A tripped circuit breaker is one of the top reasons an AC won’t turn on.
- Inspect and replace a dirty air filter. Hold it up to light. If you can’t see through it, replace it now.
- Clear debris from the outdoor condenser and check the fan. Two feet of clearance on all sides, fan spinning freely.
- Check the condensate drain for clogs or standing water. A full secondary pan or a tripped float switch will shut the system down.
- Perform a controlled power-down and restart. Thermostat OFF → outdoor disconnect OFF → main breakers OFF. Wait five minutes. Restore in reverse.
When to call a pro right away: hissing sounds or ice that returns after defrosting, a compressor that never starts, repeated breaker trips, burning smells, or any electrical work beyond a basic breaker reset.
Pro Tip: A quick filter swap and a 60-second debris clear around the outdoor unit resolve a large share of “not cooling” calls. Do these two things first, every time.
Table of Contents
- What are the air conditioning troubleshooting steps in the right order?
- How do you verify your thermostat is actually working?
- Why is a dirty air filter the most common fix?
- What should you check on the outdoor condenser unit?
- How do you defrost a frozen evaporator coil safely?
- How do you clear a clogged condensate drain?
- What electrical checks can homeowners safely do?
- What tools and supplies do you actually need?
- How long does each fix take, and what does it cost?
- When should you stop DIY and call a professional?
- Key Takeaways
- What MDTECH technicians actually see after homeowner troubleshooting
- When you’re ready for a professional: what Appliancesrepairmdtech offers
- Useful sources and further reading
What are the air conditioning troubleshooting steps in the right order?
Safe troubleshooting means working from the outside in: start with what you can see and control, then move closer to the mechanical core. Skipping steps wastes time and creates risk.
Step 1: Map your symptoms. Before touching anything, note exactly what the system is doing. No power at all? Running but blowing warm air? Short cycling (turning on and off every few minutes)? Water on the floor? Odd sounds? Write it down. This takes two minutes and saves a technician twenty.
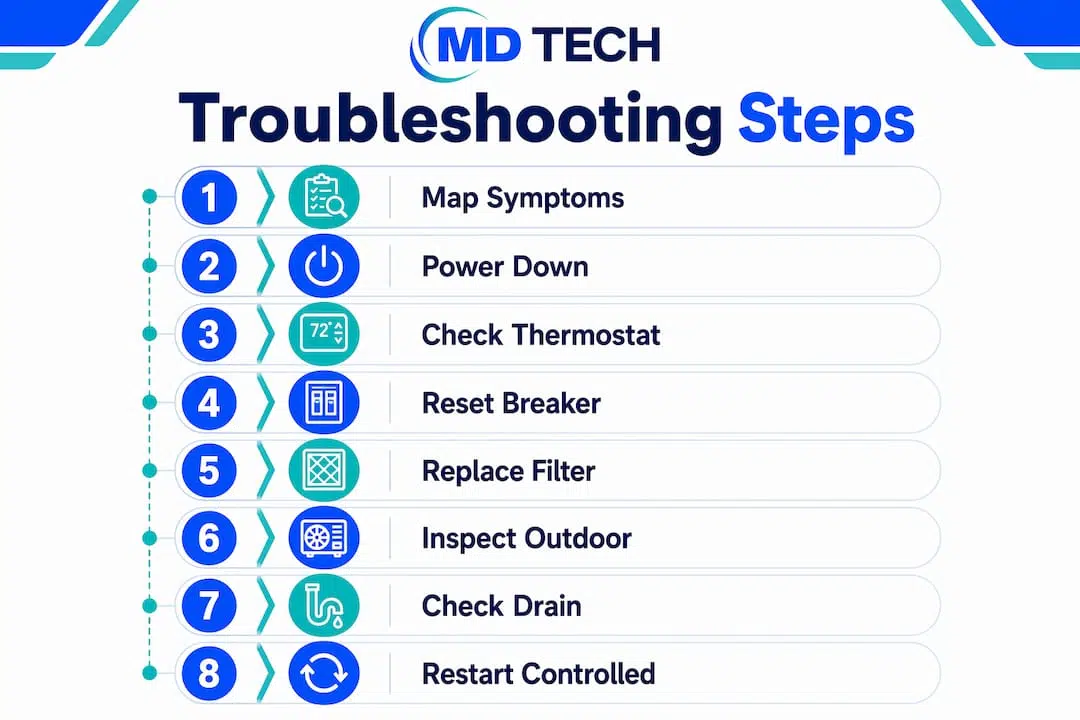
Step 2: Formal power-down sequence. Per practitioner safety guidance, the correct order is: thermostat to OFF first, then outdoor disconnect switch off, then main AC breakers off. Wait a full five minutes before opening any panel. This sequence prevents mechanical damage from a surprise restart and allows capacitor charge to dissipate.
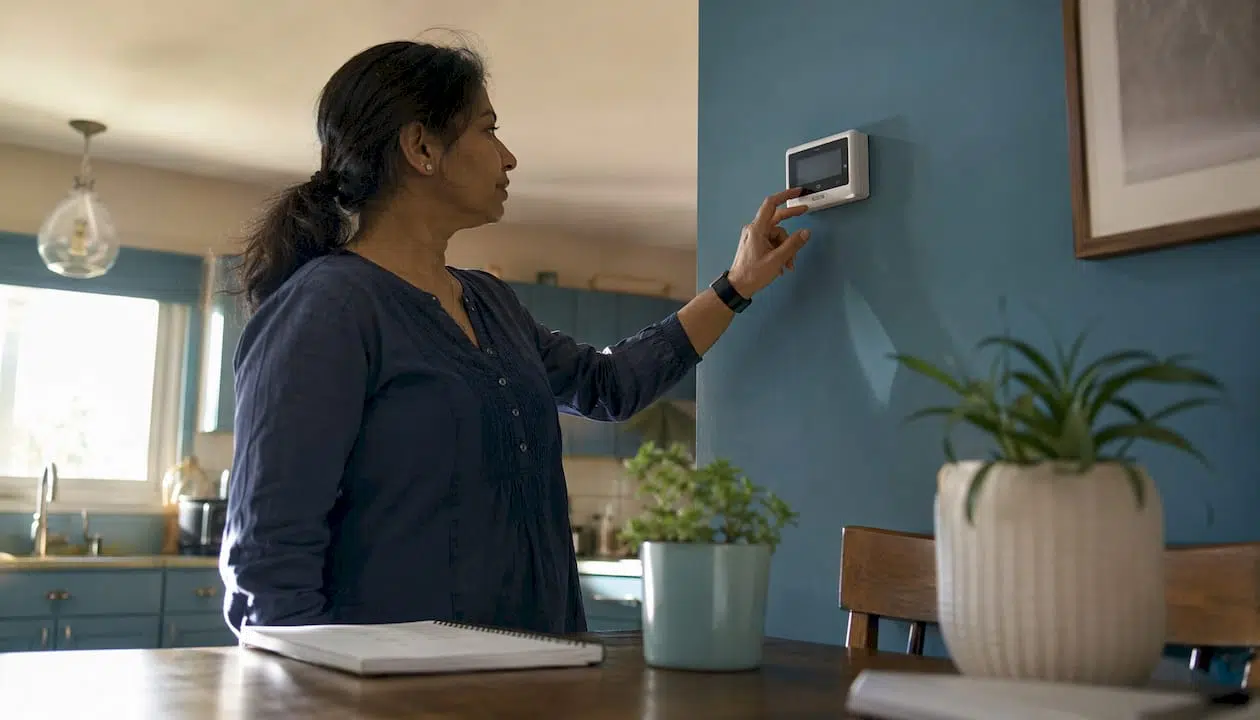
Step 3: Thermostat check. Confirm mode (COOL), setpoint (5°F below room temp), and fan setting (AUTO). Replace batteries. For smart thermostats, check Wi-Fi connection and look for error codes.
Step 4: Breaker and disconnect check. At the main panel, find the labeled AC breakers. A tripped breaker sits between ON and OFF. Flip it fully OFF, then back ON. Check the outdoor disconnect box too.
Step 5: Air filter inspection and replacement. Locate the return grille or air handler filter slot. Pull the filter and hold it to light. Replace if clogged.
Step 6: Outdoor unit visual check. Look for debris, blocked fins, and whether the fan is spinning. Gently rinse fins with a garden hose on low pressure.
Step 7: Condensate drain check. Look for standing water in the secondary pan or active dripping near the air handler.
Step 8: Controlled restart. Restore power in reverse: main breakers ON → outdoor disconnect ON → thermostat to COOL. Wait five minutes for the compressor to cycle. Note what happens.
Stop and call a pro if you encounter: refrigerant lines with ice that returns after defrost, a compressor that hums but never starts, repeated breaker trips, burning smells, or any exposed high-voltage wiring inside panels.
How do you verify your thermostat is actually working?
Thermostat problems account for a surprising number of “my AC isn’t cooling” calls, and most of them take under five minutes to rule out.
- Set mode to COOL and the setpoint at least 5°F below the current room temperature. If the room reads 78°F, set the thermostat to 72°F or lower.
- Set the fan to AUTO, not ON. Running the fan on ON circulates unconditioned air between cooling cycles and makes the house feel warmer than it is.
- Replace batteries even if the screen looks fine. A low battery can cause erratic behavior without triggering a blank screen.
- For smart thermostats: check the Wi-Fi indicator. A lost connection can prevent the system from receiving commands. Power the thermostat off, wait 30 seconds, and power it back on to re-establish communication.
After making any setpoint change, wait up to five minutes for the outdoor compressor to cycle on. Compressors have a built-in time delay to protect the motor. If the outdoor unit doesn’t start within five minutes of a clear cooling call, move to the breaker check.
Pro Tip: Note your thermostat’s model number and any error codes displayed before calling a technician. That information alone can cut diagnostic time in half.
Why is a dirty air filter the most common fix?
Dirty filters restrict airflow, reduce cooling capacity, and are the leading homeowner-correctable cause of a frozen evaporator coil. Replacing a clogged filter can lower your AC’s energy consumption by 5–15%. That’s not a minor efficiency footnote; it’s the difference between a system that keeps up on a hot day and one that runs constantly without cooling the house.
- Turn the system off at the thermostat.
- Locate the filter. It’s either at the return air grille (a large vent on the wall or ceiling) or inside the air handler cabinet itself.
- Pull the filter out and hold it up to a light source. If light barely passes through, it’s time to replace it.
- Note the size printed on the filter frame (e.g., 16x25x1). Buy the same size. Standard 1-inch pleated filters work well for most homes; households with pets or allergy concerns benefit from a MERV 8–11 rated filter.
- Slide the new filter in with the arrow on the frame pointing toward the air handler (in the direction of airflow).
- Turn the system back on and confirm airflow at the supply vents improves within a few minutes.
Most filters need replacement every 1–3 months during peak cooling season. If you run the AC daily through a Southern California summer, check monthly.
Pro Tip: Keep two or three spare filters in a labeled box near the air handler. Set a phone reminder for the first of each month, June through September. You’ll never get caught with a clogged filter on the hottest day of the year.
What should you check on the outdoor condenser unit?
The outdoor unit has one job: dump heat from your home into the outside air. When it can’t do that, the whole system suffers. Most of what can go wrong out there is visible before you touch anything.
- Clear the area. Remove leaves, grass clippings, and any objects within 2–3 feet on all sides. Blocked airflow around the condenser is a common and easily overlooked problem.
- Inspect the fins. The aluminum fins covering the coil should be straight and relatively clean. Bent fins reduce airflow; a fin comb (available at hardware stores) can straighten minor damage.
- Check the fan. With the system running, the condenser fan on top of the unit should be spinning. No movement when the unit has power is a red flag.
- Rinse the coil. Per Department of Energy guidance, gently hose down the fins from the outside using low pressure. Never use a pressure washer. High pressure bends fins and forces water into electrical components.
For more detail on fin care and condenser maintenance, the outdoor unit maintenance guide from Appliancesrepairmdtech covers the full process.
Never attempt compressor, refrigerant, or capacitor work yourself. These are licensed tasks, and capacitors can hold a lethal charge even after the unit is powered down.
How do you defrost a frozen evaporator coil safely?
A frozen coil is one of the more alarming things a homeowner can discover, but the defrost process itself is straightforward. The harder question is what caused the freeze.
- Switch the thermostat to FAN ONLY (or turn the system completely off). This stops the refrigeration cycle and lets the coil thaw. Expect 2–4 hours for a full thaw.
- Place towels under the air handler. As the ice melts, water drips. A few old towels prevent ceiling or floor damage.
- Replace the air filter while the system is off and accessible. A clogged filter is the most common cause of a frozen coil — restricted airflow drops coil temperature below freezing.
- Restore normal operation after the coil is fully thawed. Set to COOL and monitor for the next hour.
If the coil freezes again within a day or two after you’ve replaced the filter and confirmed good airflow, that’s a different problem. Ongoing freezing after proper airflow restoration, combined with hissing sounds or oily residue near the lines, points to low refrigerant.
“Refrigerant handling and recharging require EPA-certified technicians and specialized equipment. Leaks must be located and repaired before any recharge. This is not a DIY task under any circumstances.”
Refrigerant work is federally regulated. A licensed HVAC technician handles diagnosis, leak repair, and recharge. If low refrigerant is suspected, the right move is to stop running the system and schedule a service call.
How do you clear a clogged condensate drain?
Central AC systems pull moisture out of the air as they cool. That water drains through a PVC condensate line. When algae or debris clogs the line, water backs up into the secondary pan, trips the float switch (which shuts the system down), or leaks through the ceiling.
- Turn the system off at the thermostat and breaker.
- Locate the condensate drain access tee near the air handler. It’s a small PVC cap, usually white or gray.
- Remove the cap and pour in 1 cup of distilled white vinegar. Wait 30 minutes. The vinegar breaks down algae and light debris.
- Take a shop-vac to the outdoor end of the drain line (where it exits the house, usually near the foundation). Seal the vac hose around the pipe end and run it for about 60 seconds. This pulls the clog out from the far end.
- Restore power and confirm the system runs without the float switch tripping again.
Repeat this process monthly during cooling season. It takes about 15 minutes and prevents most drain clogs before they start.
Pro Tip: Add a condensate trap cleaning to your seasonal checklist every April, before peak cooling season. Algae and mold build up slowly; catching it early means you never deal with a ceiling stain.
If you find a cracked drain pan or corroded fittings, that’s a structural repair. Call a pro rather than patching it with tape.
What electrical checks can homeowners safely do?
Electrical diagnosis has a hard boundary for homeowners: you can observe and reset, but you cannot open junction boxes or replace components. Stay on the right side of that line.
- Main panel breaker check. Find the breakers labeled for the AC (often two breakers side by side). A tripped breaker sits in the middle position. Flip it fully to OFF, then back to ON. If it trips again immediately or within minutes, stop and call a professional. Repeated trips signal an underlying fault, not a one-time surge.
- Outdoor disconnect switch. This is a small box mounted on the wall near the outdoor unit. Open it and confirm the disconnect block or switch is in the ON position. Some disconnects use pull-out fuse blocks; if the fuse looks melted or shows “OL” on a multimeter, it needs professional replacement.
- Indoor service switch. Many air handlers have a service switch that looks like a light switch near the unit. Confirm it’s ON.
- Smell and sound check. Before restarting the system, stand near the air handler and outdoor unit and note any burning plastic or ozone smell. Listen for loud buzzing, grinding, or rattling.
“Burning smells, repeated breaker trips, or loud buzzing and grinding are immediate stop-DIY indicators. These signals can indicate dangerous electrical faults or failing motors — power down and call a licensed technician.”
Never open electrical junction boxes or attempt capacitor replacement. Capacitors store lethal voltage even after the unit is powered off, and discharging them safely requires training and insulated tools.
What tools and supplies do you actually need?
You don’t need much to work through this entire checklist safely. Here’s what’s worth having on hand:
- Screwdriver set (flathead and Phillips) for access panels and disconnect boxes
- Multimeter for basic AC voltage checks at the disconnect (only if you’re comfortable using one)
- Shop-vac for condensate drain clearing
- Garden hose for condenser fin rinsing
- Flashlight for inspecting the air handler and drain pan
- Replacement filters in the correct size for your unit
- Distilled white vinegar and a measuring cup for drain maintenance
- Towels for catching condensate drip during defrost
For safety: insulated gloves and safety glasses are worth putting on before opening any panel. If you need a ladder to reach the air handler or a rooftop unit, never work alone.
Do not attempt: handling refrigerant, opening high-voltage electrical panels, replacing capacitors, or forcing stuck mechanical parts. These tasks require licensing, specialized tools, and training that go well beyond what any homeowner checklist covers.
How long does each fix take, and what does it cost?
Most of the checks in this guide cost almost nothing and take less than an hour. Here’s a realistic breakdown:
| Fix | Typical Time | Typical DIY Cost |
|---|---|---|
| Thermostat battery swap / reset | 5–15 minutes | $5–$15 |
| Air filter replacement | 5–15 minutes | $5–$30 |
| Condensate drain clearing | 15–45 minutes | small cost (vinegar + shop-vac) |
| Outdoor debris clear and hose rinse | 15–60 minutes | $0 |
| Breaker reset | 5 minutes | $0 |
| Shop-vac (if you don’t own one) | — | $30–$150 to rent or buy |
When costs climb, they climb fast. Capacitor replacement runs $150–$400 with labor. A refrigerant recharge, once a leak is found and repaired, typically runs several hundred dollars. Compressor replacement on a central system can reach $1,500–$2,500 or more depending on unit size and labor rates in your area. At that point, the repair vs. replacement question becomes worth asking seriously.
- Filter changes and drain clearing are genuinely worth doing yourself. The savings are real and the risk is minimal.
- Anything involving refrigerant, capacitors, or compressors belongs with a licensed technician.
- A regular HVAC service schedule prevents most of the expensive failures from developing in the first place.
When should you stop DIY and call a professional?
Some symptoms are clear stop signs. Others are judgment calls. Here’s how to read them:
Call a pro immediately if you observe:
- Hissing or bubbling sounds from the refrigerant lines
- Ice on the coil or lines that returns within 24 hours after defrost and filter replacement
- The compressor hums but never fully starts
- Repeated breaker trips (more than once after a reset)
- Burning smells or visible scorch marks near any component
- Standing water that persists after drain clearing
- Exposed or damaged wiring
What to tell the technician: Give them the unit model and year (on the nameplate of the outdoor unit), a timeline of when the problem started, every step you already tried (thermostat, breaker, filter, defrost, drain), any sounds or smells you noticed, and whether cooling varies room to room. This information alone can shorten a diagnostic visit significantly.
When verifying a technician, confirm they hold a state HVAC license, carry EPA refrigerant certification (Section 608), and have a local service presence. Ask upfront about the diagnostic fee, what the estimate process looks like, and whether parts and labor carry a warranty.
For homeowners in Orange County and Los Angeles County, Appliancesrepairmdtech’s HVAC repair service covers these checks and more, with licensed technicians and online booking.
Key Takeaways
A dirty air filter is the single most common and most preventable cause of AC failure. Fix that first, follow the power-down sequence before touching anything else, and document what you observe before any service call.
| Point | Details |
|---|---|
| Filter first | Replace a clogged filter before any other fix; it resolves the majority of “not cooling” calls. |
| Power-down sequence | Always follow thermostat OFF → outdoor disconnect OFF → main breakers OFF, then wait five minutes. |
| Condensate drain | Pour 1 cup distilled white vinegar monthly during cooling season to prevent most clogs. |
| Stop-DIY signals | Repeated breaker trips, burning smells, hissing sounds, or returning ice mean call a licensed technician. |
| Appliancesrepairmdtech | Licensed HVAC repair in Orange and Los Angeles counties, with online booking and on-site diagnostics. |
What MDTECH technicians actually see after homeowner troubleshooting
Most of the time, when a homeowner has worked through a checklist before calling, the service visit goes faster and costs less. The filter is already replaced. The drain is clear. The breaker behavior is documented. That context matters.
What tends to get missed is the pattern. A homeowner notices the AC isn’t cooling on a Tuesday and resets the breaker. It trips again Thursday. They reset it again. By the time a technician arrives, the compressor has been stressed through multiple restart cycles, and what might have been a capacitor swap has become a harder diagnosis. Documenting the first trip, the time between trips, and any sounds during startup gives the technician the pattern, not just the symptom.
The other common gap is filter history. “I changed it recently” covers a range from two weeks to eight months. Knowing the actual replacement date, combined with the household’s filter type and MERV rating, tells a technician a lot about whether airflow restriction was a contributing factor over time.
For homeowners in Orange and Los Angeles counties, Appliancesrepairmdtech’s technicians handle the full diagnostic sequence on arrival, including refrigerant checks, electrical testing, and drain inspection. The HVAC maintenance checklist on the site is worth reviewing before any service visit.
When you’re ready for a professional: what Appliancesrepairmdtech offers
When the checklist is done and the problem is still there, the next step is a licensed technician who can pick up exactly where you left off.
Appliancesrepairmdtech serves homeowners across Orange County and Los Angeles County with on-site HVAC diagnostics, refrigerant work, electrical repairs, and full system maintenance. Technicians are licensed and EPA-certified, and same-day scheduling is available for urgent calls. Bring your notes from this guide to the visit: the model number, the symptoms, the steps you already tried, and the timeline. That preparation typically shortens the diagnostic portion of the visit and gets you to a repair estimate faster.
Booking is online. The diagnostic fee is applied toward the repair when you proceed. Parts and labor carry a warranty. For homeowners who’ve worked through every DIY step and need a technician they can trust, book an HVAC repair visit with Appliancesrepairmdtech today.
Useful sources and further reading
The following sources back the guidance in this article and are worth bookmarking for ongoing reference:
- Common Air Conditioner Problems — U.S. Department of Energy overview of refrigerant leaks, drainage issues, electrical faults, and maintenance requirements.
- Home Cooling 101 — Department of Energy guidance on filter maintenance, energy efficiency, and refrigerant handling rules.
- Guide to Home Heating and Cooling — Department of Energy resource covering outdoor unit maintenance, fin cleaning, and seasonal upkeep.
- How to Repair an Air Conditioner (DIY Fixes That Work) — Practitioner-level walkthrough of the power-down sequence, condensate drain clearing, and capacitor safety.
- AC Troubleshooting Guide — Manufacturer troubleshooting notes on breakers, thermostat settings, and stop-DIY warning signs.
“Keeping your air conditioner well-maintained and addressing issues promptly will ensure it operates efficiently and effectively.” — U.S. Department of Energy, Common Air Conditioner Problems