
Quick fixes for the most common LG dryer problems
Most LG dryers that stop heating or take forever to dry have one root cause: blocked airflow. Before you pull out a multimeter or call a technician, check these fast fixes first. They resolve the majority of complaints without any tools.
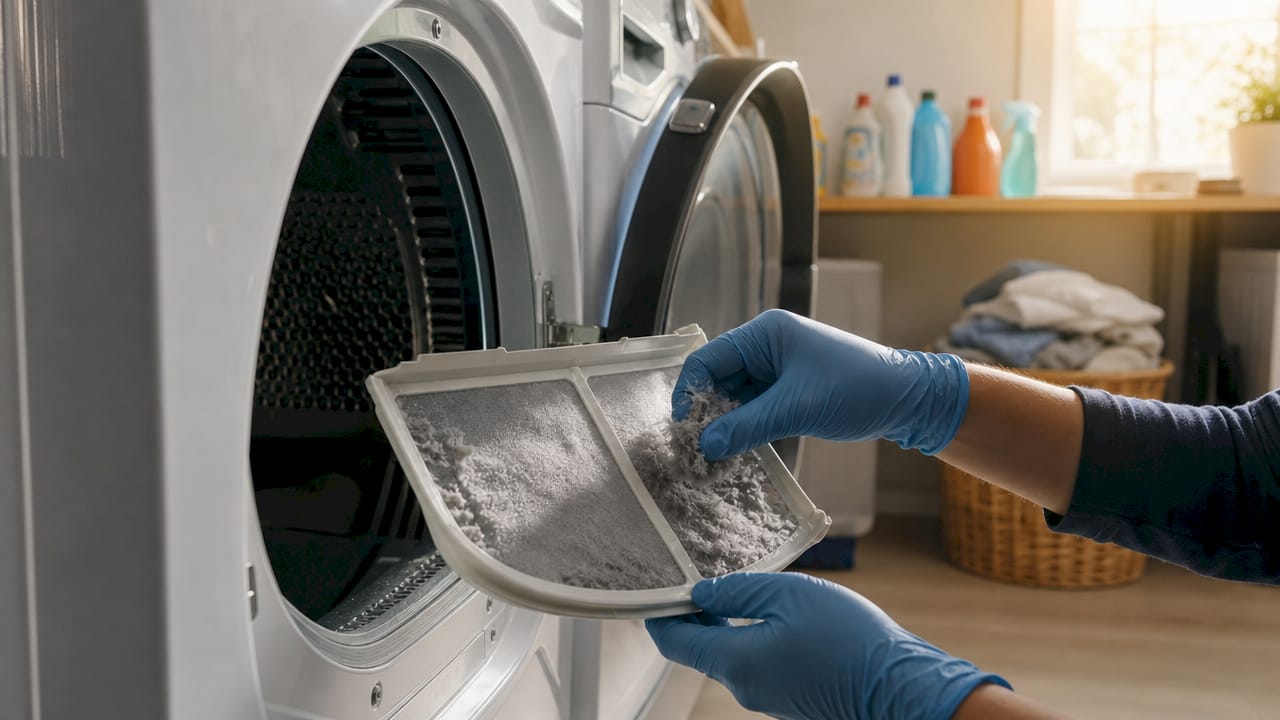
- Clean the lint filter. A clogged filter is the single most common reason for poor drying. Pull it out, remove the lint by hand, and rinse it under warm water if residue has built up. Let it dry completely before reinserting.
- Check the vent hose behind the dryer. Look for kinks, dents, or sharp bends. The hose should run in a straight line or a gentle S-curve. A crushed section cuts airflow dramatically.
- Inspect the outside vent flapper. Go outside while the dryer runs and feel for airflow. If the flapper isn’t opening fully or air feels weak, the duct is restricted somewhere between the dryer and the exterior wall.
- Watch for LG Flow Sense warnings. If your display shows d75, d80, d90, or d95, those numbers represent the percentage of airflow restriction detected in the exhaust duct. Two or four bars on the Flow Sense LED indicator mean the exhaust system is severely restricted.
- Check your cycle settings. The Energy Saver setting on Cotton/Normal cycles uses little to no heat for most of the run. If clothes feel warm but damp, that setting may be on. Press and hold the Energy Saver button to turn it off by default.
- Power cycle the dryer. Unplug it, press and hold the Power/Start button, then hold Play/Pause to perform a hard reset. Plug it back in. This hard reset clears minor control board faults before they escalate.
- Check the circuit breaker. Electric dryers need 240 volts across two breaker legs. If one breaker leg trips, the drum may spin but the heater gets no power. Turn the breaker fully off, then turn it back on.
If none of these quick steps work, the problem is deeper. The section below walks through a full diagnostic workflow.
How to troubleshoot your LG dryer step by step
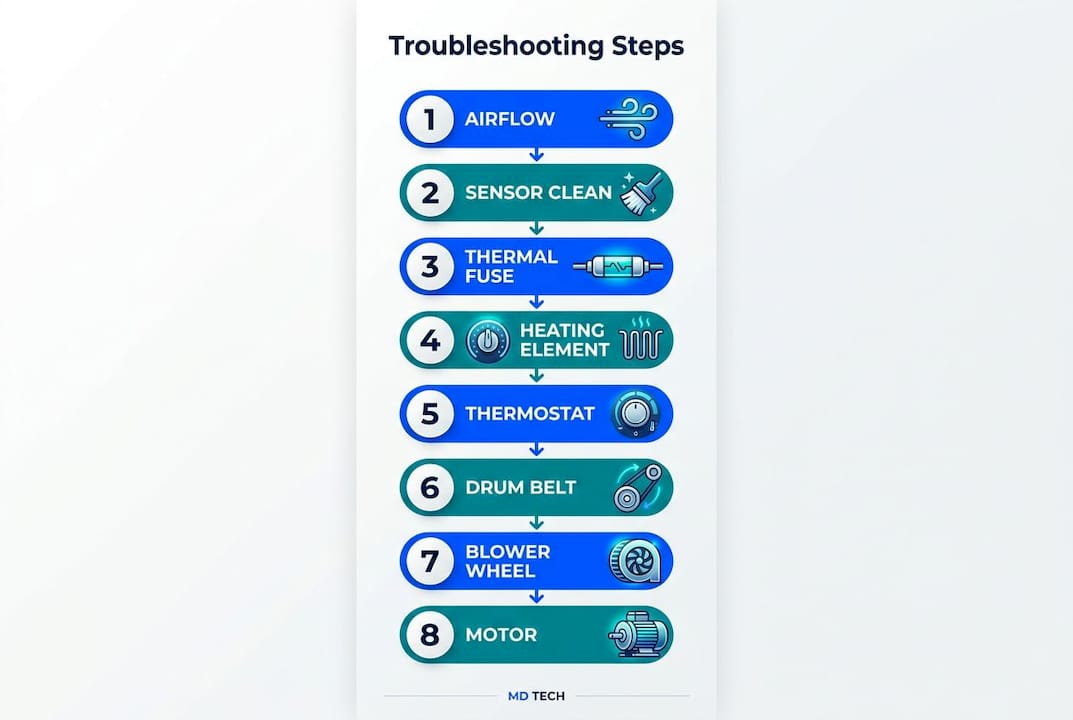
Systematic troubleshooting saves time. Work through this sequence from easiest to most involved, and stop as soon as you find the fault.
Step 1: Confirm airflow is the issue
Disconnect the vent hose from the back of the dryer and run a short cycle. If heat improves noticeably with the vent removed, the restriction is in the ductwork, not the dryer itself. Reconnect the hose and clean or replace the duct run. For persistent blockages inside the walls, a professional vent cleaning service is the right call. According to LG’s official guidance, having the home ventilation system cleaned by a professional once per year is the standard recommendation.
Pro Tip: Disconnect the vent hose temporarily and run the dryer to confirm heat improvement and locate a duct blockage. Strong heat with the vent off and weak heat with it on is a near-certain confirmation of a duct blockage, not a heating element failure.
Step 2: Clean the moisture sensor bars
The two metal sensor strips sit just inside the drum opening, below the lint filter slot. Dryer sheet residue coats them invisibly and causes the dryer to misread moisture levels. The result is cycles that end while clothes are still damp, or cycles that run far too long. Wipe the sensor strips with a cloth dampened with rubbing alcohol, then let them dry fully before running another load. A reliable test: if Timed Dry works normally but Sensor Dry is inconsistent, the sensors are the culprit, not the heater.
Step 3: Test the thermal fuse
The thermal fuse is a one-time safety device that blows permanently if the dryer overheats, usually from a blocked vent. Unplug the dryer first. The fuse is typically located on the exhaust duct inside the cabinet. Use a multimeter in continuity mode: a good fuse shows continuity; a blown fuse reads open. If it’s blown, replace it, but also fix the airflow problem that caused it to blow. Replacing the fuse without clearing the vent blockage means the new fuse will blow again.
Step 4: Inspect the heating element
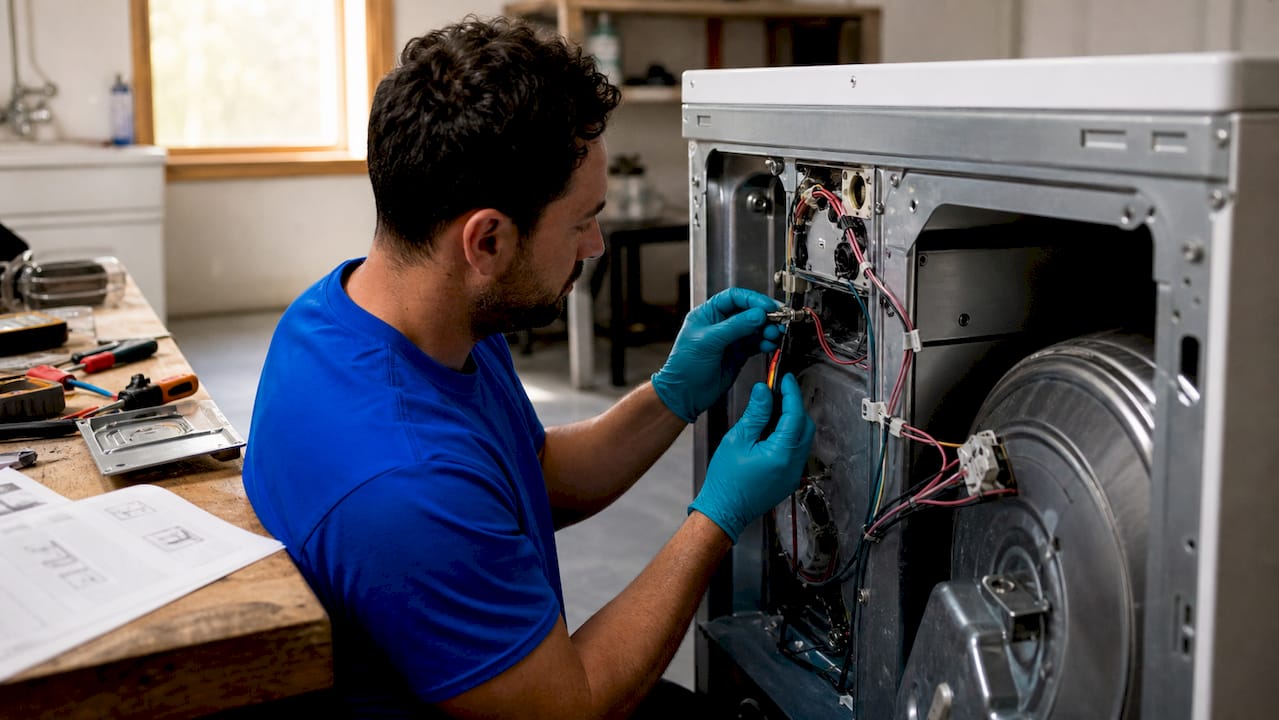
On electric models, the heating element sits in a housing at the rear of the drum. With power disconnected, remove the back panel and test the element’s terminals with a multimeter. No continuity means the element has failed and needs replacement. You can find detailed guidance on replacing heating components to make sure the job is done correctly the first time.
Step 5: Check the thermostat
LG dryers use both a cycling thermostat and a high-limit thermostat. The cycling thermostat regulates operating temperature; the high-limit thermostat cuts power if the dryer overheats. Test both with a multimeter for continuity. A thermostat that passes a cold continuity test can still fail under heat, so if the element and fuse both check out but the dryer still underheats, replacing the cycling thermostat is a reasonable next step.
Step 6: Inspect the drum belt, rollers, and idler pulley
Disconnect power before opening the cabinet. Remove the front panel to access the drum support system. Spin the drum by hand. Rough, uneven rotation or a grinding sound points to worn drum rollers or a failing idler pulley. A drum that spins too freely with no resistance usually means the belt has snapped. Worn rollers tend to produce a rhythmic thumping sound that continues even with light loads. These parts are straightforward to replace once you have the front panel off.
Step 7: Check the blower wheel
The blower wheel pulls air through the drum and pushes it out the exhaust. Lint and small items like socks can jam it. With power off, reach into the blower housing and spin the wheel by hand. It should turn freely with no wobble. A wobbling or jammed wheel restricts airflow just as badly as a blocked duct, and it can cause the Flow Sense indicator to trigger even when the ductwork is clean.
Step 8: Assess the motor
If the drum doesn’t turn and the belt is intact, the motor may have failed. A humming sound with no drum movement often means the motor is trying to start but can’t. Motors can also overheat and cut out mid-cycle, then restart after cooling. Motor replacement is a more involved repair. If you’ve ruled out the belt, rollers, and idler pulley and the drum still won’t turn, professional dryer repair is usually the most practical path forward.
For a broader overview of the full dryer troubleshooting workflow, Appliancesrepairmdtech has a dedicated step-by-step resource that covers each stage in detail.
What do LG dryer error codes mean?
LG dryers display error codes to tell you exactly where the problem is. Most codes resolve with a simple fix. The table below covers the codes you’re most likely to see.
| Error Code | What It Means | Common Cause | What to Do |
|---|---|---|---|
| d75 / d80 / d90 / d95 | Exhaust duct is 75%–95% restricted | Lint buildup, crushed hose, blocked exterior vent | Clean lint filter, straighten hose, inspect exterior flapper; call vent specialist if needed |
| Flow Sense (2 or 4 bars) | Exhaust system severely restricted | Same as d-codes above | Same steps; 4 bars = urgent cleaning required |
| OE / drn / Drain | Drain error; in cold weather, frozen drain hose or water tank | Frozen hose in winter | Soak drain hose in warm water for 10 minutes; use warm towel if hose won’t detach |
| nP | No current detected at heater | Wiring fault, tripped breaker leg | Check 240V supply; reset breaker; call electrician if voltage is wrong |
| PS | Improper voltage in power cord | White and red wires reversed on terminal block | Check power cord wiring; verify 240V at outlet |
| dE / dE4 | Door not fully closed | Lint filter not fully seated, clothing caught in door | Reseat lint filter; clear door seal; reset by unplugging for 5 seconds |
| — | Drain hose kinked, clogged, or frozen | Kinked hose or ice in sump | Straighten or replace drain hose; thaw if frozen |
| F0 / Insert Filter | Lint filter is missing or not seated | Filter removed or misaligned | Remove and firmly reinsert lint filter |
| HS | Humidity sensor error | Dirty or failed sensor | Clean sensor bars with damp cloth; allow to dry; if code persists, call for service |
| PF | Power failure | Power outage or surge | Unplug, hold Start/Pause 5 seconds, restore power |
| tE1 / tE3 | Thermistor fault | Failed temperature sensor | Factory reset (same as PF); if code returns, service required |
| tE2 | Thermistor fault during steam cycles in cold conditions | Excess humidity cooling duct during steam cycle | Select Steam Fresh, press More Time until “big” shows, press Start; service if code persists |
| CL | Child lock active | Child lock engaged | Press and hold Child Lock button for 3 seconds |
| Add | Water supply error for steam function | Steam feeder empty or drawer not closed | Fill steam feeder to max line; close drawer fully |
A few codes deserve extra attention in cold climates. LG dryers in freezing temperatures often display OE, drn, or Drain not because of a mechanical fault, but because the drain hose or water tank has frozen solid. The fix is thawing, not repair. Wrap the hose with a warm towel for about 10 minutes or soak it in warm water. Always empty the water tank after using the dryer in cold weather to prevent this from recurring.
The d80 code on gas dryers can also indicate insufficient gas supply rather than a duct blockage. If cleaning the vent doesn’t clear a d80 on a gas model, check that the gas supply valve is fully open.
For a full list of LG dryer error codes and their resolutions, LG’s official support library is the most current reference.
How to use LG dryer diagnostic mode safely
Diagnostic mode is a built-in service tool that tests individual components one at a time. It’s designed for trained technicians, but homeowners can use it carefully to confirm a suspected fault before ordering parts or scheduling service.
- Prepare the dryer. The dryer must be in standby mode: plugged in but powered off. Remove all laundry from the drum and clear any lint from the filter tray.
- Enter diagnostic mode. Press and hold both the More Time and Less Time buttons simultaneously, then press Power while still holding them. If the display shows the installation test or a diagnostic indicator, you’ve entered the mode correctly. Timing matters here. You must press the designated buttons before the startup chime finishes. If it doesn’t work on the first try, power off and repeat.
- Start the test sequence. Press Start/Pause to begin. The display will show a number, then change back to the test indicator after about one minute. Note the first number shown and the highest number that appeared just before it changed back.
- Read the results. After the second minute, the display reads “End” or “0.” About 20 seconds later, it either goes blank (no fault detected) or begins flashing error codes. Write down any codes that appear. These correspond to specific component failures: a heating element fault, a thermistor error, a motor issue, or an airflow restriction.
- Cycle through component tests. Each press of Start/Pause advances to the next test. The sequence typically covers the motor, heater, moisture sensor, door switch, and thermistor. On electric models, the third press activates both heater elements at full power (5,400W). On gas models, the same press opens the gas valve.
- Check the Flow Sense LED. During the test, watch the Flow Sense indicator on the control panel. If the LED turns on before the cycle ends, the exhaust system is restricted. If it stays off throughout, airflow is adequate.
- Exit and reset. After completing the tests, unplug the dryer for one minute to fully reset the control board. Skipping this step can leave the board in a test state and cause false error codes during normal operation.
One critical warning: never press the door switch to activate the heater while the door is open during diagnostic mode. Doing so trips the thermal fuse attached to the heater, causing a permanent no-heat condition that requires professional repair to fix. Keep the door closed whenever the heater test runs.
The LG installation check procedure is a related but simpler test you can run periodically to verify that the exhaust system is performing correctly, even when no fault code is present.
Safety first: when to DIY and when to call a pro
Most LG dryer repairs are genuinely within reach for a careful homeowner. But a few situations call for a professional, and knowing the difference protects both you and the machine.
Safe practices for any DIY work:
- Always unplug the dryer before opening any panel or touching internal components. On gas models, turn off the gas supply valve as well.
- Never activate the heater in diagnostic mode with the door open. This trips the thermal fuse and creates a new repair problem.
- After any diagnostic session, unplug the dryer for a full minute to reset the control board before running a normal cycle.
- Clean the lint filter before every load, and have the vent duct professionally cleaned at least once per year. Lint buildup in the duct is a leading cause of dryer fires in the United States.
- If you smell burning during a cycle, stop the dryer immediately. A burning odor usually means lint near the heater assembly or a roller dragging on its axle. Both need inspection before the dryer runs again.
Signs you need a professional:
- The drum light comes on when you open the door, but the dryer won’t power on or start. This points to a control board or switch fault that a hard reset won’t fix.
- Error codes return immediately after a factory reset. Persistent tE1, tE3, or nP codes after resetting indicate a component failure that needs hands-on diagnosis.
- Any issue involving the gas line, gas valve, or gas-to-propane conversion. Gas work requires a licensed technician in virtually every jurisdiction.
- The control board itself shows signs of failure: random error codes, buttons that don’t respond, or a display that flickers. Control boards are sealed components that aren’t practical to test or repair at home.
- You’ve replaced the thermal fuse twice and it keeps blowing. This means a deeper airflow or electrical fault that requires professional diagnosis to find.
When in doubt, stop. A dryer that runs with a compromised heating system or a blocked vent is a fire hazard. The cost of a professional inspection is far lower than the cost of a house fire. If you’ve worked through the steps above and the problem isn’t resolved, calling a licensed technician is the right call, not a last resort.
Appliancesrepairmdtech serves homeowners across Orange County and Los Angeles County, California, with licensed technicians who handle LG dryer diagnostics, part replacement, and vent cleaning. If your dryer needs hands-on attention, book a repair appointment and get it resolved the same day.
Not sure whether to repair or replace your LG dryer? Appliancesrepairmdtech’s repair vs. replacement guide walks through the practical factors that make the decision clear.
Key Takeaways
Most LG dryer problems trace back to airflow blockages, sensor residue, or power supply faults, all of which are diagnosable at home before calling a technician.
| Point | Details |
|---|---|
| Airflow is the first suspect | Check the lint filter, vent hose, and exterior flapper before testing any electrical component. |
| Flow Sense codes are specific | Codes d75 through d95 indicate the percentage of duct restriction; 4 bars on the LED means severe blockage. |
| Sensor residue mimics heating failure | Clean moisture sensor bars with rubbing alcohol when Sensor Dry is inconsistent but Timed Dry works normally. |
| Diagnostic mode requires caution | Never activate the heater with the door open, and unplug the dryer for one minute after any diagnostic session. |
| Annual vent cleaning prevents fires | Professional duct cleaning once per year removes lint buildup that causes both poor drying and fire risk. |