
Why is my refrigerator leaking water? Start here
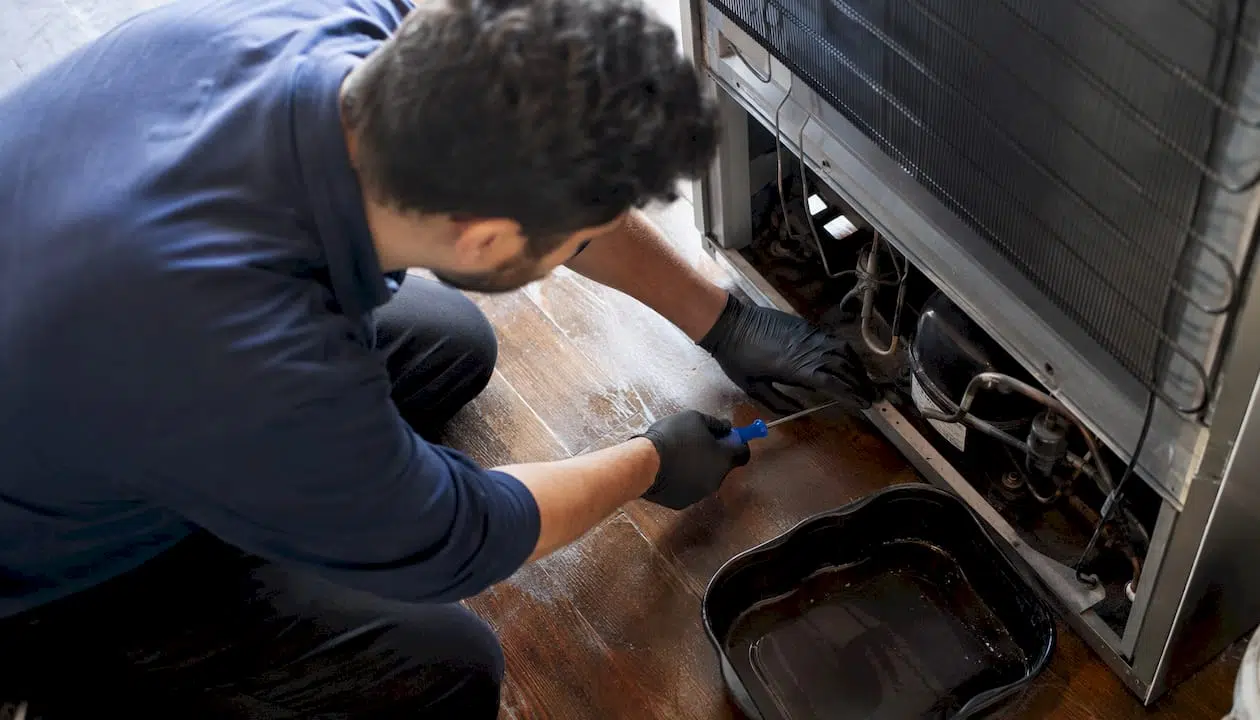
A leaking refrigerator almost always traces back to one of three things: a clogged defrost drain, a damaged water supply line, or a worn door seal. Identifying which one is causing the problem takes about five minutes of observation and costs nothing. The fix, in most cases, is something you can handle yourself.
Before you pull the fridge away from the wall, do a quick visual check:
- Water inside the fresh-food compartment or under the crisper drawers points to a blocked defrost drain.
- Water pooling behind the refrigerator suggests a loose or cracked water supply line.
- Puddles near the front grille usually mean an overflowing or misaligned drain pan.
- Condensation on door edges or shelves often signals a failing door gasket letting warm air in.
- Leaks that appear only after using the ice maker or water dispenser point to the filter housing, inlet valve, or dispenser tube.
Whirlpool’s manufacturer guidelines note that refrigerator leaks are rare when the appliance is used and maintained per the owner’s manual, which means most leaks you encounter are fixable with basic maintenance. When the source is unclear or involves internal components like coolant systems, licensed technician advice is the safer call.
Table of Contents
- The most common refrigerator water leak causes and how to fix them
- How to pinpoint exactly where your fridge is dripping
- When to call a professional and how to prevent future leaks
- Key Takeaways
- Refrigerator still leaking? Appliancesrepairmdtech fixes it fast
The most common refrigerator water leak causes and how to fix them
1. Blocked or frozen defrost drain
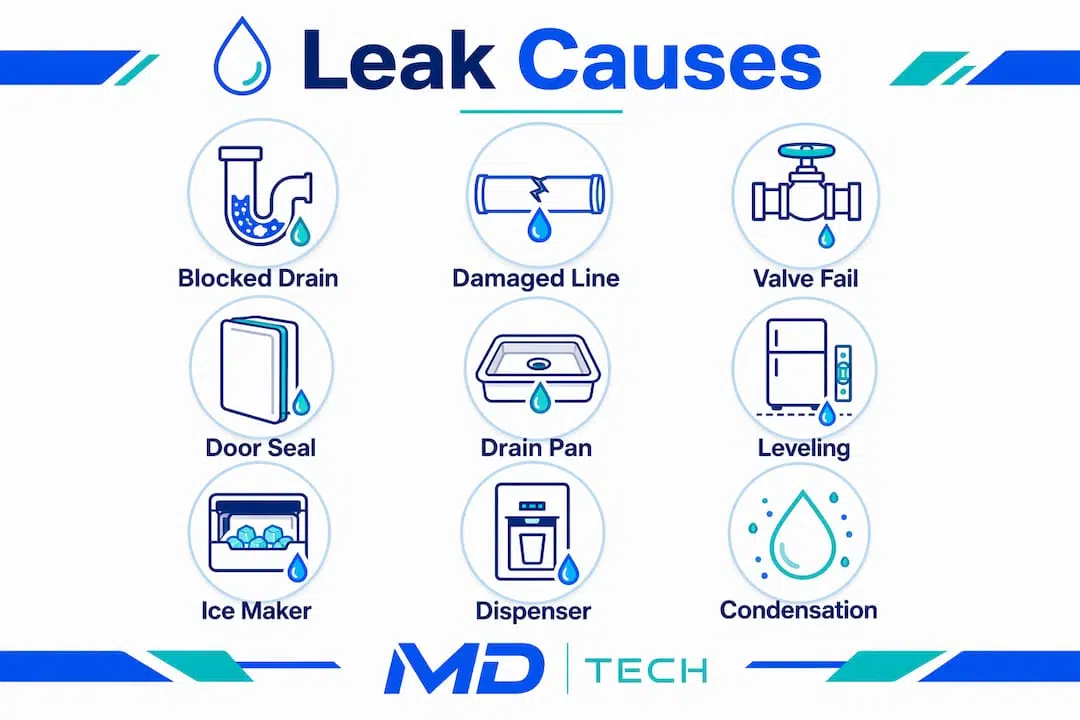
The defrost drain sits at the bottom-back of the freezer compartment. During each defrost cycle, melted frost flows through this drain tube into the pan below. When food debris or ice blocks that path, water backs up and overflows inside the freezer or fresh-food compartment, eventually leaking onto the floor.
How to fix it:
- Unplug the refrigerator.
- Remove any food from the freezer floor and locate the drain hole at the back.
- Pour warm water slowly into the drain hole to melt any ice blockage.
- Use a turkey baster or a small funnel for better control.
- Once clear, dry the area and plug the fridge back in.
- Keep food items away from the drain opening going forward.
2. Damaged or loose water supply line
Refrigerators with ice makers or water dispensers connect to your home’s water supply through a plastic or braided line running behind the unit. Loose fittings, cracks, or kinks in that line cause drips that pool behind the appliance or under the rear panel.
How to fix it:
- Unplug the fridge and shut off the water supply valve (usually under the sink or behind the unit).
- Pull the refrigerator away from the wall carefully.
- Inspect the full length of the supply line for tears, cracks, or loose compression fittings.
- Tighten any loose connections by hand, then a quarter-turn with pliers.
- Replace the line entirely if you find cracks. Braided stainless steel lines are more durable than plain plastic.
3. Failing water inlet valve
The water inlet valve controls water flow into the ice maker and dispenser. Leaking dispenser spouts often indicate inlet valve failures caused by mechanical wear or low water pressure. This one is worth calling a professional for, since the valve connects directly to your home’s water supply and requires proper tools to replace safely.
4. Worn or damaged door seal (gasket)
A refrigerator door gasket that has cracked, warped, or lost its magnetic grip lets warm, humid air seep in constantly. That warm air hits the cold interior and condenses, creating moisture that drips inside or outside the unit. You might notice wet shelves, frost buildup near the door edges, or a fridge that runs more often than usual.
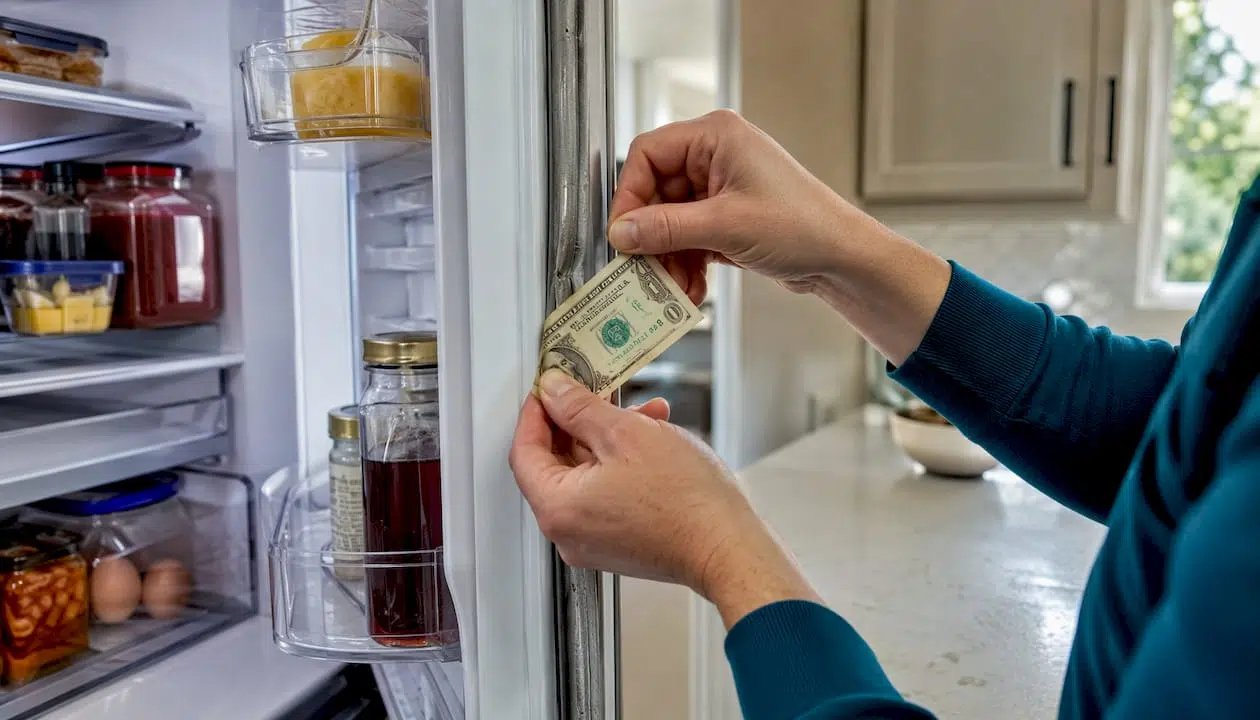
How to test it: Close the door on a dollar bill. If you can pull the bill out without resistance, the seal is failing.
How to fix it: Clean the gasket first with warm soapy water. Residue and grime can prevent a proper seal even when the gasket itself is intact. If cleaning does not help, replacement gaskets are available through the manufacturer (Whirlpool, Samsung, and LG all sell brand-specific gaskets) and install with a screwdriver in most models.
5. Cracked or overflowing drain pan
The drain pan sits underneath the refrigerator and collects defrost water, which normally evaporates during operation. A cracked pan, or one that has shifted out of position, lets water escape near the front of the appliance. Regular inspection can catch cracks or warping early before they cause floor damage.
If the pan is intact but overflowing repeatedly, look for a secondary problem: a blocked defrost drain sending more water than usual into the pan, or a kitchen that runs hot and humid, slowing evaporation.
6. Improper refrigerator leveling
A refrigerator that tilts forward prevents defrost water from draining properly toward the pan. Instead, water pools at the front of the drain tube and eventually backs up into the unit. Uneven floors or worn leveling feet are the usual culprits.
How to fix it: Use a bubble level on top of the fridge. Most models allow you to adjust the front leveling legs by hand or with a wrench. The fridge should tilt very slightly backward (about a quarter-inch) so the door swings shut on its own and water drains correctly.
7. Ice maker overfilling or malfunctioning fill valve
An ice maker that overfills leaves excess water in the ice tray, which freezes unevenly and eventually melts into puddles inside the freezer. Low water pressure or debris in the fill valve increases this risk. Ice buildup on the freezer floor is a reliable sign something is off with the fill cycle.
Adjusting the water fill level is possible on many models through the ice maker’s control arm or settings menu. If the fill valve itself is clogged or damaged, replacement is the fix.
8. Stuck dispenser lever or non-genuine water filter
This one catches a lot of homeowners off guard. Sugary drink residue can cause the dispenser lever to stick in a partially open position, letting water drip continuously. A non-genuine or improperly seated water filter can also trap air in the system, creating drip leaks from the dispenser area. LG’s troubleshooting guidance recommends flushing 2–3 gallons of water through the system after any filter replacement to clear air pockets.
How to fix it: Clean the dispenser area with warm water and a soft cloth. Always use manufacturer-approved filters, and flush the system after installation.
9. Condensation from humidity and blocked airflow
Overpacked shelves block internal air vents, forcing the compressor to work harder and creating temperature imbalances that generate excess condensation. Dirty condenser coils compound the problem by reducing the refrigerator’s ability to manage heat. The result is moisture that collects on interior surfaces and eventually drips.
Cleaning the condenser coils (located at the back or bottom of most units) every six months with a vacuum brush attachment keeps airflow efficient and reduces unnecessary condensation.
How to pinpoint exactly where your fridge is dripping
Knowing where water shows up is the fastest way to narrow down the cause. Here is a quick reference:
| Where water appears | Most likely cause | First step |
|---|---|---|
| Under crisper drawers | Clogged defrost drain | Flush drain with warm water |
| Behind the refrigerator | Loose or cracked supply line | Inspect fittings, replace if cracked |
| Front floor under grille | Overflowing or cracked drain pan | Clean and reseat the pan |
| Door edges or shelves | Worn door gasket | Dollar-bill test, clean or replace gasket |
| After dispenser or ice maker use | Filter housing, inlet valve, or fill line | Check filter seating and flush system |
| Outside surfaces sweating | Humidity or weak door seal | Check door closure and airflow clearance |
Timing matters as much as location. A puddle that appears on a schedule often follows the defrost cycle, which runs every 8–12 hours on most models. If you notice water consistently after the ice maker fills, that narrows it to the fill valve or supply line. An occasional leak after a door was left slightly open usually points to condensation, not a mechanical failure.
Pro Tip: After clearing a suspected defrost drain blockage, pour a cup of warm water into the drain and watch where it exits. If it flows into the drain pan below, the drain is clear. If it backs up or pools inside the freezer, the blockage is still there or the drain tube is kinked.
To detect appliance leaks fast, dry the floor and interior surfaces completely before your inspection. Fresh water appearing after a few hours tells you the leak is active and ongoing, not residual from a one-time event.
Safety first: unplug the refrigerator before reaching behind or beneath it. Water near electrical components is a real hazard. If you see water near the compressor or wiring, do not touch anything until the unit is unplugged.
When to call a professional and how to prevent future leaks
Some refrigerator leaks are genuinely beyond DIY territory. Appliance technicians stress that failing to address leaks quickly leads to mold growth and corroded internal components, which can push a repairable appliance into full replacement. The longer a leak sits, the more expensive the outcome.
Call a licensed technician when you encounter:
- A water inlet valve that needs replacement (involves live water connections and electrical components)
- Any concern about coolant or refrigerant leaks (these require certified handling)
- Internal leaks you cannot locate after a thorough inspection
- Mold or corrosion already visible inside the unit
- A Samsung, Whirlpool, or other brand-specific issue where the repair requires proprietary diagnostic tools
Manufacturer guidelines from GE Appliances are clear: when the leak source is unclear or involves complex internal components, professional inspection is the right call. Mr. Appliance and similar national service networks offer diagnostic visits, though local licensed technicians often provide faster turnaround and more competitive pricing for Orange County and Los Angeles County homeowners.
Preventive maintenance that actually works:
- Check the door gasket every three months. A quick wipe-down with warm water removes the grime that causes premature seal failure.
- Clean the defrost drain annually, or more often if you store a lot of food in the freezer.
- Replace the water filter on schedule (typically every six months) and always flush 2–3 gallons through the system afterward.
- Inspect the water supply line once a year for kinks, cracks, or loose fittings.
- Verify the refrigerator is level after any move or floor work.
- Clean condenser coils every six months to maintain airflow and reduce excess condensation.
The impact on food safety is worth keeping in mind too. A refrigerator struggling with a persistent leak often runs less efficiently, which can affect internal temperatures and food freshness. The FDA recommends keeping refrigerator temperature at or below 40°F. A leaking unit with a compromised door seal or blocked airflow may not hold that consistently.
Ignoring a leak is rarely a money-saving move. Early detection and repair are consistently more cost-effective than addressing the mold, corrosion, or floor damage that builds up from a leak left unattended for weeks or months.
Key Takeaways
Most refrigerator leaks trace back to a clogged defrost drain, damaged water supply line, or worn door seal, and catching the problem early prevents mold, corrosion, and costly appliance failure.
| Point | Details |
|---|---|
| Defrost drain is the top cause | Flush the drain hole with warm water to clear blockages causing interior puddles. |
| Location identifies the source | Water behind the fridge points to the supply line; water inside points to the drain. |
| Door seal failures compound leaks | A failed gasket lets humid air in constantly, creating ongoing condensation and drips. |
| Timing reveals the pattern | Leaks tied to ice maker or dispenser use point to the fill valve, filter, or inlet valve. |
| Appliancesrepairmdtech handles what DIY cannot | For inlet valve failures, coolant concerns, or unresolved leaks, book a licensed technician through Appliancesrepairmdtech in Orange and Los Angeles counties. |
Refrigerator still leaking? Appliancesrepairmdtech fixes it fast
A puddle under your fridge is one of those problems that gets worse the longer it sits. If you have worked through the DIY steps above and the leak persists, or if the issue involves a water inlet valve, internal corrosion, or a component you cannot safely access, that is exactly where Appliancesrepairmdtech comes in.
Appliancesrepairmdtech serves homeowners and renters across Orange County and Los Angeles County with licensed technicians who diagnose refrigerator leaks on the first visit. No guessing at parts, no repeat service calls for the same problem. The team handles all major brands, including Samsung, Whirlpool, LG, GE, and Frigidaire, with same-day and next-day appointments available through online booking.
Whether you need a refrigerator repair in Irvine or a quick fix for common fridge problems anywhere in the service area, booking takes two minutes at appliancesrepairmdtech.com. Get the leak diagnosed and fixed before it turns into a flooring or mold problem.