MDTECH APPLIANCE REPAIR

Appliance Installation

Freezer Installation in Orange County, California

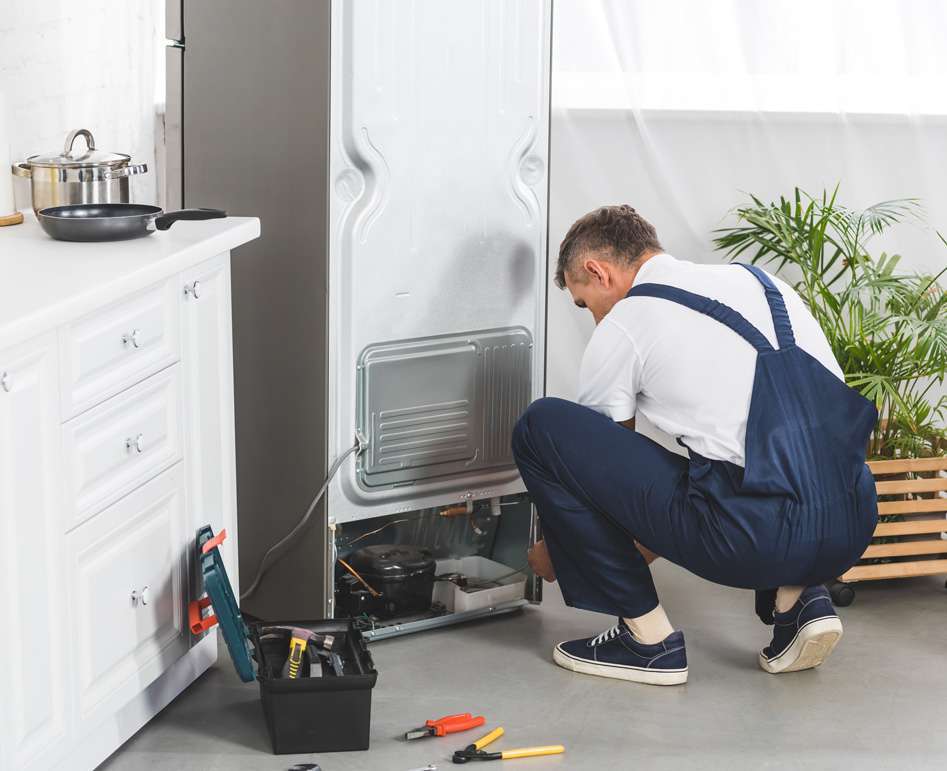
Freezer Installation

Freezer Installation in Irvine Orange County CA Best Freezer Installation in Irvine, Lake Forest, Laguna Hills, and More Cities in Orange County and Los Angeles County, CA Proper freezer installation is essential for safe and efficient performance. Moreover, a correctly installed freezer helps prevent food spoilage and energy waste. In addition, it ensures long-term reliability and safety for your home. For professional results, many homeowners in Irvine, Orange County, CA choose MDTECH Appliance Repair. They provide fast and reliable installation services. Importance of Professional Freezer Installation Professional freezer installation is important for several reasons. First, it ensures your appliance works at peak efficiency. Second, it reduces the risk of future breakdowns. Finally, it protects your investment. Correct Sizing: Your freezer must fit properly in the installation space. Safe Connections: Proper electrical setup prevents hazards. Temperature Settings: Correct calibration ensures food safety. Common Freezer Installation Problems Even small mistakes during installation can lead to big issues. Therefore, it is important to avoid common problems. Misalignment: Poor placement reduces efficiency. Faulty Wiring: Incorrect connections may cause safety risks. Warranty Issues: Some warranties require professional installation. As a result, hiring experts like MDTECH Appliance Repair helps prevent these issues. How to Choose the Right Installation Provider Choosing the right service provider is very important. Therefore, you should always compare options before deciding. Experience: Choose a company with proven installation expertise. Customer Reviews: Check feedback before booking service. Fast Service: Same-day installation is a big advantage. For example, many homeowners in Irvine choose MDTECH for quick and reliable service. Questions to Ask Before Hiring Before hiring an installer, ask a few key questions. This helps you avoid problems later. Are you licensed and insured? Do you provide installation warranties? How much experience do you have? These questions help you choose a qualified professional. DIY vs Professional Freezer Installation Some homeowners consider DIY installation. However, it is not always safe or effective. Therefore, professional help is often the better choice. Safety: Experts reduce the risk of electrical issues. Accuracy: Professionals ensure correct placement and setup. Cost Savings: Proper installation prevents future repairs. For instance, incorrect installation can lead to temperature issues or leaks. Signs You Need Professional Help If you notice any of the following issues, you should call a professional immediately. Temperature changes inside the freezer Strange noises during operation Water leakage or frost buildup In such cases, MDTECH Appliance Repair can help quickly resolve the issue. Cost of Freezer Installation The cost of freezer installation depends on several factors. For example, complexity and location can affect pricing. Generally, installation costs range between $100 and $300. However, additional work may increase the price. Simple Installation: Lower cost and faster setup. Complex Installation: Higher cost due to electrical or plumbing work. Therefore, it is always best to request a clear estimate before starting. Benefits of Professional Installation Professional installation offers many long-term benefits. First, it improves appliance performance. Second, it increases energy efficiency. Finally, it extends the life of your freezer. Better Performance: Your freezer runs more efficiently. Energy Savings: Proper setup reduces electricity usage. Food Safety: Stable temperatures protect stored food. As a result, professional service provides better value over time. Conclusion In conclusion, freezer installation should always be handled with care. Moreover, professional installation ensures safety, efficiency, and long-term performance. Therefore, choosing a trusted company like MDTECH Appliance Repair in Irvine, Orange County, CA is the best decision for reliable results.

Freezer Installation Read More »
Faucet repair in Orange County, California

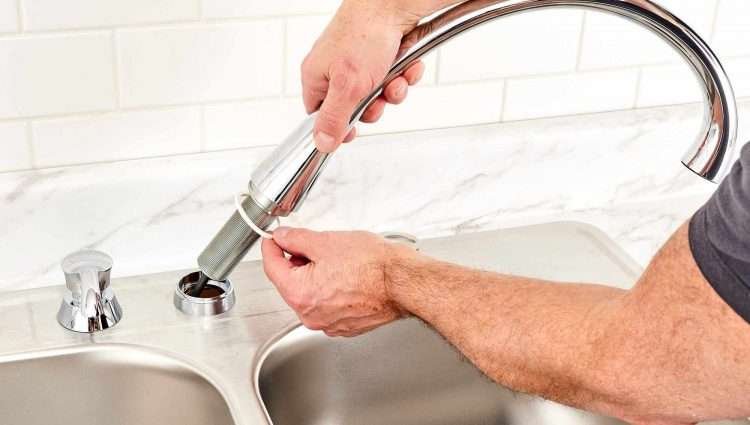
Faucet Installation

Faucet Installation in Irvine Orange County CA Best Faucet Installation in Irvine, Lake Forest, Laguna Hills, and more Cities in Orange County or Los Angeles County of CA Faucet installation in Irvine Orange County CA, is a vital home improvement project that can enhance both the functionality and aesthetic appeal of your kitchen or bathroom. Whether you’re aiming to upgrade an old faucet or replace a broken one, understanding the nuances of installation can make the process smoother. The Significance of a Well-Installed Faucet A properly installed faucet not only improves water efficiency but also complements your home’s decor. Here are a few reasons to consider: Enhanced functionality: A new faucet can offer improved flow and pressure. Visual appeal: A stylish faucet can transform the look of your space. Increased property value: Updates in home features can attract potential buyers. Factors to Consider Before Faucet Installation Before diving into faucet installation in Irvine Orange County CA, it’s essential to evaluate key factors that could affect your project’s success. Water Pressure and Flow Rate Understanding your home’s water pressure and flow rate is crucial. High water pressure can lead to splashing, while low pressure might result in insufficient flow. Tip: Measure water pressure with a gauge for accurate readings. Desired flow rate: Aim for at least 1.5 gallons per minute (GPM) for optimal performance. Budget and Material Establishing a budget is vital to prevent overspending. Faucets come in a variety of materials and price ranges, from affordable plastic to durable stainless steel. Considerations: Quality of material: Higher quality usually means longevity. Installation costs: Factor in whether you’ll hire a professional or handle it yourself. Choosing wisely here ensures lasting satisfaction with your faucet upgrade! Types of Faucets Available With various faucet styles available, selecting the right one is often overwhelming. Exploring the differences between traditional and modern designs, as well as single-handle versus double-handle options, can help simplify your choice. Traditional vs. Modern Faucets Traditional faucets often feature classic designs with ornate detailing, perfect for vintage or rustic settings. In contrast, modern faucets boast sleek lines and minimalist aesthetics that complement contemporary decor. Personal preference: Choose a style that resonates with your home’s theme. Functionality: Both styles can be equally effective; it’s about what fits your taste! Single-Handle vs. Double-Handle Faucets When considering functionality, think about single-handle and double-handle faucets. Single-handle faucets allow easy temperature adjustments with one hand, ideal for quick access. However, double-handle faucets offer precise control for those who prefer fine-tuning. Installation complexity: Single-handle faucets are typically easier to install. Aesthetic preference: Consider your kitchen or bathroom’s layout when making your choice. Understanding these options ensures you’ll select a faucet that aligns with both your practical and stylistic needs. Steps to Install a Faucet Now that you’ve selected the perfect faucet, it’s time to dive into the installation process. Following precise steps will help ensure that your faucet functions beautifully and efficiently. Shutting Off Water Supply Before starting, safety must come first. Shutting off the water supply to your sink is essential to prevent unexpected floods. Locate the shut-off valves: These are usually found under the sink. Turn the valves clockwise: Ensure that both hot and cold water supplies are off. Attaching and Securing the Faucet Once the water is off, you can begin attaching the new faucet. Insert the faucet: Place the faucet through the mounting holes. Secure it tightly: Use a wrench to tighten any nuts or bolts, ensuring it’s stable and won’t shift over time. Checking these steps carefully guarantees a smooth installation process, paving the way for a hassle-free experience with your new faucet. Tools Required for Faucet Installation Before you embark on your faucet installation journey, gathering the right tools is crucial. Having the right equipment not only simplifies the process but also ensures that everything goes smoothly. Wrench and Pliers Two of the most essential tools for this job are a wrench and pliers. Wrench: Ideal for tightening the nuts that hold the faucet in place. Pliers: Excellent for gripping and turning awkward fittings. A personal tip? Having a multi-tool can save you time and space! Sealant and Tape To prevent leaks, sealant and plumber’s tape are must-haves. Sealant: Silicone or plumber’s putty creates a watertight seal where the faucet meets the sink. Plumber’s tape: Wrapping threads on fittings ensures secure connections and minimizes leak risks. Equipped with these tools, you’re well on your way to a successful faucet installation! Hiring a Professional vs. DIY Installation Once you have the tools and knowledge, a significant decision arises: should you hire a professional or tackle the installation yourself? Weighing the pros and cons of each option can lead to the best choice for your situation. Hiring a Professional Opting for a professional installation comes with distinct advantages, such as: Expertise: Professionals like MDTECH Appliance Repair can ensure everything is installed correctly and efficiently. Time-saving: Hiring someone means you can focus on other home projects or enjoy your day. DIY Installation On the other hand, a DIY installation can be rewarding and cost-effective. Cost savings: You save on labor costs, which can be significant. Learning experience: Installing the faucet yourself provides practical skills and confidence for future projects. Choosing between these methods depends on your comfort level, available time, and budget. Weighing these factors helps ensure that your faucet installation goes off without a hitch! Importance of Proper Faucet Installation Whether you choose to hire a professional or DIY your faucet installation, ensuring it is done correctly is paramount. Improper installation can lead to a myriad of issues that might arise sooner than you think. Benefits of Proper Installation A well-installed faucet not only enhances functionality but also prolongs its lifespan. Leak Prevention: Secure installations minimize the risk of leaks, protecting your kitchen or bathroom from water damage. Consistent Performance: Properly installed faucets deliver optimal water flow and pressure, improving daily use. In my own experience, an incorrect installation once led to persistent dripping that escalated into a costly repair. Investing time and effort into proper faucet installation today saves you both headaches and

Faucet Installation Read More »

Fan Installation in Orange County, California

Fan Installation

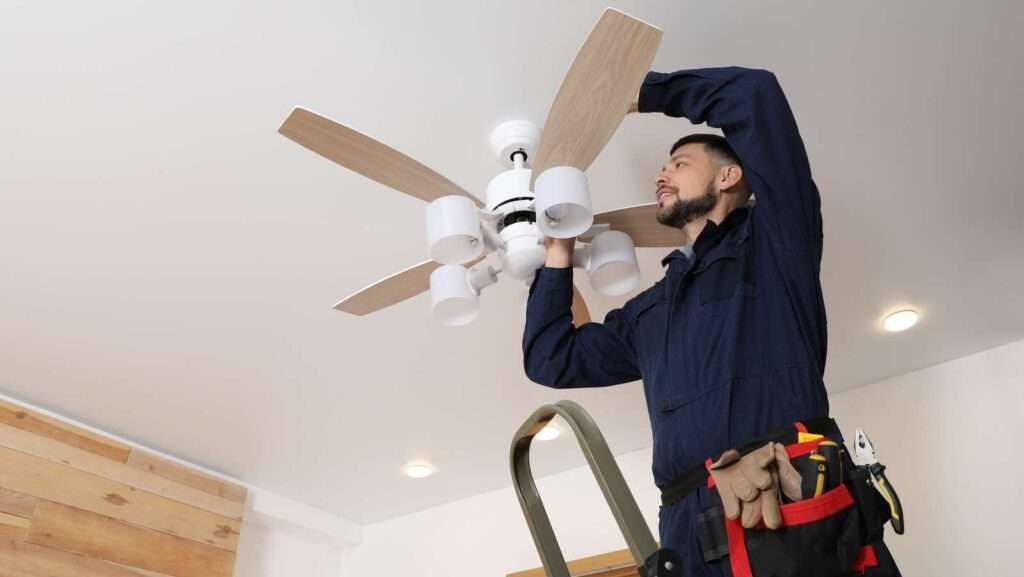
Fan Installation in Irvine Orange County CA https://www.youtube.com/watch?v=32W4RAWapFU Best Fan Installation in Irvine, Lake Forest, Laguna Hills, and more Cities in Orange County or Los Angeles County of CA Importance of Professional Fan Installation When it comes to fan installation in Irvine, Orange County, CA, the importance of professional installation cannot be overstated. Proper installation ensures optimal airflow and efficiency, enhancing your comfort in your home. A poorly installed fan can lead to issues such as wobbling, inadequate ventilation, or even safety hazards. For instance, a neighbor of mine faced a major inconvenience when her ceiling fan was installed incorrectly, resulting in constant rattling and a higher energy bill. Choosing qualified technicians like those from MDTECH Appliance Repair can help you avoid such pitfalls. Benefits of Hiring Experienced Technicians Opting for experienced technicians for your fan installation offers several advantages: Expertise: Skilled professionals understand the nuances of different fan types and can provide tailored solutions for your space. Efficiency: Professional installations are typically completed more quickly than DIY efforts, allowing you to enjoy your new fan sooner. Safety Assurance: Trained technicians ensure all electrical connections are secure and comply with safety codes. Warranty Protection: Many fan warranties require professional installation to remain valid. Choosing MDTECH Appliance Repair means you’ll receive top-quality service tailored to your specific needs in Irvine, Orange County, CA. Steps to Prepare for Fan Installation Measuring the Space Before installation day, it’s crucial to measure the space where your fan will be installed. Here’s how to do it effectively: Measure Height and Diameter: Ensure the ceiling height is appropriate for the fan size. Check Clearance: Make sure there’s enough space around the fan for air circulation and that it won’t obstruct any light fixtures or other features. Account for Ceiling Type: Different ceiling types may require specific mounting hardware or techniques. A friend of mine overlooked this step and ended up with a fan that was too big for her space, which was quite a hassle! Choosing the Right Fan Selecting the right fan for your home is essential for functionality and style. Here are some factors to consider: Style: From modern to traditional, fans come in various designs to match your decor. Size: Choose a fan size that suits the dimensions of your room. Larger rooms may require multiple fans or a bigger fan to ensure effective airflow. Features: Consider additional features such as remote control, reversible blades, or integrated lighting. By weighing these options, you can ensure that your new fan meets both your aesthetic and functional needs. Hiring a Professional Installation Service in Irvine, Orange County, CA Researching Local Companies Once you’ve selected your fan, the next step is to hire a professional installation service. Here’s how to find the right company: Online Reviews: Check platforms like Yelp or Google Reviews for recent customer experiences. Word of Mouth: Ask friends and family for recommendations; personal experiences can provide valuable insights. Service Offerings: Ensure the company specializes in fan installation and has experience with your chosen model. I found a fantastic service through a neighbor’s referral, which made my decision much easier! Checking Licenses and Insurance Before finalizing your choice, check the licenses and insurance of the installation company: Licenses: Ensure the company has the necessary state and local licenses to operate legally. Insurance: Ask for proof of general liability insurance to protect yourself from potential liabilities during the installation. Taking these precautions can make a significant difference in ensuring a smooth installation process. Preparing Your Home for Fan Installation Clearing the Installation Area To set the stage for a successful installation, ensure the area is clear. Here’s how to prepare effectively: Remove Obstacles: Clear away any furniture or items blocking access to the installation area. Create a Clear Path: Ensure there’s a direct route from the front door to the installation site for the technicians. A friend learned this the hard way when she forgot to move a large rug, causing delays during her installation! Ensuring Proper Electrical Connections Make sure that the necessary electrical outlets are ready for the fan installation: Check Voltage: Confirm that you have the right voltage outlets for your fan model. Accessibility: Ensure outlets are easily accessible and not blocked by furniture. Taking these simple steps can help the installation go smoothly, allowing you to start enjoying your new fan without hassle! Installation Day: What to Expect Installation Timeline As installation day approaches, you might wonder what to expect. Typically, the process can take anywhere from one to two hours, depending on various factors, such as the complexity of the installation. Here’s a quick overview: Arrival: The installation team will arrive on time and assess your space. Preparation: They’ll prepare the area by ensuring all tools and materials are ready. Installation: Expect the technicians to install the fan efficiently while keeping you informed throughout the process. A neighbor of mine had a particularly smooth installation day, thanks to the clear timeline shared by the installers! Testing and Demonstration Once the installation is complete, the real fun begins with testing and demonstration. The technicians will usually: Run Initial Tests: They’ll test the fan to ensure it functions correctly. Demonstrate Features: Expect a walkthrough of your new fan’s features and controls, showcasing how to maximize its efficiency. This step is especially helpful for first-time users! After my own installation, the technician explained specific settings that made a world of difference in my comfort level. Fan Installation in Irvine, Orange County, CA MDTECH Appliance Repair stands out as the premier service provider in Irvine, Orange County, CA, for fan installation. With a commitment to excellence, MDTECH offers top-notch solutions tailored to your needs. Their skilled technicians are dedicated to ensuring a smooth installation process, providing peace of mind and confidence in your newly acquired fan. Whether it’s for a ceiling fan, wall-mounted fan, or any other type, MDTECH Appliance Repair is your trusted choice for reliable and efficient service in the area!

Fan Installation Read More »

Duct Installation in Orange County, California

Duct Installation

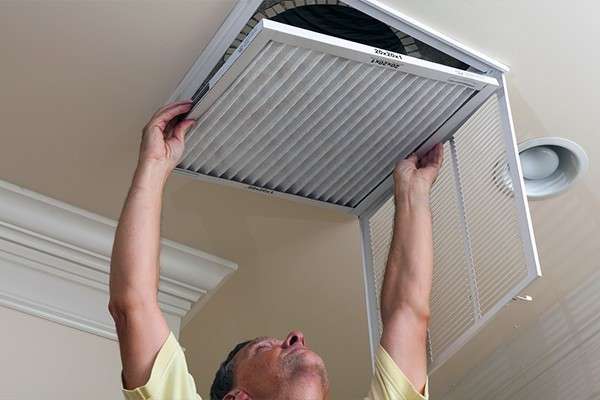
Duct Installation in Irvine Orange County CA https://www.youtube.com/watch?v=32W4RAWapFU Best Duct Installation in Irvine, Lake Forest, Laguna Hills, and More Cities in Orange County and Los Angeles County, CA When it comes to maintaining a comfortable home, duct installation plays a major role. It directly affects airflow, cooling, and heating efficiency. In a climate like Irvine, Orange County, CA, proper ductwork becomes even more important. At MDTECH Appliance Repair, we provide professional duct installation services. We focus on efficiency, safety, and long-term performance. As a result, homeowners enjoy better comfort and lower energy costs. Importance of Professional Duct Installation Proper duct installation ensures your HVAC system works at its best. Poor installation, on the other hand, creates several long-term problems. For example, it can cause uneven airflow, energy loss, and higher utility bills. Therefore, professional service is always the better choice. ### Key Benefits of Proper Installation Better airflow: Air moves evenly across all rooms. Energy savings: Proper sealing reduces energy waste. System protection: Your HVAC system runs with less strain. In addition, correct installation helps maintain indoor comfort throughout the year. Common Signs of Poor Duct Installation Faulty ductwork often shows clear warning signs. If you notice these issues, your system may need inspection. Uneven temperatures: Some rooms feel hotter or colder than others. Higher energy bills: Costs increase without higher usage. Strange noises: Whistling or rattling sounds from vents. Moreover, these issues usually get worse over time. So, early repair helps prevent bigger damage. Benefits of Professional Duct Installation Services Professional installation offers stronger performance and long-term value. It also improves your home environment in several ways. Improved Indoor Air QualityClean airflow matters for your health. Proper duct sealing helps reduce dust and allergens. Sealed connections: Prevent dirt from entering ducts. Cleaner air: Reduces allergens and airborne particles. For instance, many homeowners in Irvine notice better breathing comfort after service from MDTECH Appliance Repair.  Increased Energy Efficiency Efficient duct systems reduce energy waste. They also help your HVAC system perform better. Less air leakage: Keeps cooled or heated air inside. Balanced system load: Prevents overworking your HVAC unit. As a result, many customers report lower monthly energy bills after proper installation. — Common Causes of Duct Damage Duct systems can fail for several reasons. Understanding these causes helps prevent future issues. Age and WearOlder ducts often break down over time. In addition, humidity can speed up damage. Material aging: Old ducts develop cracks and leaks. Rust formation: Metal ducts may corrode over time. Poor Installation WorkIncorrect installation is another major cause of duct failure. Wrong sizing: Improper duct size reduces airflow efficiency. Loose joints: Air escapes through weak connections. Therefore, choosing experts like MDTECH Appliance Repair helps avoid these issues from the start. DIY Duct Maintenance Tips Homeowners can perform simple maintenance to improve system performance. However, major issues still require professional help. Check for Air LeaksStart by inspecting visible ductwork. Look for disconnected or loose sections. Feel for escaping air near joints. Seal Small GapsIf you find minor leaks, you can fix them easily. Foil tape: Works well for small gaps. Mastic sealant: Ideal for stronger and long-lasting sealing. However, for larger problems, contact MDTECH Appliance Repair for expert help. — Why Choose MDTECH for Duct Installation in Irvine Choosing the right company makes a big difference in results. MDTECH Appliance Repair focuses on quality, safety, and customer satisfaction.  What Sets MDTECH Apart Experienced technicians: Skilled in all types of duct systems. Reliable service: Work completed efficiently and on time. Customer focus: Solutions tailored to your home’s needs. In addition, we ensure every installation improves comfort and reduces energy waste. Final Thoughts Proper duct installation improves airflow, comfort, and energy efficiency. It also protects your HVAC system from long-term damage. Therefore, professional service is always a smart investment. For reliable duct installation in Irvine and surrounding areas, trust MDTECH Appliance Repair for lasting results.

Duct Installation Read More »

Dryer LP Conversion Installation in Orange County, California

Propane Dryer LP Conversion Installation

Propane Dryer LP Conversion Installation in Irvine Orange County CA https://www.youtube.com/watch?v=32W4RAWapFU Best Dryer LP Conversion Installation in Irvine , Lake Forest, Laguna Hills, and more Cities in Orange County or Los Angeles County of CA When considering alternatives for home energy sources, propane stands out as a reliable choice. It’s a multifaceted fuel that not only powers appliances but also offers several advantages for homeowners. Propane, a byproduct of natural gas processing and crude oil refining, is stored as a liquid and turned into gas for use in various settings, including homes. Many families have switched to propane for its efficiency and performance. For example, imagine a cold winter day when you’re waiting for your clothes to dry; propane dryers heat up quickly and get the job done faster than electric counterparts, saving you time and energy. Here are some key features of propane to keep in mind: Versatile Use: Aside from dryers, propane can be used for heating, cooking, and even powering outdoor grills. Energy Efficiency: Propane burns cleaner than many fossil fuels, which means it’s a better option for the environment. Availability: Just about every region in the U.S., including Irvine, CA, has access to propane suppliers. As you delve into the benefits and the conversion process of appliances to propane, consider how integrating this eco-friendly option could enhance your home energy efficiency. Benefits of Propane Eco-Friendly Option One of the standout benefits of using propane is its eco-friendliness. In a world increasingly conscious of environmental issues, propane presents a viable alternative to traditional energy sources. It produces fewer greenhouse gas emissions than many other fuels, making it a cleaner-burning option. For instance, many families in Irvine have made the switch to propane out of a desire to reduce their carbon footprint. Low Emissions: Propane releases significantly lower levels of carbon dioxide compared to gasoline and coal. Non-Toxic: Unlike certain energy sources, propane is non-toxic and won’t contaminate groundwater, making it a smarter choice for households. Switching to propane allows homeowners to contribute positively to the environment while still enjoying the comforts of home. Cost-Effective Solution Another compelling reason for homeowners to consider propane is its cost-effectiveness. Many families find that converting to propane appliances, including dryers and heating systems, can result in significant savings over time. Consider these financial advantages: Lower Utility Bills: Propane appliances tend to consume less energy, often leading to a reduction in monthly bills. Price Stability: Propane prices are generally more stable than those of electricity or natural gas, providing more predictable energy costs. Increased Appliance Lifespan: Appliances powered by propane often run more efficiently and can last longer, decreasing replacement costs. When looking at the overall picture, the financial and environmental benefits of propane make it a strong contender for energy needs in Irvine and other parts of Orange County. Families have not only experienced savings on bills but also peace of mind knowing they are making a responsible energy choice. Dryer Conversion Process Steps to Convert Dryer to Propane If you’re convinced that transitioning to a propane dryer is the right move for your home, the good news is that the conversion process is straightforward. Many families in Irvine have taken this step, enjoying the benefits of faster drying times and reduced energy costs. Here’s a simple outline of the steps involved in converting your dryer to propane, often with the help of professionals like MDTECH Appliance Repair. Gather Necessary Tools and Materials: Propane conversion kit specific to your dryer model Adjustable wrench Screwdriver Safety glasses and gloves for protection Disconnect the Electric Dryer: Before starting the conversion, ensure safety by unplugging the dryer and turning off the gas supply if applicable. Install the Conversion Kit: Follow the manufacturer’s instructions carefully. This typically involves replacing the orifices used for natural gas with those for propane. Test for Leaks: After installation, check for gas leaks using a soapy water solution on connections. Bubbles indicate leaks that need addressing. Reconnect and Set Up: Hook up the propane line and power on your newly converted dryer. Many homeowners find that while the process can be a DIY project, hiring professionals like MDTECH Appliance Repair ensures safety and adherence to local codes. The satisfaction of knowing your dryer is now running efficiently on propane is well worth the effort! Irvine, CA: A Focus on Energy Efficiency Energy Saving Initiatives in Irvine Irvine, CA, has truly embraced energy efficiency, making it a prime example for other communities to follow. Residents are not just looking for ways to save on utility bills; they are also dedicated to promoting a sustainable future. Many families have already made significant strides towards energy-efficient living, and the local government supports these initiatives enthusiastically.One way Irvine excels is through various energy-saving programs aimed at enhancing residential efficiency, including: Rebate Programs: Homeowners can receive financial incentives for upgrading to energy-efficient appliances, including propane dryers. Community Workshops: The city frequently holds workshops focused on energy conservation techniques, where residents can learn practical tips for reducing energy usage at home. Energy Audits: Programs that offer free or low-cost energy audits help households identify opportunities for efficiency improvements. By actively participating in these initiatives, residents not only ease their monthly expenses but also contribute to Irvine’s commitment to sustainability. When families share their success stories—like significant reductions in utility bills after converting to propane—it inspires others to follow suit. The community feels increasingly empowered, knowing that every small step taken in energy efficiency leads to a more sustainable environment for future generations. Conclusion In conclusion, the benefits of switching to propane for dryer use in Irvine, CA, are compelling. From its eco-friendly nature to significant cost savings, families are discovering that propane is a smart alternative to traditional energy sources. As showcased throughout this article, propane not only enhances energy efficiency but also aligns with Irvine’s commitment to a sustainable community. Reflecting on the steps to convert a dryer to propane, many homeowners find that getting professional help from trusted providers like MDTECH Appliance Repair simplifies the process. They can proceed with confidence,

Propane Dryer LP Conversion Installation Read More »

Best Appliance Repair & Appliance Installation Service In Aliso Viejo

Dryer installation

Dryer installation in Irvine Orange County CA https://www.youtube.com/watch?v=cTof2-U9520 Best Dryer Installation in Irvine, Lake Forest, Laguna Hills, and more Cities in Orange County or Los Angeles County of CA MDTECH Appliance Repair and Installation is a trusted service provider specializing in dryer installation and repair for residents of Irvine, Orange County, CA. With their professional expertise, they ensure that your dryer is properly installed and fully functional, reducing the risk of future problems. Whether you’re installing a brand-new dryer or dealing with a malfunctioning one, MDTECH offers fast, reliable, and high-quality service to make your life easier. The Importance of a Properly Installed Dryer A functional dryer is essential to a smooth-running household, especially when you consider how vital it is for your daily laundry routine. A properly installed dryer works efficiently, dries clothes quickly, and ensures energy savings. However, if your dryer isn’t installed correctly, it can lead to frequent breakdowns, increased utility costs, and even safety hazards. Here’s why proper dryer installation is crucial: Efficiency: A well-installed dryer ensures optimal performance and quicker drying times. Energy Savings: Proper installation helps your dryer use less energy, reducing utility bills. Safety: Correct installation minimizes the risk of fire hazards or electrical issues. Ensuring that your dryer is installed by professionals like MDTECH Appliance Repair can save you both time and money in the long run, providing peace of mind that everything is set up correctly. Common Dryer Installation Issues While installing a dryer may seem straightforward, several common issues can arise during or after the installation process. Addressing these early can prevent bigger problems later on. Poor Ventilation One of the most common problems during dryer installation is improper ventilation. A poorly installed vent can cause issues such as: Clogged Vent: Lint buildup in an improperly connected vent can restrict airflow, leading to longer drying times and increased energy consumption. Overheating: A dryer without adequate ventilation can overheat, posing a fire hazard. Moisture Buildup: Poor venting may lead to moisture buildup inside the dryer, causing mold and mildew issues. A recent customer who had MDTECH Appliance Repair handle their dryer installation noticed a significant improvement in drying times and energy efficiency, all thanks to proper vent installation. Electrical Problems Another common issue is improper electrical connections. Dryers require specific voltage and proper grounding to function safely. Potential issues include: Incorrect Voltage: A dryer hooked up to the wrong power supply may not function properly, or worse, it could short-circuit. Improper Grounding: Without correct grounding, the dryer poses an electrical hazard, putting the safety of your home at risk. For example, a neighbor attempted a DIY dryer installation but encountered electrical issues that could have caused serious problems. After calling MDTECH, the dryer was installed correctly, ensuring safety and performance. Why Professional Dryer Installation is Essential While some homeowners might be tempted to install a dryer themselves, hiring a professional like MDTECH Appliance Repair ensures the job is done right the first time. Here’s why professional installation is a smart choice: Expert Knowledge: Professional technicians understand the specifics of various dryer models and know how to install them safely and efficiently. Avoid Costly Mistakes: Incorrect installation can lead to long-term issues, requiring expensive repairs or even replacement. Warranty Protection: Professional installation often keeps your warranty valid, protecting you from future repair costs. Safety First: Experts know how to handle the electrical and ventilation components safely, reducing the risk of fire or other hazards. For instance, a family in Irvine had a new dryer installed by MDTECH Appliance Repair, and they reported a flawless process, complete with a walk-through of safety tips and maintenance advice. DIY Dryer Maintenance Tips While professional installation is key, maintaining your dryer is something you can handle yourself. Regular upkeep can help extend the lifespan of your dryer and ensure that it continues to operate efficiently. Here are some simple DIY maintenance tips: Clean the Lint Trap One of the easiest ways to maintain your dryer is by cleaning the lint trap after every load. This improves airflow, reduces drying time, and helps prevent potential fire hazards. Inspect and Clean the Vent Every few months, check your dryer’s vent and hose for any lint buildup. Cleaning the vent regularly prevents clogs and ensures efficient performance. A clogged vent can cause overheating and longer drying cycles. Level the Dryer Make sure your dryer is level. An unbalanced dryer can cause excessive noise and vibrations, which may lead to wear and tear over time. Wipe Down the Drum Occasionally wipe down the inside of the drum with a damp cloth to remove lint or debris that may have built up during the drying process. For example, a homeowner noticed that her dryer was taking longer to dry clothes than usual. After checking the vent and cleaning it out, the dryer returned to optimal performance. These small maintenance steps can make a big difference in how well your dryer functions over time. Finding the Best Dryer Installation Service in Irvine, Orange County, CA When it comes to dryer installation, finding a reliable and experienced service provider is essential. With so many options available in Irvine, here are some key factors to consider when choosing a service: Experience and Expertise: Look for companies with years of experience in appliance installation and repair, like MDTECH Appliance Repair. Customer Reviews: Check online reviews to gauge the quality of service and customer satisfaction. Service Range: Ensure the company is experienced with different dryer brands and models to handle any potential issues. A colleague recently used MDTECH Appliance Repair for their dryer installation after reading glowing reviews online. The team’s professionalism and attention to detail left them confident that their appliance was installed correctly and safely. Professional Dryer Installation Process If you’re considering having your dryer installed professionally, it’s helpful to know what to expect during the process. Here’s an overview of how MDTECH Appliance Repair typically handles dryer installations: Initial Consultation: The technician will evaluate your space to ensure it’s suitable for installation, checking for proper ventilation and electrical connections. Installation: The dryer will be connected to the power

Dryer installation Read More »

Drainage Installation in Orange County, California

Drainage Installation

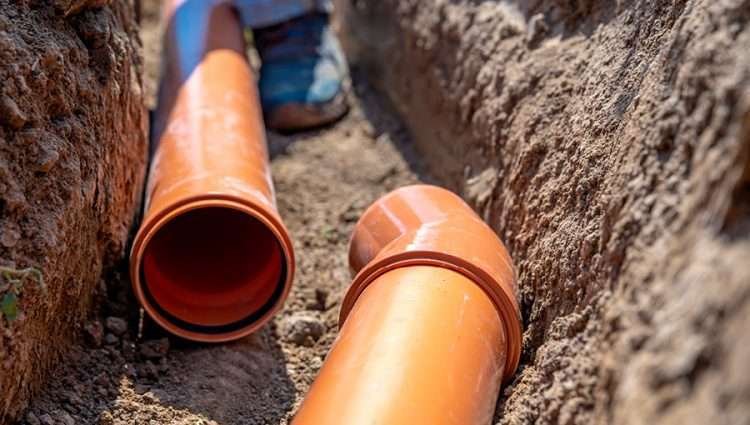
Drainage Installation in Irvine Orange County CA https://www.youtube.com/watch?v=32W4RAWapFU Best Drainage Installation in Irvine ,Lake Forest, Laguna Hills and more Cities in Orange County or Los Angeles County of CA In Irvine, a community known for its beautiful landscapes and well-planned neighborhoods, the importance of an effective drainage system cannot be overstated. Many homeowners often overlook this aspect until they face issues like pooling water in their yards or flooded basements. Ensuring proper drainage installation is key to maintaining home integrity. With countless homes in the area relying on MDTECH Appliance Repair, it’s essential to remember that proper drainage contributes not only to household aesthetics but also to overall home health. Here’s why proper drainage matters: Prevents Water Damage: Effective drainage systems minimize the risk of water intrusion. Protects Landscaping: Keeps gardens and lawns healthy, preventing soil erosion. Enhances Property Value: A well-maintained drainage system adds value to your home. With these points in mind, let’s delve deeper into what makes an excellent drainage system and how to implement it in your Irvine residence. Importance of Proper Drainage System Installation in Irvine Understanding the significance of a proper drainage system in Irvine can save homeowners from costly repairs and unnecessary stress. Think back to those rainy days—remember how frustrating it is to see water pooling in your yard or seeping into your garage? A well-installed drainage system plays a vital role in preventing such issues. Key Benefits of Proper Drainage Installation Here’s why investing in a drainage system is essential: Flood Prevention: A good drainage system effectively directs water away from your property, minimizing the risk of flooding. Foundation Protection: Proper drainage helps preserve the structural integrity of your home’s foundation by eliminating excess moisture. Landscaping Conservation: It keeps gardens lush and healthy by preventing soil erosion and waterlogging. Regular maintenance and thoughtful installation can protect your home and maintain its value—crucial in the beautiful Irvine area. Let’s explore the factors to consider before diving into your drainage project. Factors to Consider Before Installing a Drainage System Before diving into the installation of a drainage system, it’s essential to consider multiple factors to ensure you’re making the right choices for your home. Imagine embarking on a road trip without a map—things probably won’t go as planned! Similarly, a few considerations can guide you to successfully tackle your drainage needs. Critical Considerations for Drainage Installation Here are some key factors to keep in mind: Assess Your Property’s Layout: Understand the topography of your lot. Is it flat, sloped, or uneven? Evaluate Soil Type: Certain soils, like clay, retain water, while sandy soils drain quickly. This affects your drainage options. Local Regulations: Check with Irvine’s building codes or regulations to determine what’s permissible in your area. Taking the time to assess these elements can lead to a more efficient and effective drainage system tailored to your unique needs. Next, let’s explore how to assess your drainage needs accurately for optimal results. A. Assessing Drainage Needs Choosing the Right Drainage Solutions Now that you’ve considered the critical factors for your drainage installation, it’s time to assess your specific drainage needs. Picture this: you wouldn’t wear winter gear in the summer, right? Similarly, it’s essential to select drainage solutions that suit your property’s unique requirements. Types of Drainage Solutions to Consider Here are some common drainage options to think about: French Drains: Ideal for redirecting surface water and groundwater away from problem areas. Dry Wells: A great option for absorbing excess water in areas with heavy rainfall. Surface Drains: Effective for collecting and diverting water from driveways or patios. To make an informed decision, consider discussing your needs with a professional such as MDTECH Appliance Repair, who can provide tailored solutions and guide you to the best options available. With the right system in place, you can look forward to a well-drained property—let’s dive into the proper installation techniques next! Proper Installation Techniques for Drainage Systems Having recognized the importance of assessing drainage needs and selecting the right solutions, the next step is mastering proper installation techniques. Think of this process as laying a strong foundation for a house—the right techniques ensure longevity and effectiveness. Key Installation Steps to Follow Here’s a quick guide to ensure a successful installation: Plan Your Layout: Start by mapping out where the drainage lines will go, considering the flow of water. Excavate the Area: Dig trenches that are deep and wide enough to accommodate your drainage materials. Choose Quality Materials: Opt for perforated pipes and gravel that will enhance water flow and filtration. Remember, it’s crucial to double-check dimensions and slope to ensure that water flows correctly. If you feel unsure during this process, don’t hesitate to call experts like MDTECH Appliance Repair, who can lend their experience and guarantee a hassle-free installation. Next, let’s explore how to effectively plan your drainage system layout for the best results. Planning Drainage System Layout Implementing Effective Drainage Techniques With a solid plan for your drainage system in mind, it’s time to focus on executing effective drainage techniques. Think of planning the layout as creating a roadmap—you want to ensure that every part works together to guide water away from your home efficiently. Steps for Effective Layout Implementation Here are some essential steps to consider: Identify Problem Areas: Look for spots where water tends to accumulate after rains and chart those locations. Determine Pipe Slope: Aim for a 1% slope (or 1-inch drop for every 10 feet) to ensure optimal water flow. Use Catch Basins and Grates: Strategically place these in high-water areas to capture and redirect excess water. By implementing these techniques mindfully, you’re establishing a drainage system that not only functions effectively but also enhances the overall landscape of your property. Ready to avoid potential pitfalls? Let’s look into the common mistakes to avoid during drainage system installation. Common Mistakes to Avoid During Drainage System Installation As you move forward with your drainage system installation, it’s crucial to be aware of common pitfalls that can hinder its effectiveness. Just like with cooking, following the wrong recipe can lead to an unsavory dish! Common Pitfalls to Watch For Here are some frequent mistakes that homeowners should avoid: Neglecting Soil Type: Failing

Drainage Installation Read More »

Drain hose Installation in Orange County, California

Drain hose Installation

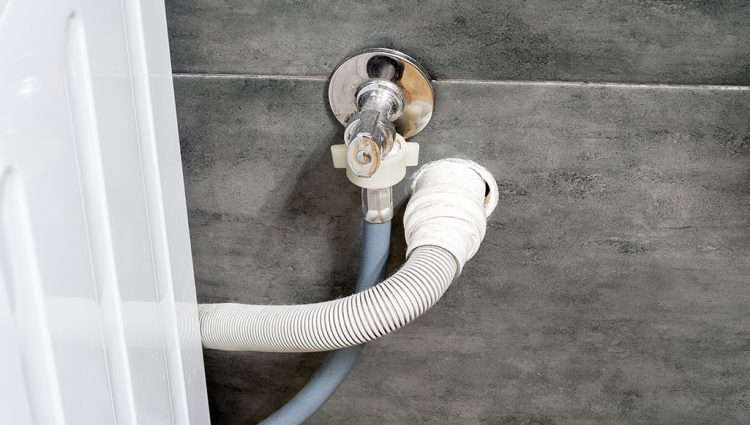
Drain hose Installation in Irvine Orange County CA https://www.youtube.com/watch?v=32W4RAWapFU Best Drain hose Installation in Irvine, Lake Forest, Laguna Hills, and more Cities in Orange County or Los Angeles County of CA Importance of Proper Drain Hose Installation When it comes to ensuring the longevity and efficiency of your appliances, proper drain hose installation plays a crucial role. An improperly installed drain hose can lead to a myriad of problems – from water leaks and pooling to significant appliance malfunctions. Here are some reasons why correct installation is essential: Prevents Water Damage: Correctly positioned hoses minimize the risk of water spillage that can damage flooring and surrounding areas. Enhances Appliance Performance: A properly installed drain hose allows for efficient drainage, ensuring that your appliance operates smoothly. Saves on Repair Costs: Avoiding issues caused by poor installations can save you from costly repairs. Overview of Irvine, Orange County CA Edition Irvine, located in the vibrant Orange County, embodies both sophistication and modern living. Here, the community values high-quality home maintenance services. MDTECH Appliance Repair is committed to providing residents with expertise in drain hose installation in Irvine, ensuring efficiency and reliability in every home. The warm California climate further emphasizes the need for a well-installed drainage system, especially during seasonal rainfall. Tools and Materials Needed Essential Tools for Drain Hose Installation Before diving into the installation process, it’s crucial to gather all the necessary tools. Having the right tools on hand can make the job much easier and efficient. Here’s a quick list of essentials: Screwdriver: A flathead and Phillips screwdriver to secure the hose clamps. Hose Cutter: For trimming the drain hose to the required length. Pliers: Helpful for gripping and twisting tough fittings. Level: To ensure that your hose is properly aligned for efficient drainage. Tape Measure: A must-have for measuring the length and distance accurately. Recommended Materials for Maximum Efficiency Alongside the tools, selecting the right materials is vital for a successful installation. Here’s what to consider: Quality Drain Hose: Opt for durable, flexible hoses that can withstand high water pressure. Hose Clamps: Stainless steel clamps resist corrosion, providing a secure fit. Sealants or Adhesives: When necessary, use waterproof sealants to prevent leaks. Investing in the right tools and materials will ensure a smooth drain hose installation in Irvine, enhancing appliance performance and durability. Preparing for Installation Inspecting Existing Drainage System Before you start any drain hose installation, it’s crucial to inspect your existing drainage system. This step can save you tons of effort and frustration later! Here’s what to look for: Clogs and Blockages: Check for any visible clogs that could interfere with drainage. Leaks: Look for signs of leaks or corrosion around existing hoses. Proper Sloping: Ensure that the drainage system has an adequate slope to facilitate proper water flow. Taking the time to assess these areas will help you identify potential problems before they occur. Measuring and Planning Layout Once your inspection is complete, measuring is next. A well-planned layout is key to an effective installation. Be sure to: Measure the Length: Use your tape measure to find the necessary hose length between the appliance and the drain. Determine Fitting Angles: Plan out any bends or angles your hose will need to navigate. By thoroughly preparing and planning, you set the stage for a seamless drain hose installation in Irvine, ensuring everything flows smoothly! Step-by-Step Installation Guide Connecting the Drain Hose Now that you’re prepped and ready, it’s time to dive into the actual installation! Connecting the drain hose is the first major step. Here’s how to do it effectively: Align the Hose: Start by placing one end of the hose onto the appliance’s drain outlet. Make sure it fits snugly. Slide in the Clamp: Using your screwdriver, slide a hose clamp over the connection point. This will keep everything secure. Check for Leaks: Before moving on, it’s smart to run a quick test by pouring some water into the appliance’s drain. This way, you can ensure a tight connection. Securing the Hose in Place Once connected, the next step is to secure the hose to prevent any movement. Here are a few tips: Positioning: Ensure the hose is running downhill to promote proper drainage. Use More Clamps: If necessary, use additional clamps to fasten the hose at various points along its length. Check for Kinks: Make sure the hose isn’t kinked or twisted, as this can obstruct water flow. Following these steps will guarantee a successful drain hose installation in Irvine, leaving you with peace of mind and a properly functioning appliance! Troubleshooting and Maintenance Common Issues with Drain Hose Installation Even with a well-planned drain hose installation, issues can arise. Here are some common problems to be aware of: Leaks at Connections: If you notice water pooling, this may indicate a loose connection or missing clamp. Slow Drainage: A kinked hose or improper slope can slow down drainage, leading to backups. Frequent Clogs: Residue buildup in the hose could signal a need for cleaning or a better design. If you encounter any of these issues, don’t panic – a quick assessment can often identify the root cause. Tips for Long-Term Maintenance Maintaining your drain hose is essential for optimal performance. Here are some practical tips: Regular Inspections: Check connections and hoses every few months for signs of wear or leaks. Cleaning: Use a mild detergent periodically to keep the hose free from clogs. Ensuring Proper Slope: Regularly verify that the hose remains positioned correctly. Following these troubleshooting tips and maintenance practices will help you avoid complications, ensuring your drain hose functions efficiently for years to come in Irvine, Orange County CA! Benefits of Professional Installation Services Hiring a Professional in Irvine, Orange County CA When it comes to drain hose installation in Irvine, enlisting the help of professionals like MDTECH Appliance Repair can make a world of difference. Many homeowners opt for the DIY route, but here’s why hiring an expert can be beneficial: Experience: Professionals have the training and experience to handle complex situations and unforeseen issues effectively.

Drain hose Installation Read More »

Double Oven Installation in Orange County, California

Double Oven Installation

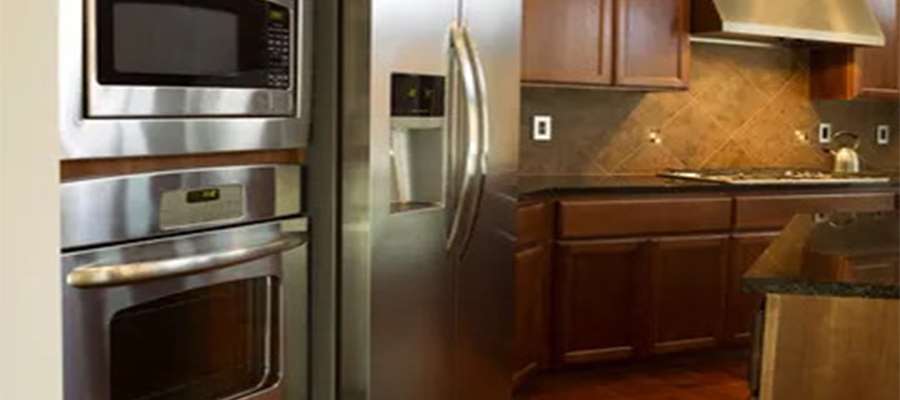
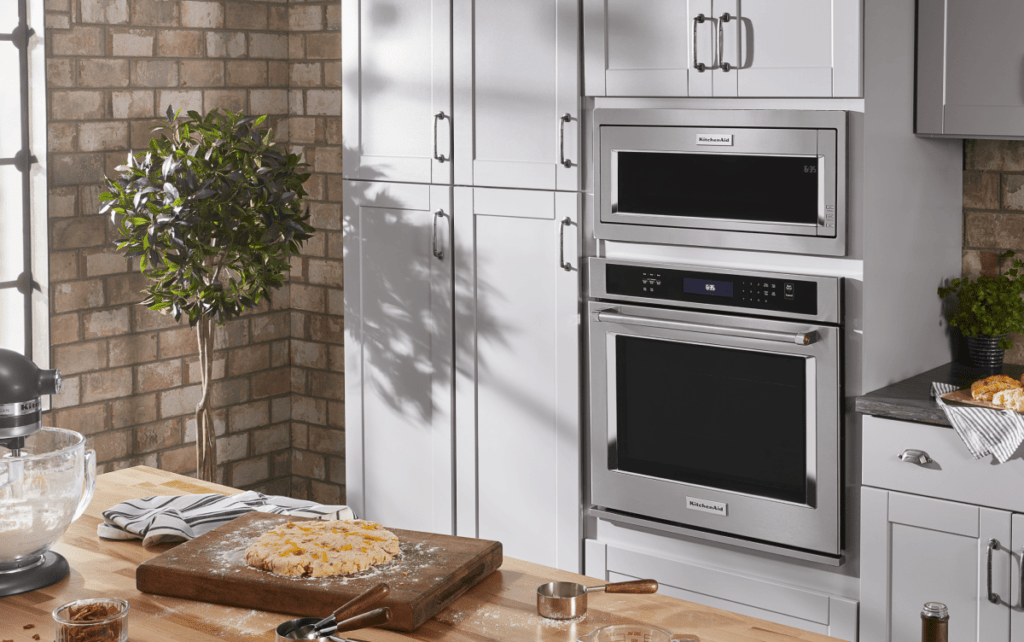
Double Oven Installation in Irvine Orange County CA https://www.youtube.com/watch?v=w9aFAqIq9s8 Best Double Oven Installation in Irvine, Lake Forest, Laguna Hills, and more Cities in Orange County or Los Angeles County CA Importance of Professional Double Oven Installation Double ovens are a fantastic addition to any kitchen, providing extra cooking space and versatility for culinary enthusiasts. Proper installation is crucial for ensuring optimal performance and safety. Professional double oven installation by MDTECH Appliance Repair guarantees that your appliance is set up correctly, allowing you to enjoy its full range of features without worry. Common Double Oven Issues Double ovens can enhance your cooking experience, but like any appliance, they can encounter problems that require attention. Some common issues include: Uneven Cooking: If one oven cooks faster than the other, it may be due to calibration issues or faulty heating elements. Oven Not Turning On: Electrical issues or faulty components can prevent the oven from functioning. Door Seal Problems: Worn seals can lead to heat loss, impacting cooking efficiency. For example, when Sarah noticed that her upper oven wasn’t heating correctly, she contacted MDTECH Appliance Repair for a quick diagnosis and repair, ensuring her baking adventures could continue without interruption. Finding Reliable Double Oven Installation Services When you need to install a double oven, finding a trustworthy service provider is essential. Here are some steps to help you choose the right company: Research Local Companies: Look for businesses specializing in appliance installation. MDTECH Appliance Repair is a trusted name in Irvine for professional double oven installations. Read Customer Reviews: Customer feedback on platforms like Yelp and Google can provide insights into the quality of service you can expect. Ask for Recommendations: Getting referrals from friends and family can lead you to reputable installation services. After hearing glowing reviews about MDTECH Appliance Repair from her neighbors, Emily felt confident choosing us for her double oven installation. The MDTECH Appliance Repair Installation Process Choosing MDTECH Appliance Repair for your double oven installation means you can expect a seamless and professional process. Here’s what you can anticipate: Initial Consultation: Our technician will discuss your needs and preferences regarding the double oven installation. Site Assessment: We will evaluate the installation space to ensure it meets the requirements for your new oven, including power supply and ventilation. Installation: Our experienced technicians will carefully install your double oven, ensuring it is securely connected and functions properly. Final Testing: We conduct thorough tests to ensure both ovens operate as expected, giving you peace of mind. Benefits of Professional Double Oven Installation Opting for professional installation has many advantages: Expertise and Experience: The technicians at MDTECH Appliance Repair have the training to handle double oven installations safely and efficiently. Warranty Protection: Many manufacturers require professional installation to maintain the warranty, protecting your investment. Time Efficiency: Our team can complete installations quickly, minimizing disruption to your kitchen routine. For instance, when Mark’s new double oven arrived, he chose MDTECH Appliance Repair for installation, appreciating our swift and thorough service that allowed him to start cooking immediately. Cost Considerations for Double Oven Installation Understanding the costs involved in double oven installation can help you budget effectively. Several factors can influence the price: Type of Oven: Different models and brands may have varying installation requirements and costs. Installation Complexity: If modifications to your kitchen are necessary, this can increase the overall price. Service Provider Rates: MDTECH Appliance Repair offers competitive and transparent pricing, ensuring you know what to expect. For example, when Lisa scheduled her double oven installation with MDTECH Appliance Repair, she was pleased with our clear pricing structure, which allowed her to plan her budget accordingly. DIY vs. Professional Double Oven Installation While some homeowners might consider a DIY installation, opting for a professional is often the better choice. Here’s why: Safety First: Double ovens are complex appliances that require proper electrical connections, reducing the risk of accidents when installed by professionals. Quality Assurance: Our trained technicians ensure that your oven is installed correctly, minimizing the risk of future issues. Long-Term Reliability: Professional installation helps maintain your appliance’s efficiency and lifespan. When Jenny attempted to install her double oven herself, she quickly realized the complexities involved. She reached out to MDTECH Appliance Repair, where our experts ensured a hassle-free installation. Scheduling Your Double Oven Installation Ready to schedule your double oven installation with MDTECH Appliance Repair? Here’s how to get started: Contact Us: Reach out via phone or our website to request an appointment for double oven installation. Provide Details: Share information about your new double oven and any specific requirements you may have. Choose a Convenient Time: Select a time that works best for you, and our technician will arrive promptly to assist you. Enjoy Your New Oven: With professional installation, you can trust that your double oven is ready for all your cooking needs. Why Choose MDTECH Appliance Repair for Your Double Oven Installation? If you’re looking for reliable double oven installation services in Irvine, MDTECH Appliance Repair is your top choice. Here’s why: Local Expertise: We understand the specific needs of Irvine residents and provide tailored services for every installation. Commitment to Quality: Our skilled technicians ensure high-quality service that exceeds your expectations. Customer Satisfaction: We prioritize your satisfaction and work diligently to ensure you’re happy with our services. For professional double oven installation in Irvine, Orange County, CA, trust MDTECH Appliance Repair. Our experienced team is ready to help you get the most out of your new appliance. Contact us today to schedule your service!

Double Oven Installation Read More »

Cooktop LP Conversion Installation in Orange County, California

Propane Cooktop LP Conversion Installation 

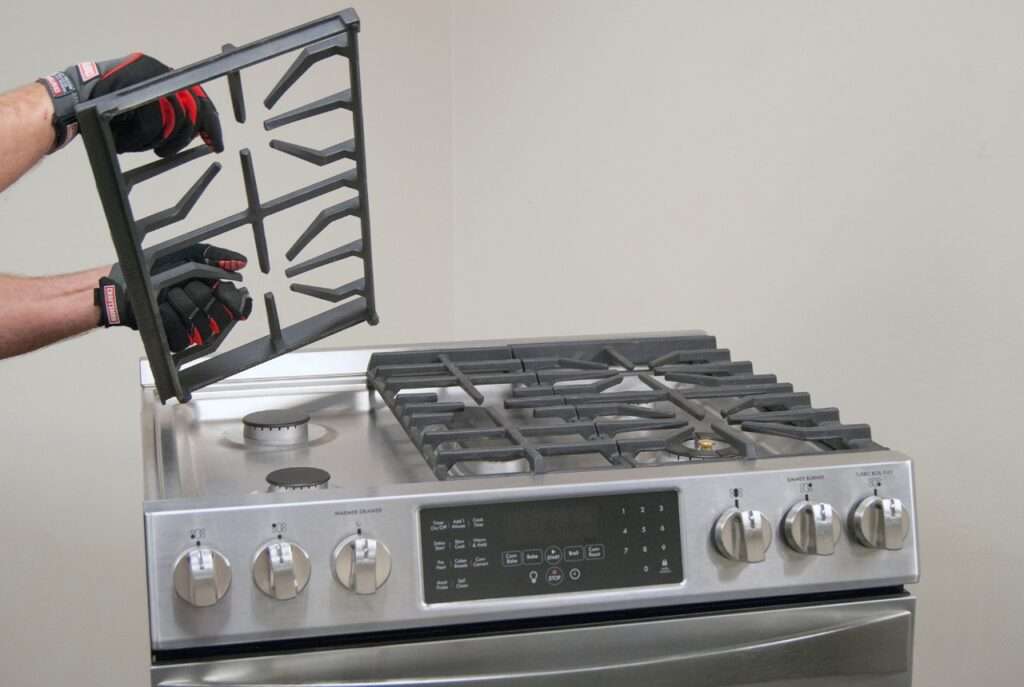
Propane Cooktop LP Conversion Installation in Irvine Orange County CA https://www.youtube.com/watch?v=ICOLn4yKogU Best Cooktop LP Conversion Installation in Irvine, Lake Forest, Laguna Hills, and more Cities in Orange County or Los Angeles County CA     Importance of Propane Cooktop Conversion In the world of cooking, efficiency and performance are paramount. Propane cooktops offer significant advantages over traditional electric ranges, making propane cooktop LP conversion a popular choice for many home chefs. Whether you enjoy grilling steaks or simmering sauces, converting your existing cooktop to propane can vastly enhance your culinary experience. Benefits of Effortless Cooking Upgrade Upgrading to a propane cooktop isn’t just about efficiency; it’s about enjoying a stress-free cooking environment. Some benefits include: Fast Heating: Propane burns hotter and faster than electricity. Precise Temperature Control: Instant flame adjustments at your fingertips. Energy Efficiency: Often more cost-effective in the long run. Imagine whipping up a delicious dinner in half the time, all thanks to your upgraded cooktop! It’s a small investment with a big impact.   Understanding Propane Cooktops How Propane Cooktops Work Once you’ve made the leap to a propane cooktop, it’s important to understand how it operates. Propane cooktops use a gas-burning system where propane fuel ignites the burners, providing direct and adjustable heat. Burner Types: Most systems include sealed or open burners for different cooking styles. Ignition: Piezo igniters help provide a reliable flame instantaneously. This means you can transition from simmering to high heat without delay, letting your culinary creativity flourish! Safety Considerations While propane cooking is efficient and effective, safety should never be overlooked. Maintaining vigilance can prevent accidents: Regular Inspections: Ensure all connections are secure and leak-free. Ventilation: Proper airflow is essential to minimize the risk of gas buildup. Smoke Detectors: Install alarms near your cooking area for added assurance. Always remember, a well-maintained cooktop equals a worry-free cooking experience!   LP Conversion Process Steps for LP Conversion Transitioning to a propane cooktop is truly a rewarding process. Here’s a simple breakdown of the steps involved in LP conversion: Shut Off Power: Always start by turning off the electric supply and gas source. Remove Existing Burner Plates: Carefully detach the components to expose the burner assembly. Install LP Conversion Kit: Follow the instructions provided in the kit to replace parts that adjust gas flow. Reconnect Gas Supply: Ensure all connections are secure before testing. Test for Leaks: Use soapy water to check for any gas leaks at new connections. Final Adjustments: After reassembly, make final adjustments to burners for optimal performance. Tools Required for Conversion To make this transformation smoother, gather these tools: Wrench set Screwdrivers (both flathead and Phillips) Pipe wrench Soapy water solution (for leak testing) Having these handy will streamline the conversion process, ensuring a seamless upgrade to your cooking experience!   Choosing a Professional Service Factors to Consider When it comes to LP conversion, selecting the right professional service is crucial for a successful installation. Here are a few factors to keep in mind: Experience: Look for a technician who specializes in propane conversions. Licensing and Insurance: Verify that the professional is licensed and insured to operate. Reviews and Recommendations: Check online reviews or ask friends for recommendations to gauge their reputation. These factors ensure that the job is done correctly and safely, giving you peace of mind as you cook. Finding the Right Service Provider Finding the right partner for your propane cooktop LP conversion can feel overwhelming, but it doesn’t have to be! Start by: Online Research: Look for local companies like MDTECH Appliance Repair. Get Quotes: Contact at least three service providers for estimates. Interview Technicians: Ask about their experience with similar projects. By following these steps, you’ll be well on your way to discovering a reliable professional to handle your upgrade!   Cost Analysis Budgeting for LP Conversion When considering an LP conversion for your propane cooktop, budgeting is essential. Generally, you can expect costs to range from $100 to $500, depending on factors such as: Type of Cooktop: Some models require more extensive modifications. Labor Costs: Professional services may charge hourly, so it’s wise to get an estimate upfront. Additional Parts: Don’t forget to account for any necessary parts or gas lines. Setting aside a flexible budget ensures that you won’t face any surprises along the process! Cost Comparison with Other Cooking Upgrades Comparatively, how does LP conversion stack up against other upgrades? Here’s a quick overview: Electric to Gas Conversion: Can range from $500 to $2,000. Installation of Double Ovens: Often costs between $1,200 and $3,500. By opting for a propane cooktop LP conversion, you not only enhance your cooking experience but also do so at a fraction of the cost of other significant kitchen remodels. It’s an upgrade that pays for itself in performance and efficiency!   Regulations and Compliance Understanding Local Regulations Before embarking on your propane cooktop LP conversion, it’s crucial to familiarize yourself with local regulations in Irvine and Orange County, CA. Each area has specific rules governing: Permitting Processes: Some conversions may require a permit. Gas Line Standards: Adhering to local codes ensures safe gas line installations. Checking with your local municipal office or fire department can clarify any requirements ahead of time. Ensuring Compliance with Safety Standards Compliance doesn’t stop at the installation stage. Safety should always be a priority, so ensure you follow industry standards: Proper Installation: Have your system installed by licensed professionals like MDTECH Appliance Repair. Regular Inspections: Set up annual check-ups to ensure all equipment meets safety standards. Taking these steps not only keeps your kitchen safe but also enhances the longevity of your propane cooktop! Remember, staying informed equates to safer cooking. Maintenance Tips Extending the Lifespan of Your Propane Cooktop To get the most out of your propane cooktop, regular maintenance plays a vital role. Simple habits can significantly extend its lifespan, ensuring you enjoy efficient cooking for years to come. Here are some tips: Keep it Clean: Regularly wipe down burners and surfaces to prevent buildup. Check Connections: Periodically inspect gas line connections for leaks or wear. Avoid Overheating: Manage flame levels to

Propane Cooktop LP Conversion Installation  Read More »

Scroll to Top